12 minutes
Setting Up Hubstaff for Tasks (Integrations)
We’re excited to get you up and running on our task tracking applications. In order to get started there are just a few steps that need to happen.
Click here for complete setup guides for each integration
Activecollab: https://support.hubstaff.com/activecollab-integration-setup/
Asana: https://support.hubstaff.com/asana-time-tracking-setup/
Breeze: https://support.hubstaff.com/breeze-time-tracking-integration-setup/
Freshbooks: https://support.hubstaff.com/setting-hubstaff-freshbooks-time-tracking/
Freshdesk: https://support.hubstaff.com/freshdesk-time-tracking-integration/
Github: https://support.hubstaff.com/github-integration-setup/
Gitlab: https://support.hubstaff.com/gitlab-time-tracking-integration/
Insightly: https://support.hubstaff.com/hubstaff-insightly-integration/
Jira: https://support.hubstaff.com/jira-time-tracking-setup/
LiquidPlanner: https://support.hubstaff.com/liquidplanner-time-tracking-integration-setup/
Mavenlink: https://support.hubstaff.com/mavenlink-integration-setup/
Paymo: https://support.hubstaff.com/setting-hubstaff-paymo-time-tracking/
Pivotal Tracker: https://support.hubstaff.com/pivotal-tracker-integration-setup/
Podio: https://support.hubstaff.com/podio-time-tracking-integration/
Quickbooks online: https://support.hubstaff.com/quickbooks-online-integration-setup/
Redbooth: https://support.hubstaff.com/redbooth-time-tracking-integration-setup/
Redmine: https://support.hubstaff.com/hubstaff-redmine-integration-setup/
Salesforce: https://support.hubstaff.com/salesforce-time-tracking-integration/
Teamwork: https://support.hubstaff.com/teamwork-pm-time-tracking/
Trello: https://support.hubstaff.com/trello-time-tracking-setup/
Unfuddle: https://support.hubstaff.com/unfuddle-time-tracking-integration/
Wrike: https://support.hubstaff.com/wrike-time-tracking-setup/
Zendesk: https://support.hubstaff.com/zendesk-time-tracking-setup/
Zoho Projects: https://support.hubstaff.com/zoho-projects-time-tracking-integration-setup/
IMPORTANT: You must connect your account in order to see tasks that are assigned to you. Also, connecting an integration allows for time to be sent back to the third-party software.
Step 1
Click the “Integrations” option in the left sidebar and choose a third-party integration from the list.

Step 2
Depending on the integration that you choose you’ll need to either verify your account with oAuth or API. oAuth will take you directly to the service you’re integrating with and ask you to approve the connection, while the API connection will generally ask you for some sort of API token to enter before the connection can be made. We’ve included a couple of examples of what this might look like below.
oAuth:

API:
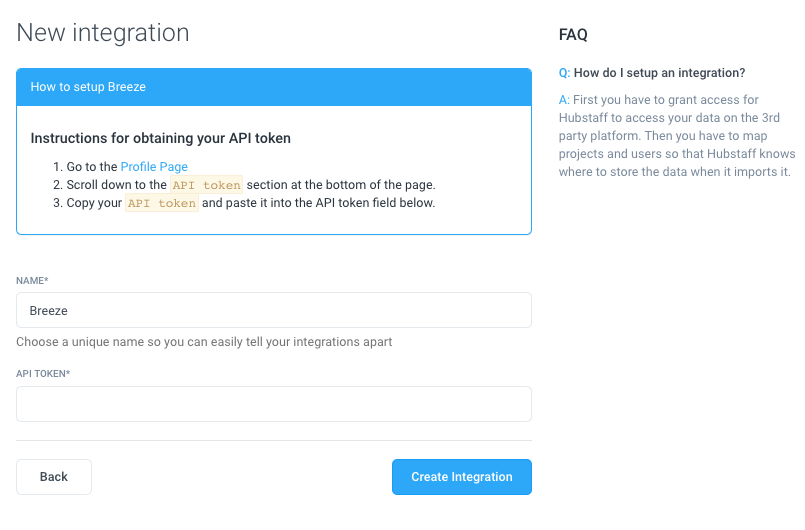
Then you’ll be directed to a page that is specific to the integration that you choose. Either way the next step is to map your users and projects.
Note that not all integrations will require you to go through the setup page. Here are all integration types that will automatically take you to the authentication page: Asana, Github, Mavenlink, Podio, Quickbooks, Redbooth, Trello and Wrike.
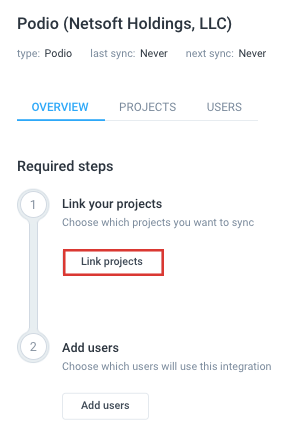
Step 3
Here’s what mapping your projects looks like. The idea is to match up your projects in the PM software with the projects in Hubstaff. Note: You can have more than one integration, but each project can only be mapped to one integration.
Once you click to “link” a project, you will see a modal exposed. The modal looks like this:
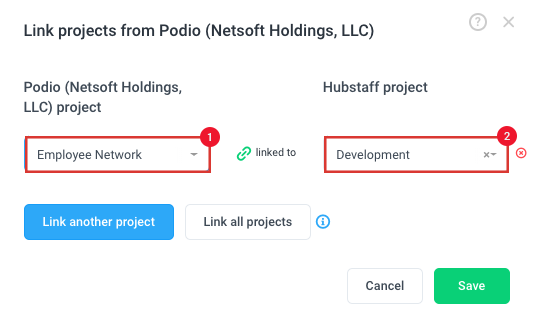
This step is very similar to mapping your projects. The idea is to map the users of your external system to your Hubstaff users.
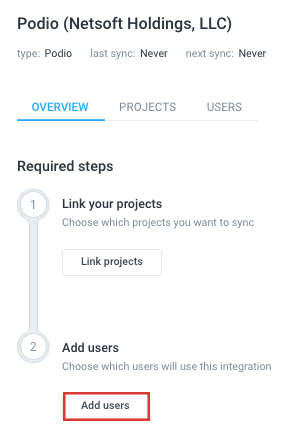
Step 4
Expand the app to see the tasks from your integration on the tasks pane. You should be able to see all of your assigned tasks in the window to the right of the project list.
This is how tasks should look like on the desktop app:
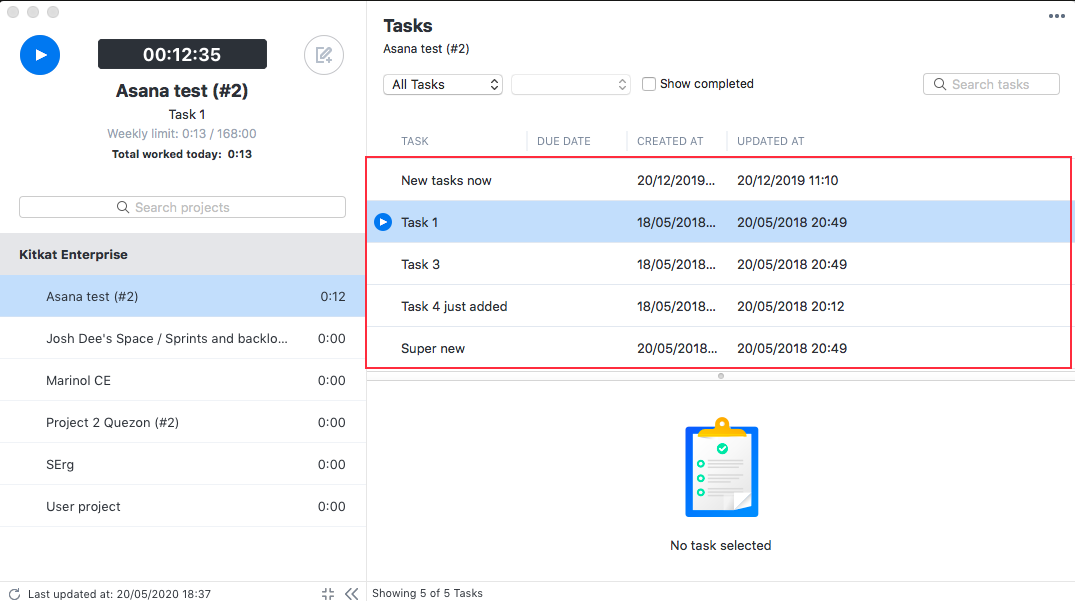
You will see the tasks if you click on the project that you have mapped in the previous step. You are still able to track time directly on Hubstaff projects without selecting a task, but if you want track time to a task specifically then you need to start the timer from within the task pane.
Each Hubstaff user can only be mapped once per integration.
The Project mapping and User mapping take place on the same page and there is no need to save your work. It will save automatically.
Tasks might not sync right away. It can take approximately 5 minutes after linking your team. Also, please keep in mind that each time you add a new project or user to your project management tool, the integration needs be refreshed in Hubstaff for those changes to take effect, then link those accordingly.
Currently, when you add a new project in the project management third-party provider, you need to access the integrations page in Hubstaff > refresh the projects list > link the new project > assign team members to the Hubstaff project that’s linked to the newly added project.