10 minutes
Gitlab Time Tracking Integration
Gitlab Time Tracking Integration
If you use Gitlab for project management, tracking time to Gitlab is possible with Hubstaff. To enable this, you have to set it up in your Hubstaff account.
Only the user with an Owner/Organization manager role on Hubstaff can set up an integration.
You must connect your account in order to see tasks that are assigned to you.
Step 1
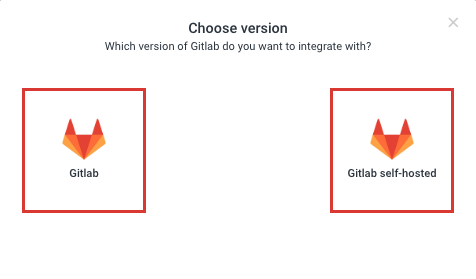
To get started, click on Settings > Integrations on the sidebar menu. Then make sure you have selected the correct organization on the top right corner of the page. Next, select Integration then find the Gitlab logo from the list of available integrations. We have two separate integrations for Gitlab (cloud, self-hosted v8.x & v9+). Select the one that is compatible with your current Gitlab configuration.


Choose which Gitlab version you wish to connect to Hubstaff:
Step 2
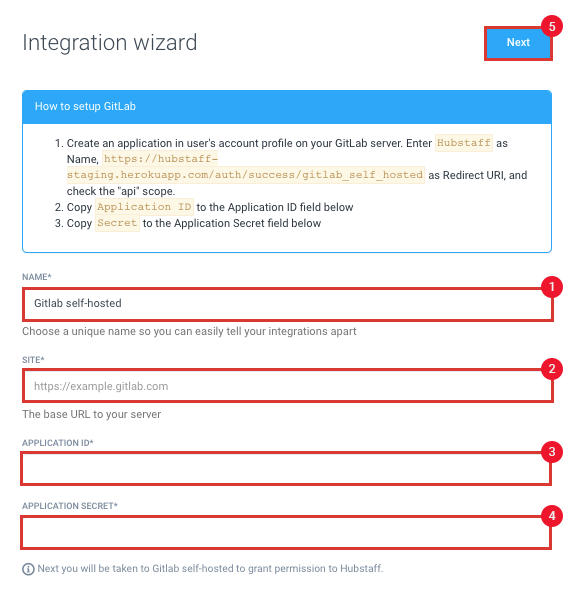
Gitlab self-hosted (v8.x and v9+)
Enter your integration name, then the Gitlab URL (if your server is self-hosted) in the Site field, and your Application ID and Application secret, then click on Next.
Please make sure that the SSL certificate is correct and valid if you have a self-hosted Gitlab account. If you are using a self-hosted Gitlab you will need to update the redirect_url to https://app.hubstaff.com/auth/success/gitlab_self_hosted.
If the integration requires that you add scopes, you’ll need to enable the API scope in Gitlab.
Gitlab (cloud)
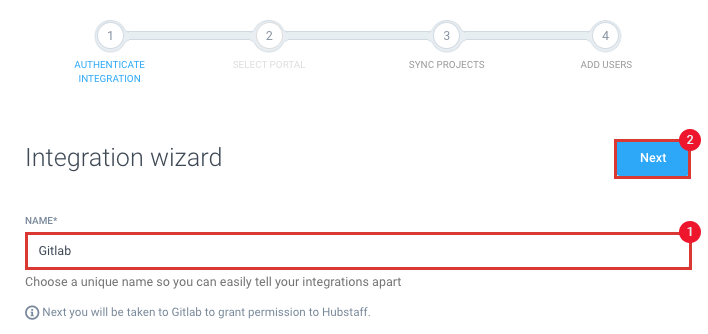
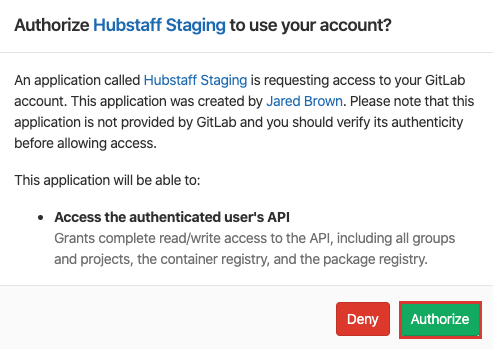
You will be asked to grant access to Hubstaff to complete the integration:
Step 3
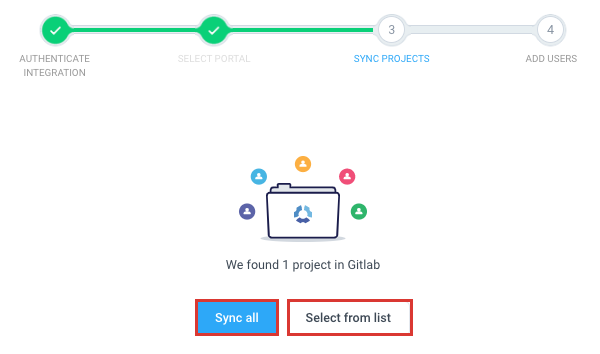
The next step would be to link your Gitlab projects. Click on Sync all to connect all existing Gitlab projects, or Select from list to choose which projects to connect to Hubstaff.
Step 4
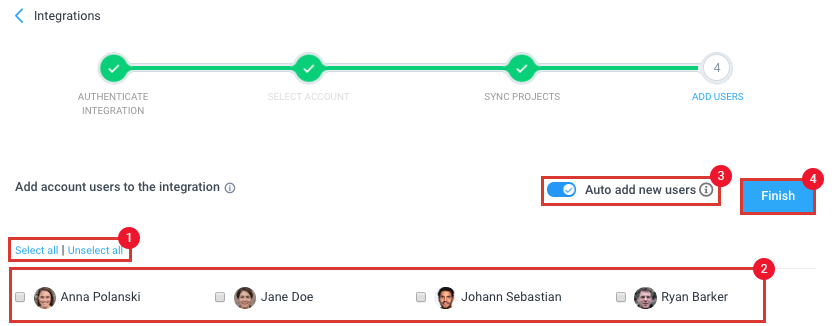
Next, you’ll need to select which team members you need to work on the integration. You have the option to select/unselect all users, select individual users, and/or to automatically add new users to your Gitlab integration. Click Finish to continue.
Each user you invite will be sent a confirmation email to authenticate their Gitlab account.
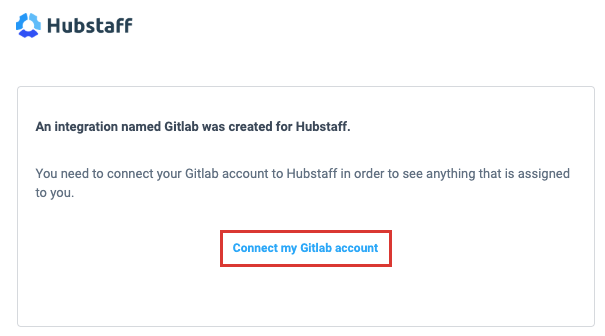
Clicking on the Connect my Gitlab account button will take them to the authorization page. Click Connect to continue.
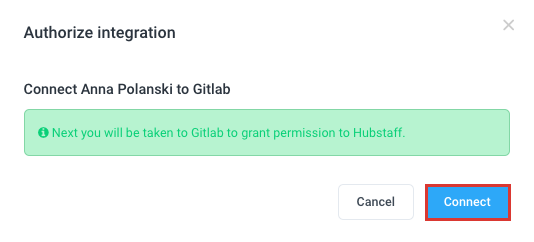
After logging in to their personal Gitlab accounts, that user will be added on the integration page.
Step 5
After you’ve set up the integration, the app will be queued to sync automatically. When it has synced, your team will see their assigned issues in the app and be able to start tracking time to them. Your team will be able to see issue due dates, descriptions, and updates.
![]()
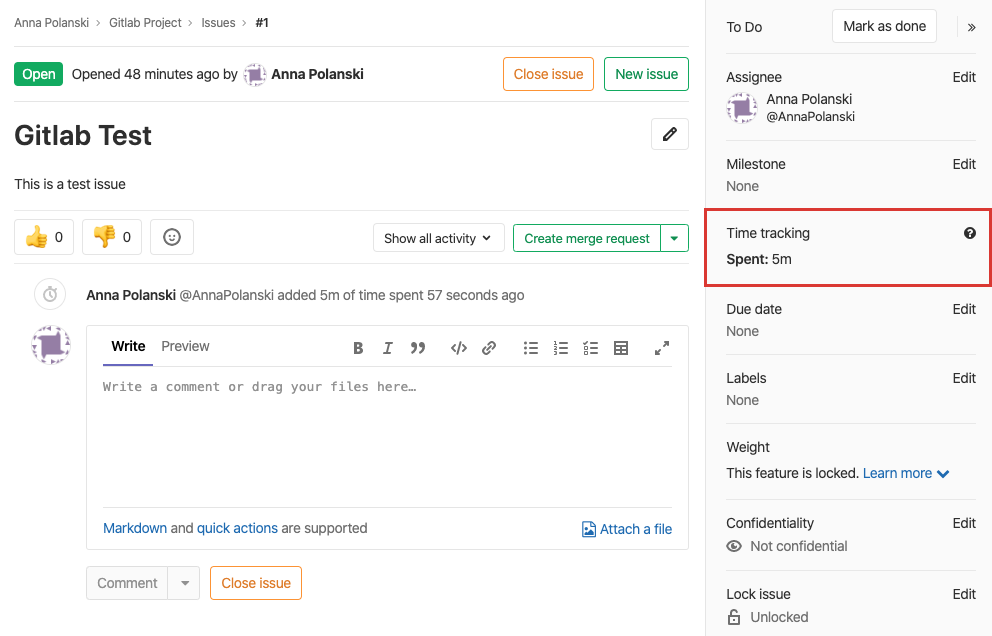
Time tracked to Gitlab issues from the Hubstaff app will sync back on the Time Tracking section of the issue page on Gitlab:
Tasks might not sync right away and can take approximately 5 minutes after linking your team. Also, please keep in mind that each time you add a new project or user to your project management tool, the integration needs be refreshed in Hubstaff for those changes to take effect, then link those accordingly.
Currently, when you add a new project in the project management third-party provider, you need to access the integrations page in Hubstaff > refresh the projects list > link the new project > assign team members to the Hubstaff project that’s linked to the newly added project.
This integration supports logging time back to the integration as comments. To learn more, click here.
Tasks can be completed outside of Hubstaff in the project management tool to have the time synced as well.
Tasks synchronized with an integration will remain in Hubstaff as a simple task if the integration is deleted.
Subtasks are not supported with this integration.