37 minutes
Hubstaff Members and Invites Overview
Hubstaff makes it easy to send invites and manage team members within your organization so they can start tracking time in no time. Follow the steps below to get started:
All of the options below are accessible via the People page on the sidebar.
![]()
Inviting team members
Step 1
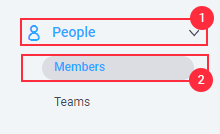
To invite a team member, simply navigate to People > Members on the left-hand sidebar then click on Invite Member.
![]()
You can also add Members, by clicking on “Invite Members” at the left bottom corner of the side panel.

Step 2
A popup dialog should appear where you can fill in the role and the projects the user will be added to. Once you’re finished, press Send. Alternatively, you can click on the Copy invite link button to send a direct invitation link to your team.

You can also use add members using the “Invite via Link“.
Step 3
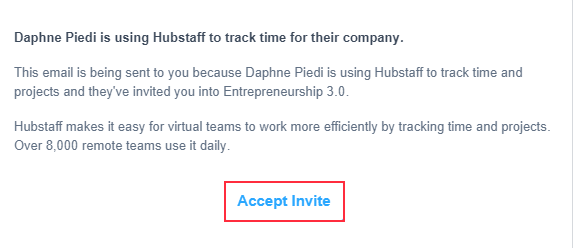
An invitation email with a confirmation link will be sent to the user. After accepting the invite, they will be asked to set up their own Hubstaff account. Once completed, the users will automatically be added to your organization.
Importing team members
Send invites
Now you can import team members to Hubstaff via .CSV, .XLS, or .XLSX making it easier to bulk upload your member list into your Hubstaff organization. To do this, follow these steps:
Step 1
First, navigate to People > Members.

Step 2
On the Members page, click on the Import Members button.

Step 3
On the dialog box, click on Download the template here to see the specific format before uploading your CSV file.

Step 4
Open the CSV file. The file will include these rows and columns:
- Name
- Role
- Teams
- Projects
- Require timesheet approval
- Hourly Pay rate
- Pay period
| Name | Role | Teams | Projects | Require timesheet approval | Hourly Pay rate | Pay period | |
|---|---|---|---|---|---|---|---|
| FirstName LastName – Remove or change | test@email.com | Manager (User or Manager) | Team1, Team2 (This will assign existing teams, but not create new teams) | Project1, Project2 (This will assign existing projects, but not create new projects) | No (Yes or No) | 10 | Weekly (None, Weekly, Twice per month, Bi-weekly, Monthly) |
| FirstName2 LastName2 – Remove or change | email@example.com | User (User or Manager) | Team1 (This will assign the existing team, but not create a new team) | Project3 (This will assign existing projects, but not create new projects) | Yes (Yes or No) | 20 | Monthly (None, Weekly, Twice per month, Bi-weekly, Monthly) |
Replace the data with your member’s details and settings then save the CSV file.
Step 5
After editing the file, go back to the Import members dialog, then click on Browse files, or drag the CSV you just saved to the dialog box.

Step 6
After successfully uploading the CSV file, click Import.

Step 7
Finally, you’ll receive a notification that the file is being processed and you will get an email when ready.

This process usually takes a minute but may increase depending on the number of members you’re attempting to import.
Below is a sample email upon completion of the import.

Create accounts
Account provisioning lets you create accounts for new team members directly from the Members page. It also allows organizations to add team member roles, pay rates, and projects, and even generate passwords for new accounts (as opposed to the standard invitation process).
To learn more, click here.
Adding member information
Step 1
To add member information, click on Actions next to a team member’s name and then select Edit info. You can also click the team member’s name to open the edit info page.

You can also click on any user’s avatar, and then click on Member profile.
![]()
Step 2
The INFO page is broken into 3 parts Identity, Contact, and Custom fields.
After adding the necessary information click Save Changes.
Identity
- OS USERNAME
- EMPLOYEE ID
- BIRTHDAY
- IP ADDRESS- Captured by Hubstaff
- DATE- Captured by Hubstaff
Contact
- WORK ADDRESS
- WORK EMAIL
- WORK PHONE
- HOME ADDRESS
- PERSONAL EMAIL
- PERSONAL PHONE
Custom Fields – add the custom field

Optional
You can also add custom member fields via Settings > All Settings > and under the Members card select Custom fields > Profile fields > Add custom field.

You can also fill out the Employment tab when the Hubstaff People add-on is enabled.
Here you can add:
- Job details
- Job title*
- Job type
- Department*
- Work address
- Hiring Details
- Employment type
- In-office/remote
- % in office/%remote
- Employed through
- Accounting
- Tax info
- Tax type
- Account code
- Currency
- Timeline
- Start date
- End date
- Termination reason
- Employment comments
Note: Fields with the asterisk (*) are customizable drop-down fields where employers can add personalized options.

Change member settings
Step 1
To change member settings, click on the user’s avatar, then select Member Profile.
![]()
Step 2
Next, go to the Settings tab, then from here you can change the following settings:
- Able to track time – designates whether the user can track time to the organization or if tracking is disabled.
- Modify time – choose whether the user can add/remove/change time.
- Add a member to all new projects – enabling this setting adds the user to all new projects.
- Add as – here you can choose the user’s role when they are added to new projects.
- Allowed apps – lets users track time either on all types of applications (mobile/browser/desktop), or desktop only.
- Idle timeout – lets you select how long before the idle timeout feature is initiated for the user.
- Keep idle time – allows or disallows users from keeping detected idle time.

Step 3
Click on Save Changes to save your settings.

Adding members to projects
Step 1
To add projects for a team member, go to People > Members on the sidebar.

Step 2
Under the Projects column, next to a team member’s name, click the pencil icon to open the Edit member dialog.

Step 3
Edit the user’s role on the projects, then select the projects you wish to add. Hit Save to finish adding projects.

Setting up payment options
Step 1
To add projects for a team member, go to People > Members on the sidebar.

Step 2
Under the Payment column, next to the member’s name, click on the pencil icon to edit the user’s payment options.

Step 3
The Payments dialog will appear. Fill in the following information:

-
- Toggle to adjust the Pay rate or Bill Rate settings.
- The Pay Period – (none, weekly, twice per month, bi-weekly, monthly). Adding a pay period will automatically mark hours as paid based on the below available pay period options:
- Weekly: Every org week start date.
- Bi-Weekly: Every other org week start date (For Bi-weekly payments you will have the option to choose from 2 pay periods)
- Twice per month: 16th and 31st of the month
- Monthly: 31st of the month
- Past Timesheets: Edit Timesheets
- Optional: Activate/deactivate the timesheet approval feature. Click here to learn more about how the timesheet approval feature works.
- Update the Pay rate – pay rates are the amounts used for payroll/ Bill rate – bill rates are the rates used to invoice clients.
- Update the Pay type – can be set to Hourly or Fixed payments.
- Set the starting date of the new Pay rate.
- Click Save Changes to confirm the changes.
Adding user limits
Step 1
To add a weekly limit, click on the People > Members tab on the left sidebar.

Step 2
Under the Limits column, next to the member’s name, click on the pencil icon to edit the user’s limits.

Step 3
The Limits dialog will appear. You can customize the following options:
- Expected weekly work hours
- Recurring Weekly Limit
- Optional: Use shifts to set daily limits – limits the user to track time on specific schedules set.
- Recurring Daily Limit
- Expected workdays
- Disable tracking on specific days

For a more in-depth look at the features of the limits click the links below.
Team member onboarding
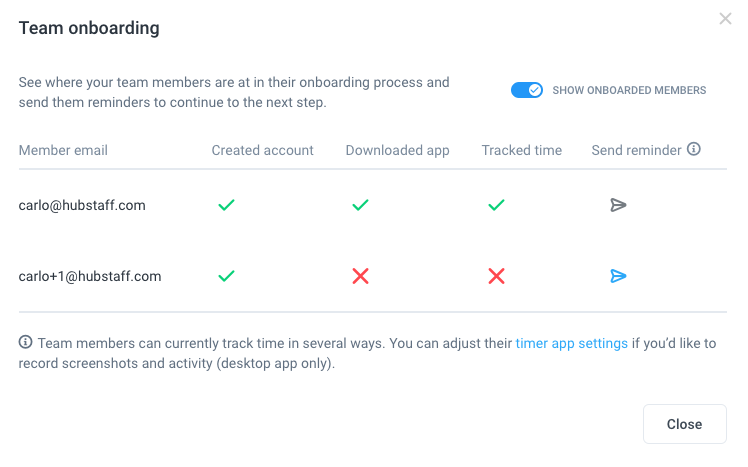
The team member onboarding feature allows owners/managers to check which users have created a Hubstaff account, downloaded the app, tracked time, and also sends reminders to users to complete setting up their accounts.
Step 1
To access the dialog box, go to the People > Members page.

Step 2
Click on “Onboarding status” on the rightmost part of the page.
![]()
Step 3
A popup dialog should appear where you can see the status onboarding status of each user. Toggle the Show onboarded members setting to show only users who haven’t been completely onboarded.
For more details, please check the team onboarding support article here.
Adding users to Teams
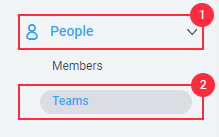
To add users to a team, first, you’ll have to add a Team by navigating to the Teams tab on the sidebar, and then clicking on Add Team.

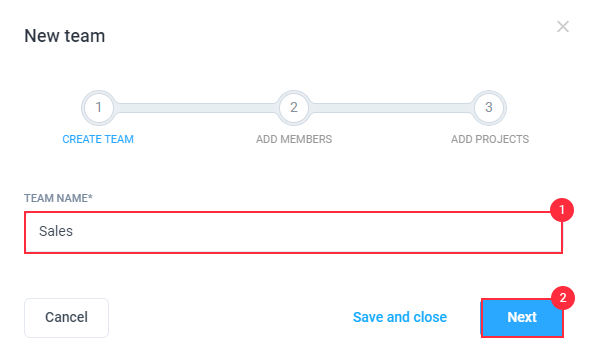
Then, click on Next > Add Teammates and Team Leads one by one or “Select All” on each category.
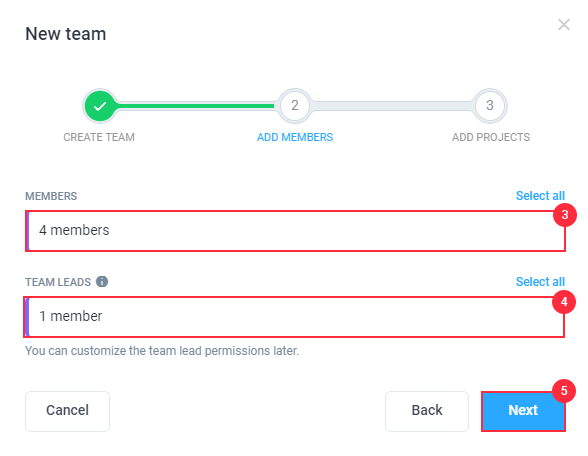
Click on Next again> Lastly add your projects one by one or “Select All” and click “Save“.

Edit user settings from the Invite section
You may also access the user’s settings mentioned in previous steps before they accept the invitation by navigating to the Invites tab to make the onboarding process more seamless.
Step 1
Select People > Members from the main navigation menu. Once there, click on the Invites tab.

Step 2
Click on the Invites tab and then click on the desired option.

Step 3
One special mention to this section is that if you edit the user’s role, and they don’t have an existing account in Hubstaff, you will be able to edit their Name, if an account already exists this field is auto-filled. After the user accepts the invitation, only they can edit their account name.

Remove a team member
Step 1
Click on the People > Members tab on the left sidebar.

Step 2
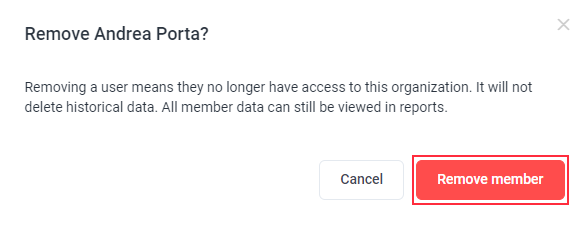
Click Actions to the right of the member you want to remove, then click the Remove member option from the dropdown.

Step 3
Click OK on the confirmation box.
Enabling or Disabling time tracking for a team member
You can enable or disable time tracking for members of your organization. Disabling time tracking for anyone will disallow users from tracking time from their timer and you won’t be able to add manual time for them.
Step 1
Click on the People > Members tab on the left sidebar.

Step 2
Click on the Actions button to the right of the team member you want to enable/disable time tracking.
![]()
Batch Actions
Batch actions let you apply an action to multiple team members in one go.
Step 1
Click on the People > Members tab on the left sidebar.
Select the users that will require batch actions by checking the box beside the user.
Click on the required batch action and the users will be updated.


Step 2
Select the action you wish to apply in bulk on the list of batch actions:

Member Update via CSV importer
Update multiple member details in one go via file upload.
Step 1
First, navigate to People > Members.

Step 2
On the Members page, click on the Batch actions and then Import list to bulk update.

Step 3
On the new pop-up window, click on the Update all members button.
Import the file once the changes are added.

