14 minutes
Setting up Timesheet Approvals
This is our complete guide to setting up timesheet approvals in Hubstaff.
What are timesheet approvals and how does it help your organization?
Timesheet approvals provide organizations with an opportunity to review and verify employee time entries prior to processing payroll. Beyond this, timesheet approvals also offer several additional benefits, including the following:
- Ensures that employees report their hours correctly.
- Gives managers visibility into what their team is working on and helps identify inefficiencies or time sinks.
- Helps avoid payroll mistakes by preventing errors, intentional or accidental (e.g. incorrect clock-ins, double entries).
- Helps monitor how much time (and cost) is being spent on specific projects or tasks.
- Approvals ensure compliance with labor laws, such as overtime rules and minimum wage laws and serve as a formal record of agreed-upon work hours.
- Protects the organization during audits or disputes with employees.
- Helps inform decisions about hiring, staffing, and workload distribution.
How to enable timesheet approvals for your organization
To enable timesheet approvals:
Step 1
Navigate to Settings > All settings > Enable/disable features.

Step 2
Click Enable under the Approve timesheets section.

Enable timesheet approvals for each team member
To enable timesheet approvals for individual users:
Step 1
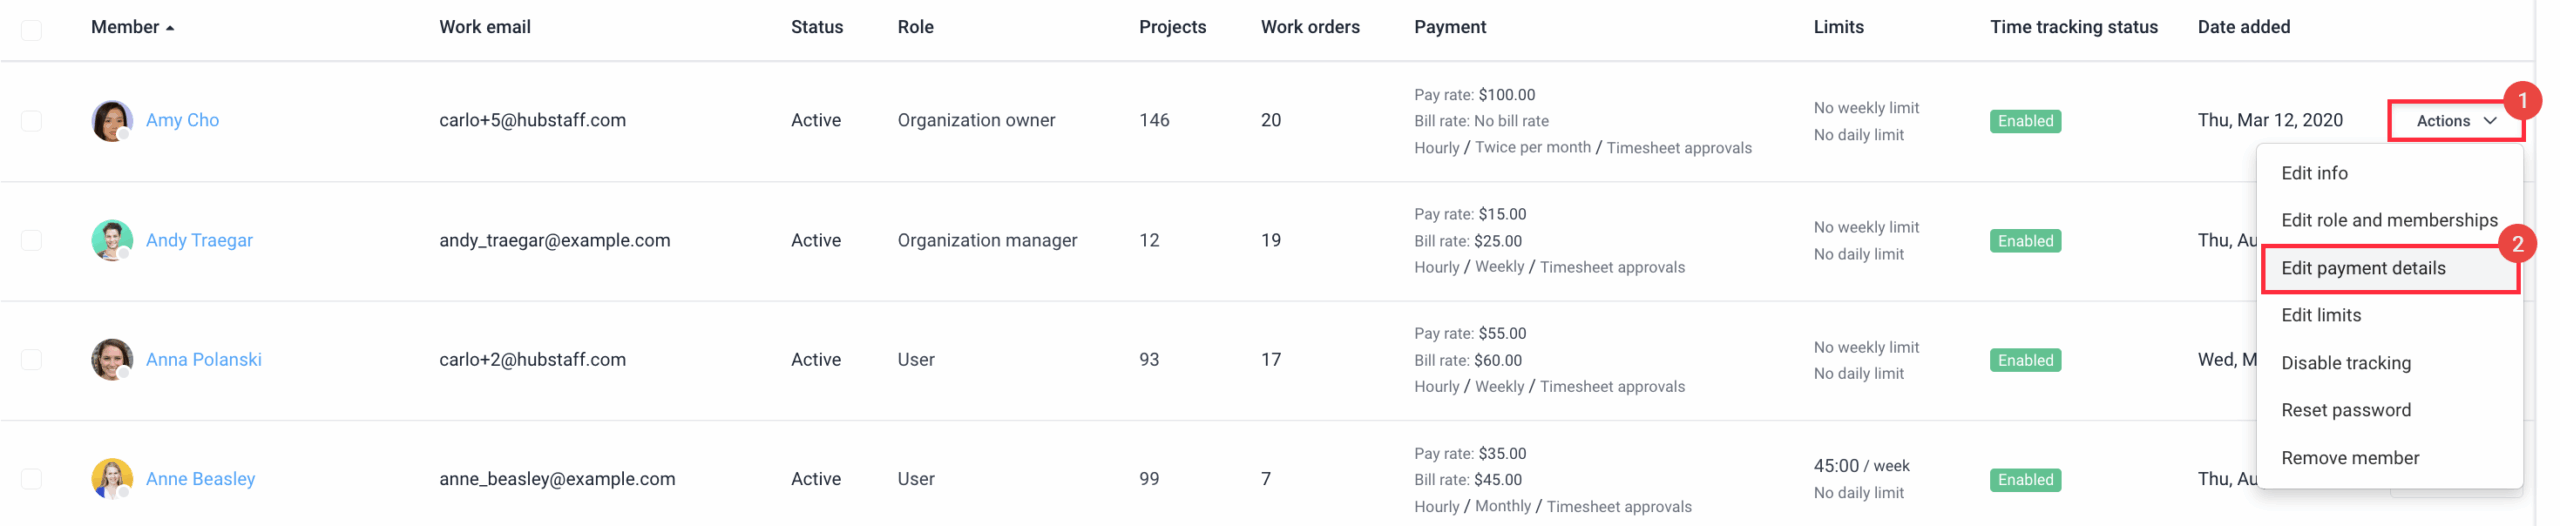
Navigate to People > Members.

Step 2
Click Actions > Edit payment details next to the user’s name on the far right.
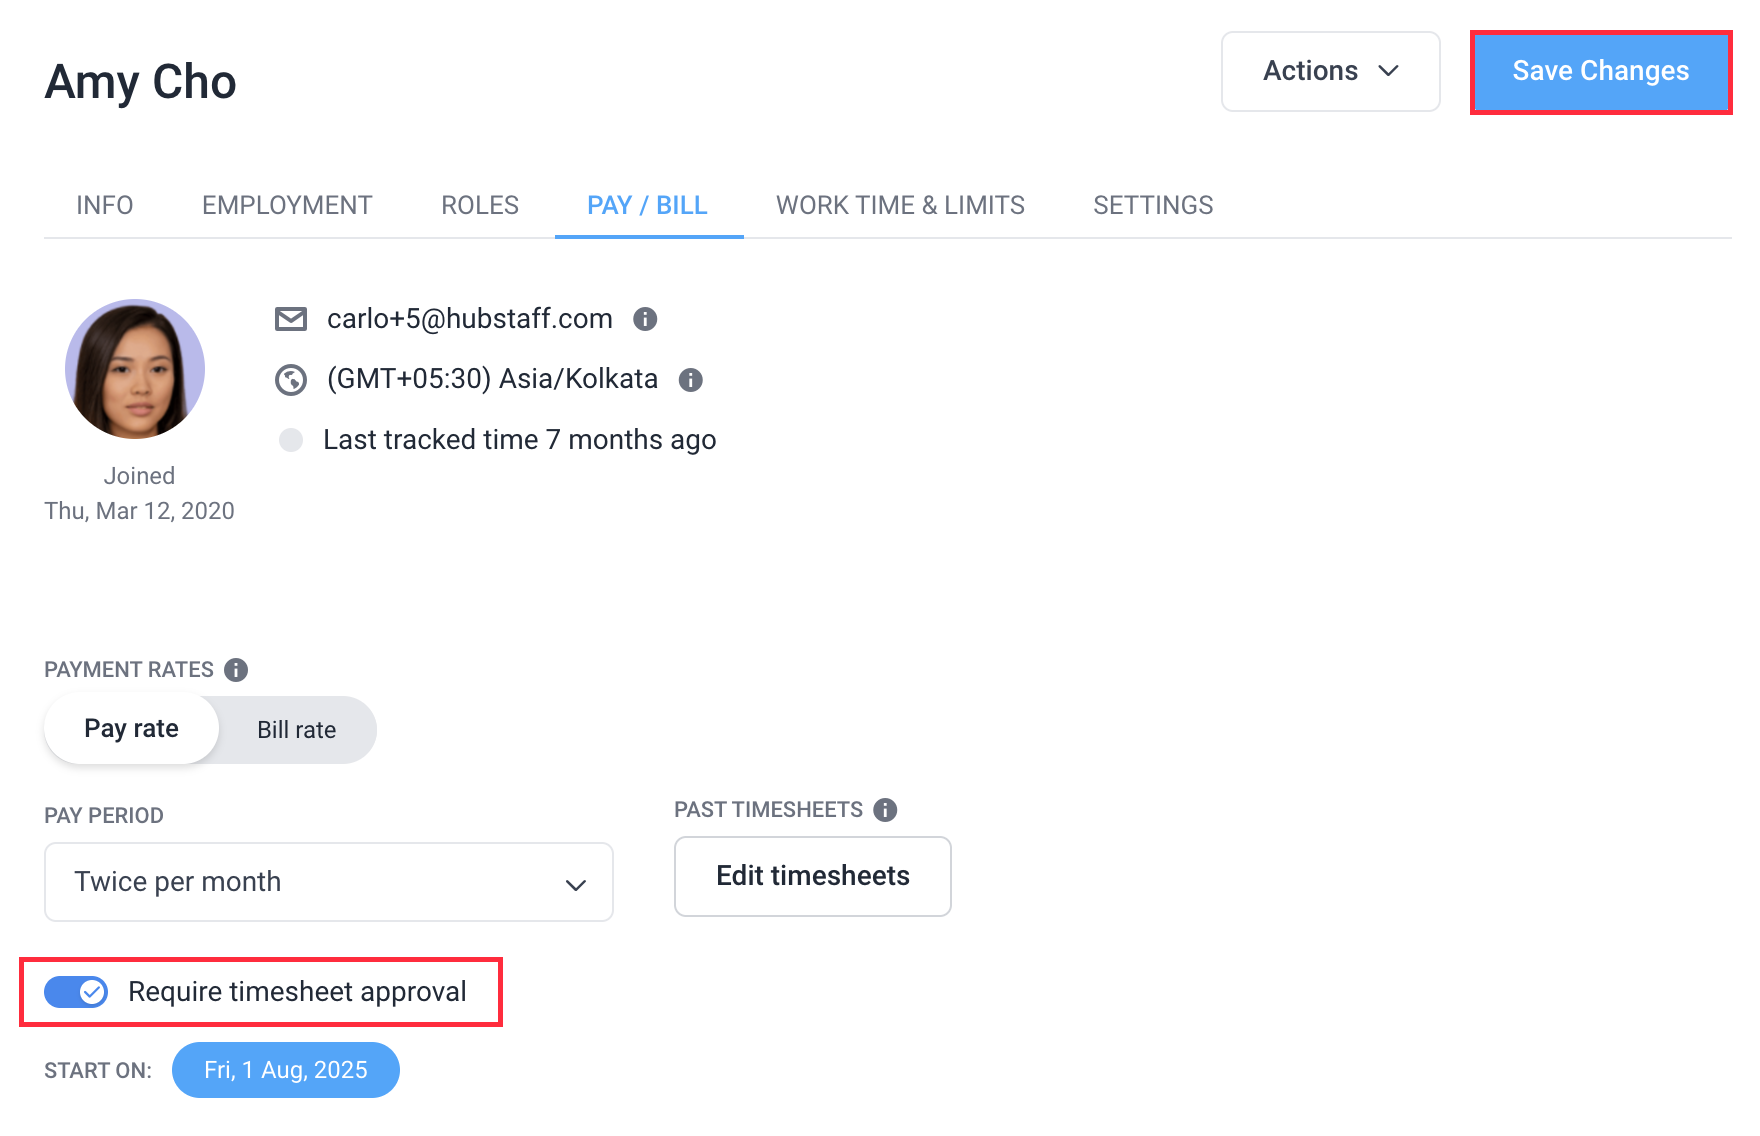
Step 3
Place a checkmark on the Require timesheet approval option then hit Save Changes.
Reviewing timesheets as a team member
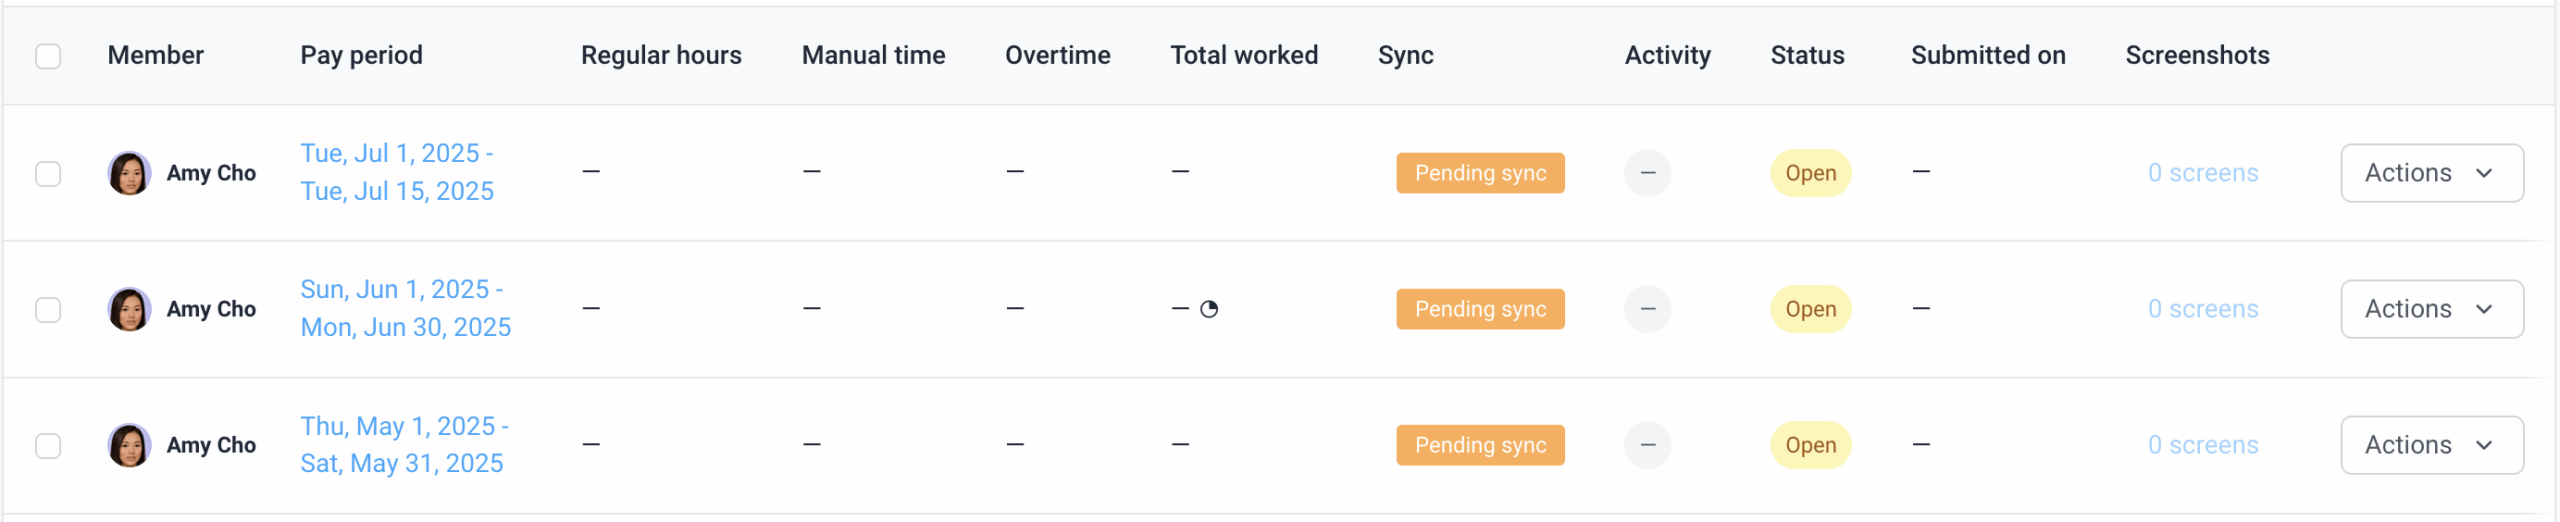
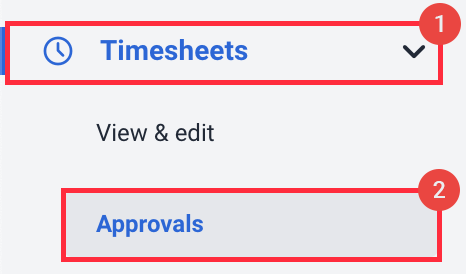
To view your timesheets as a user, click on Timesheets > Approvals. On that page you will see each timesheet broken down by pay period. To learn more about timesheet approvals for team members, click here. If you don’t see a timesheet created for you, even when a pay period is set, please contact your organization owner/manager to enable the timesheet approvals feature.
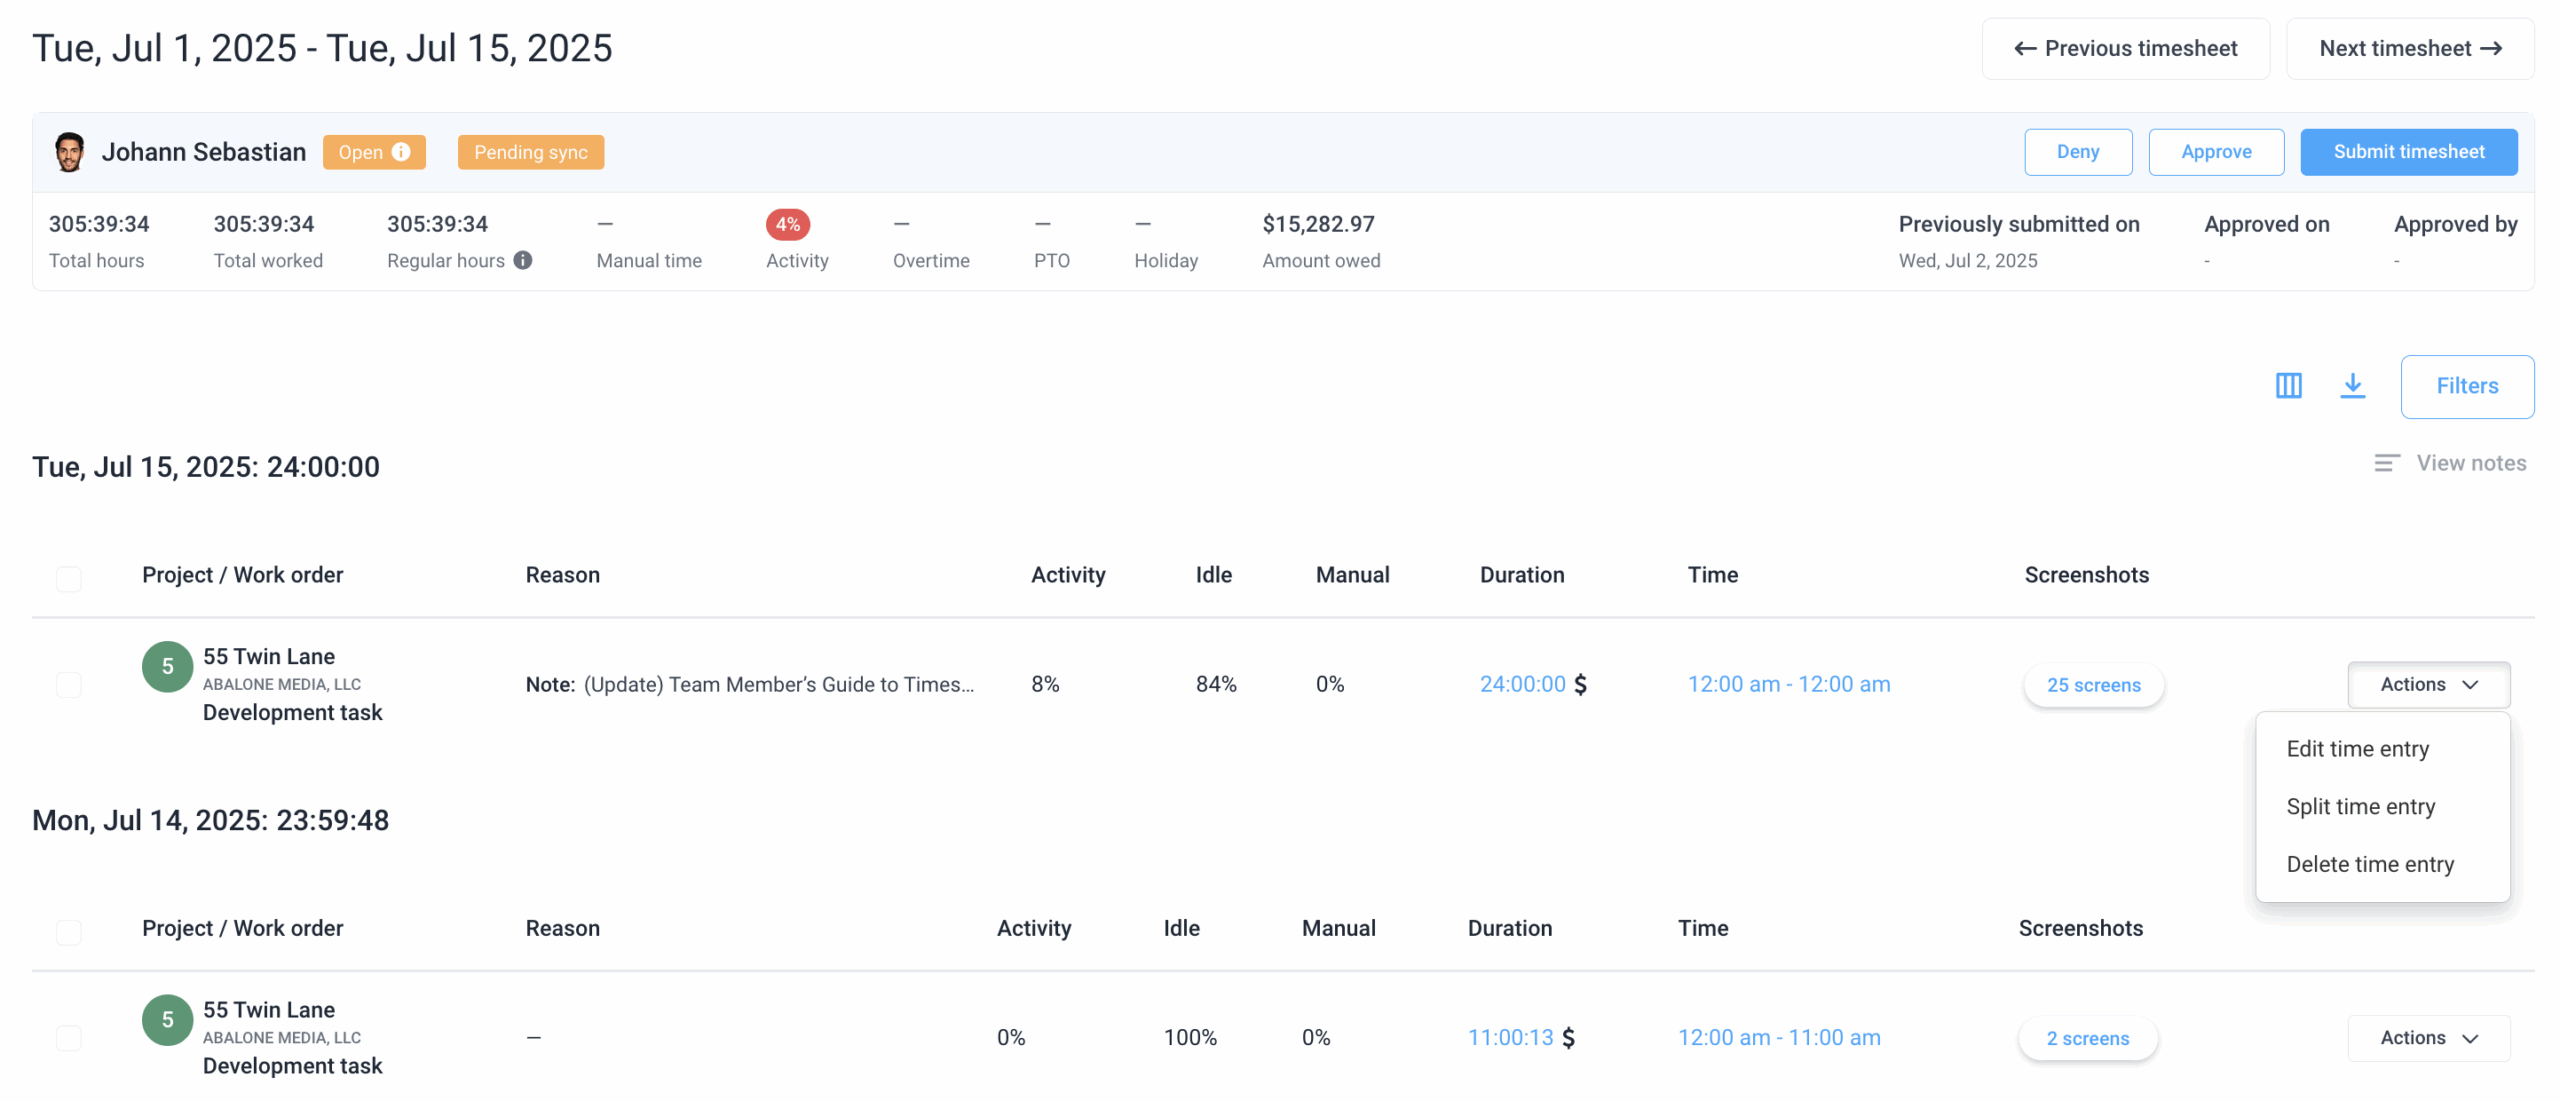
Reviewing timesheets as a manager
To review your team’s timesheets:
Step 1
Navigate to Timesheets > Approvals.
Step 2
You will automatically be taken to the Open tab, where you’ll see all of your teams open timesheets awaiting review.
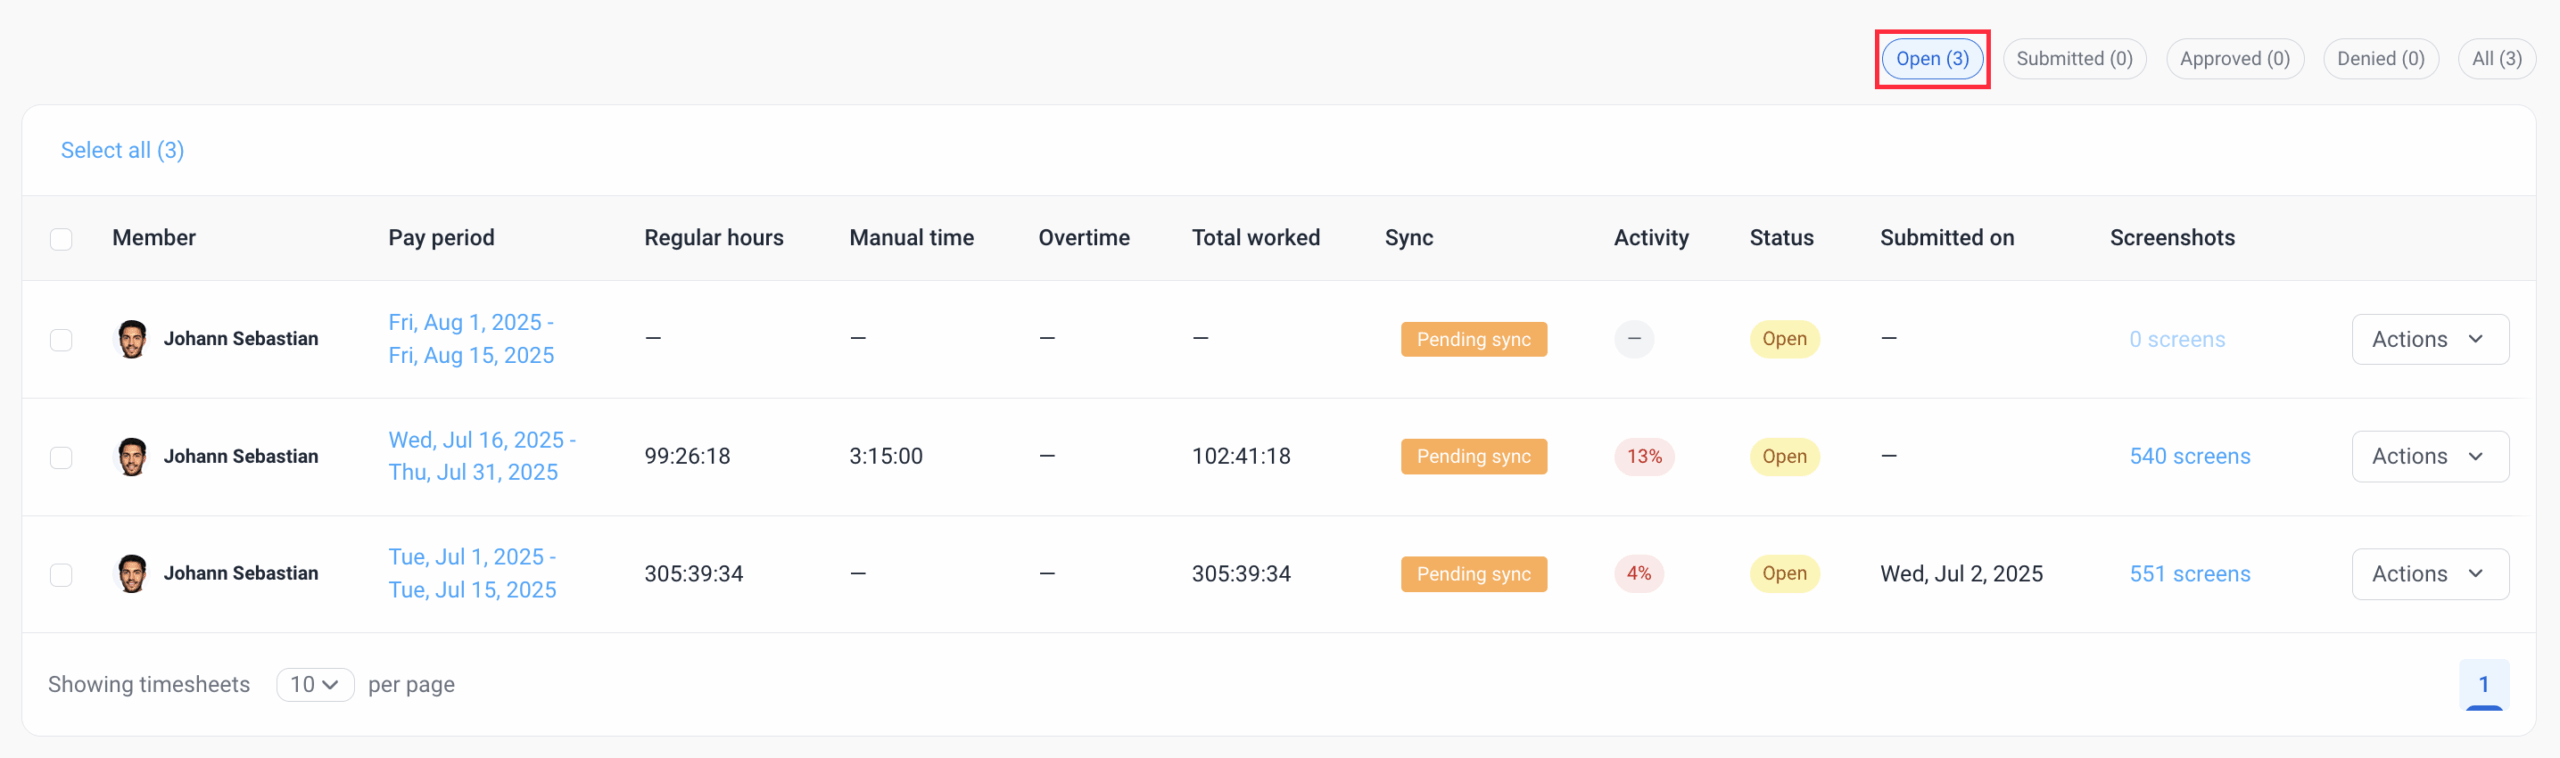
Step 3
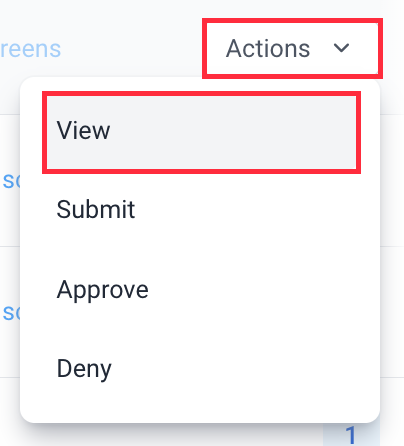
To view the contents of each timesheet, either:
- Click on the Pay period, or
- Click on Actions > View.
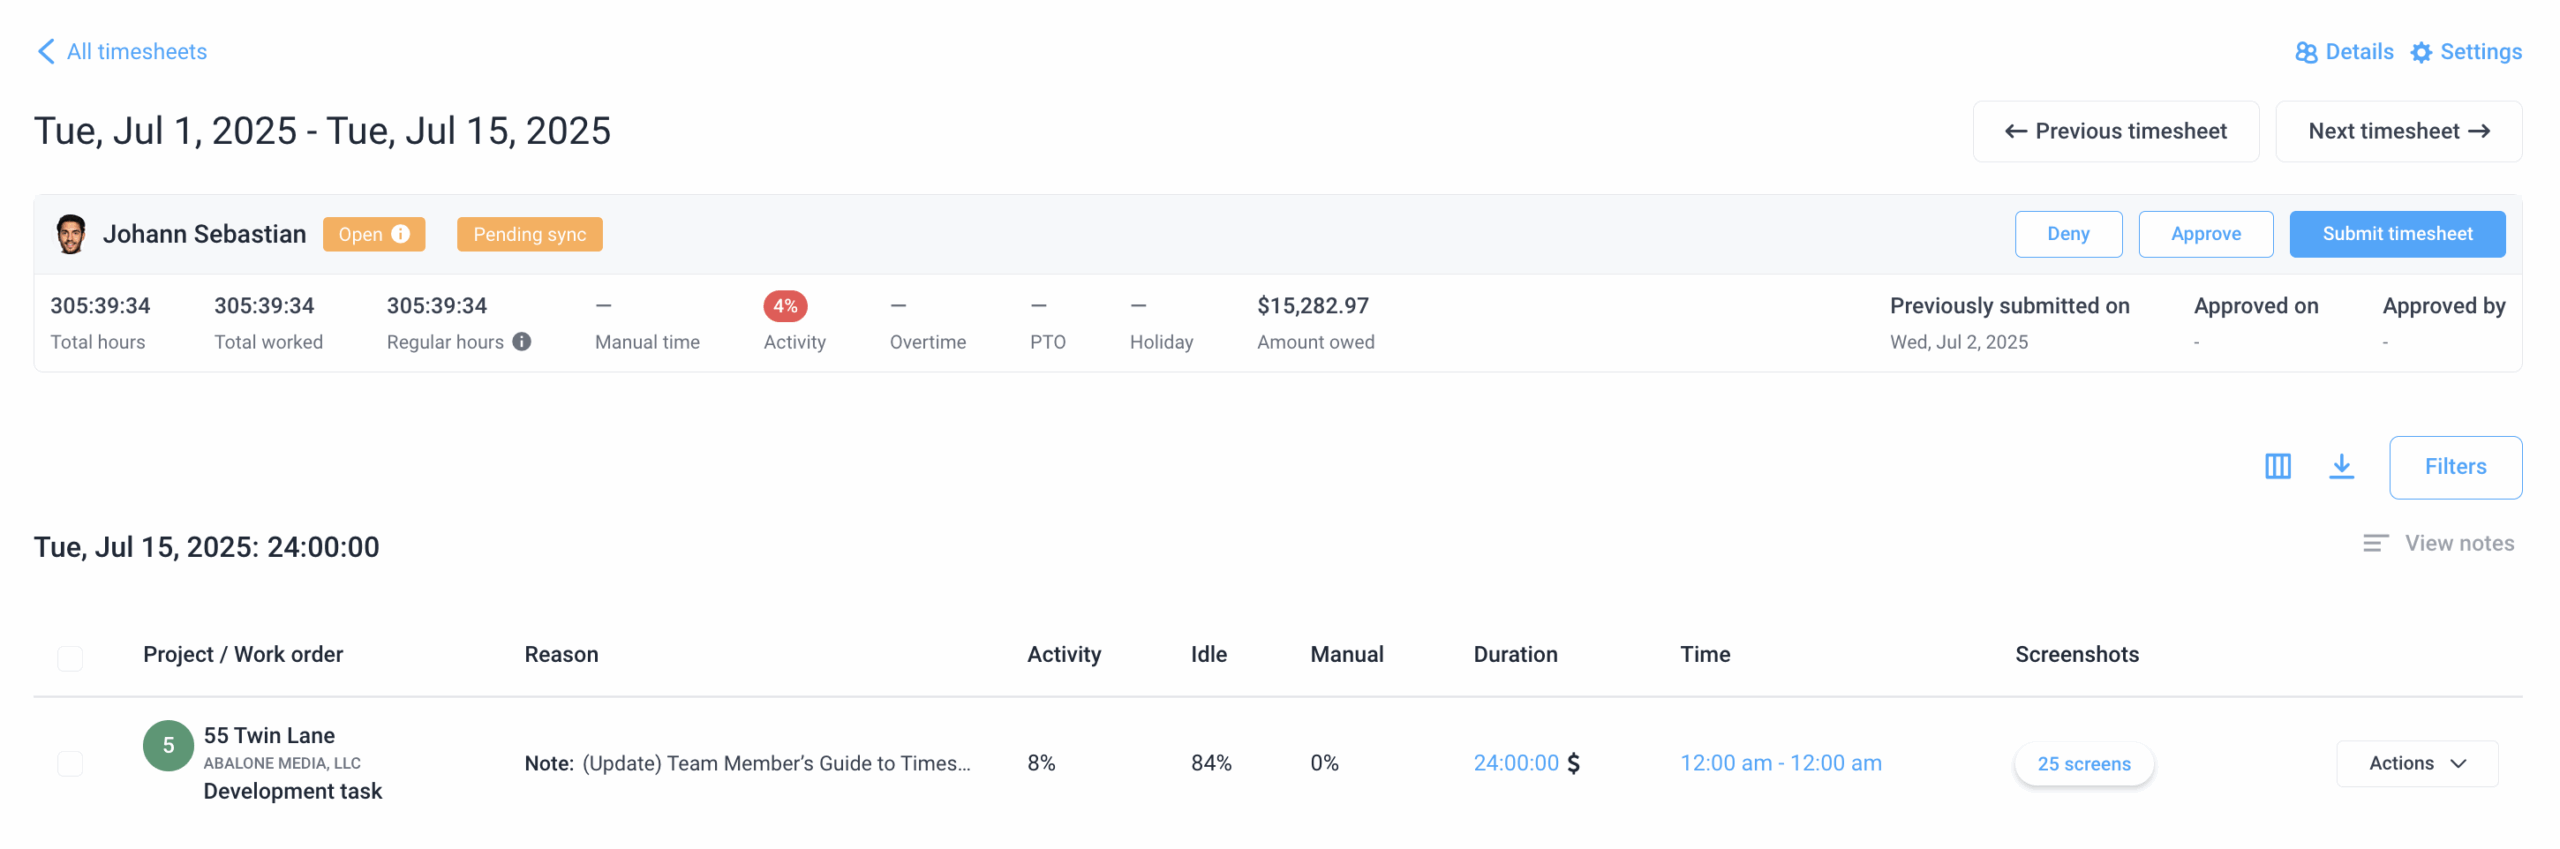
Step 4
Here you will see the contents of each timesheet, such as total hours, manual time, activity percentages, overtime, PTO, holidays and amounts owed.
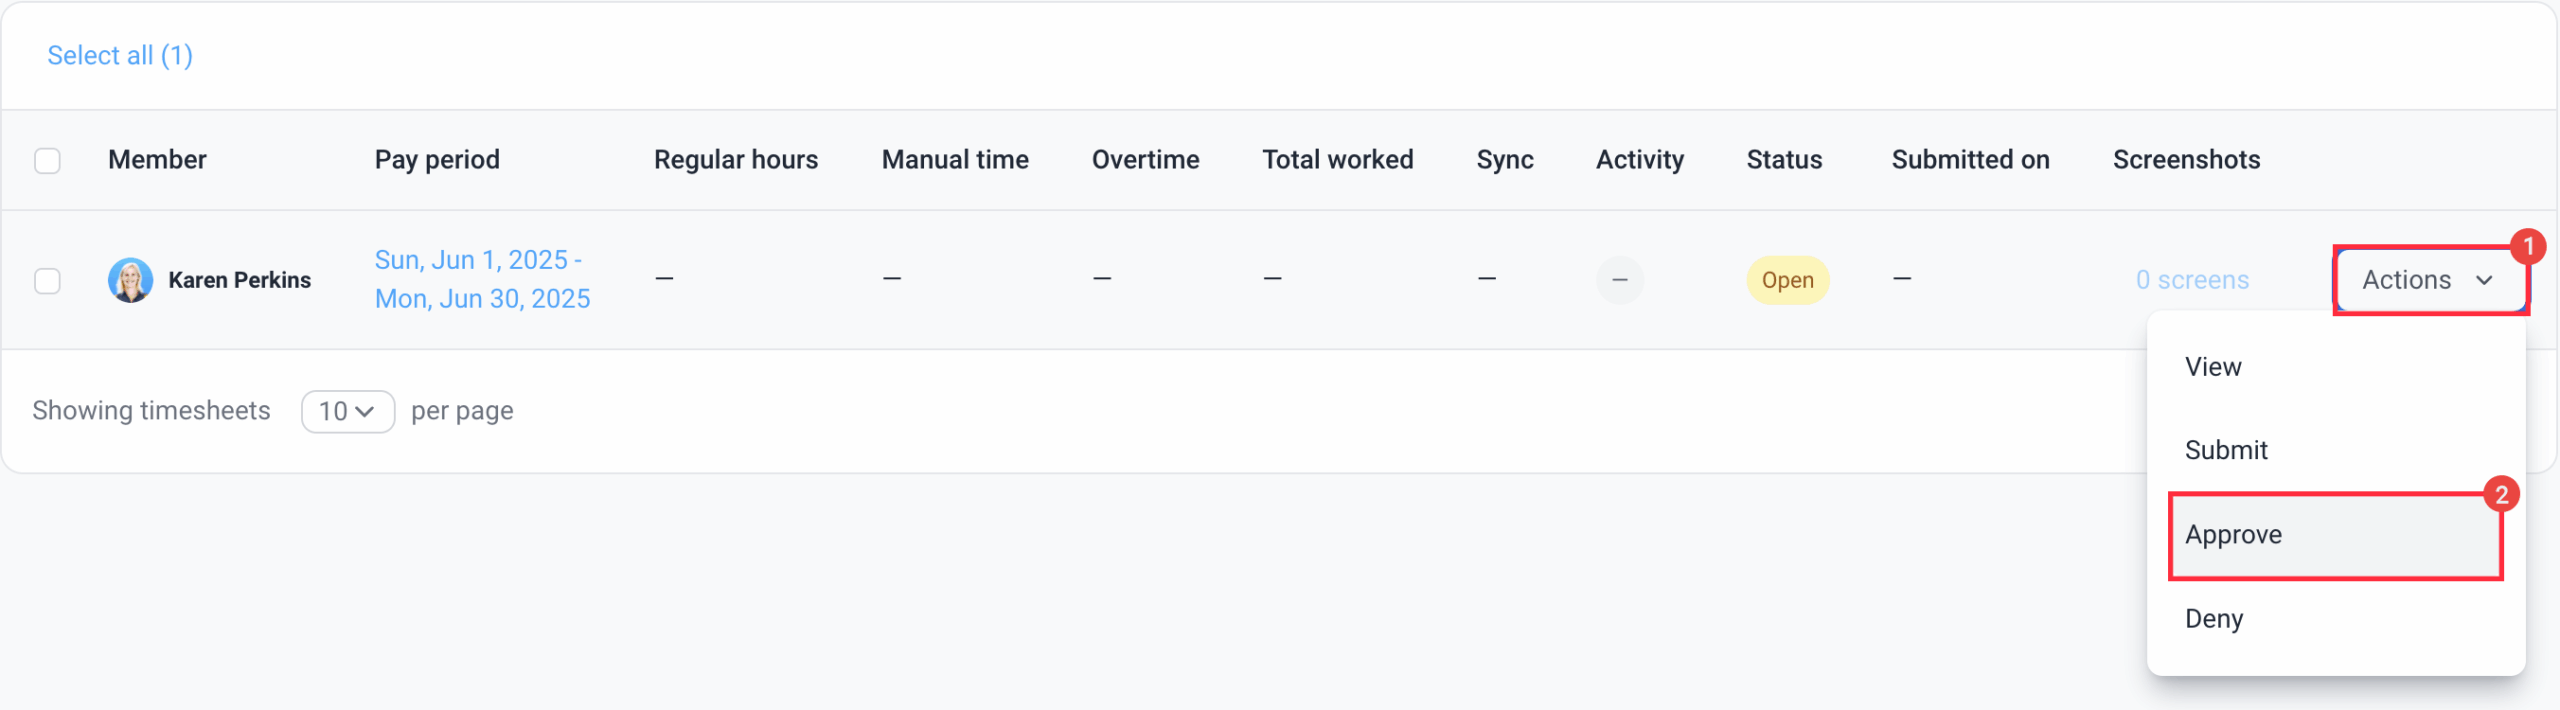
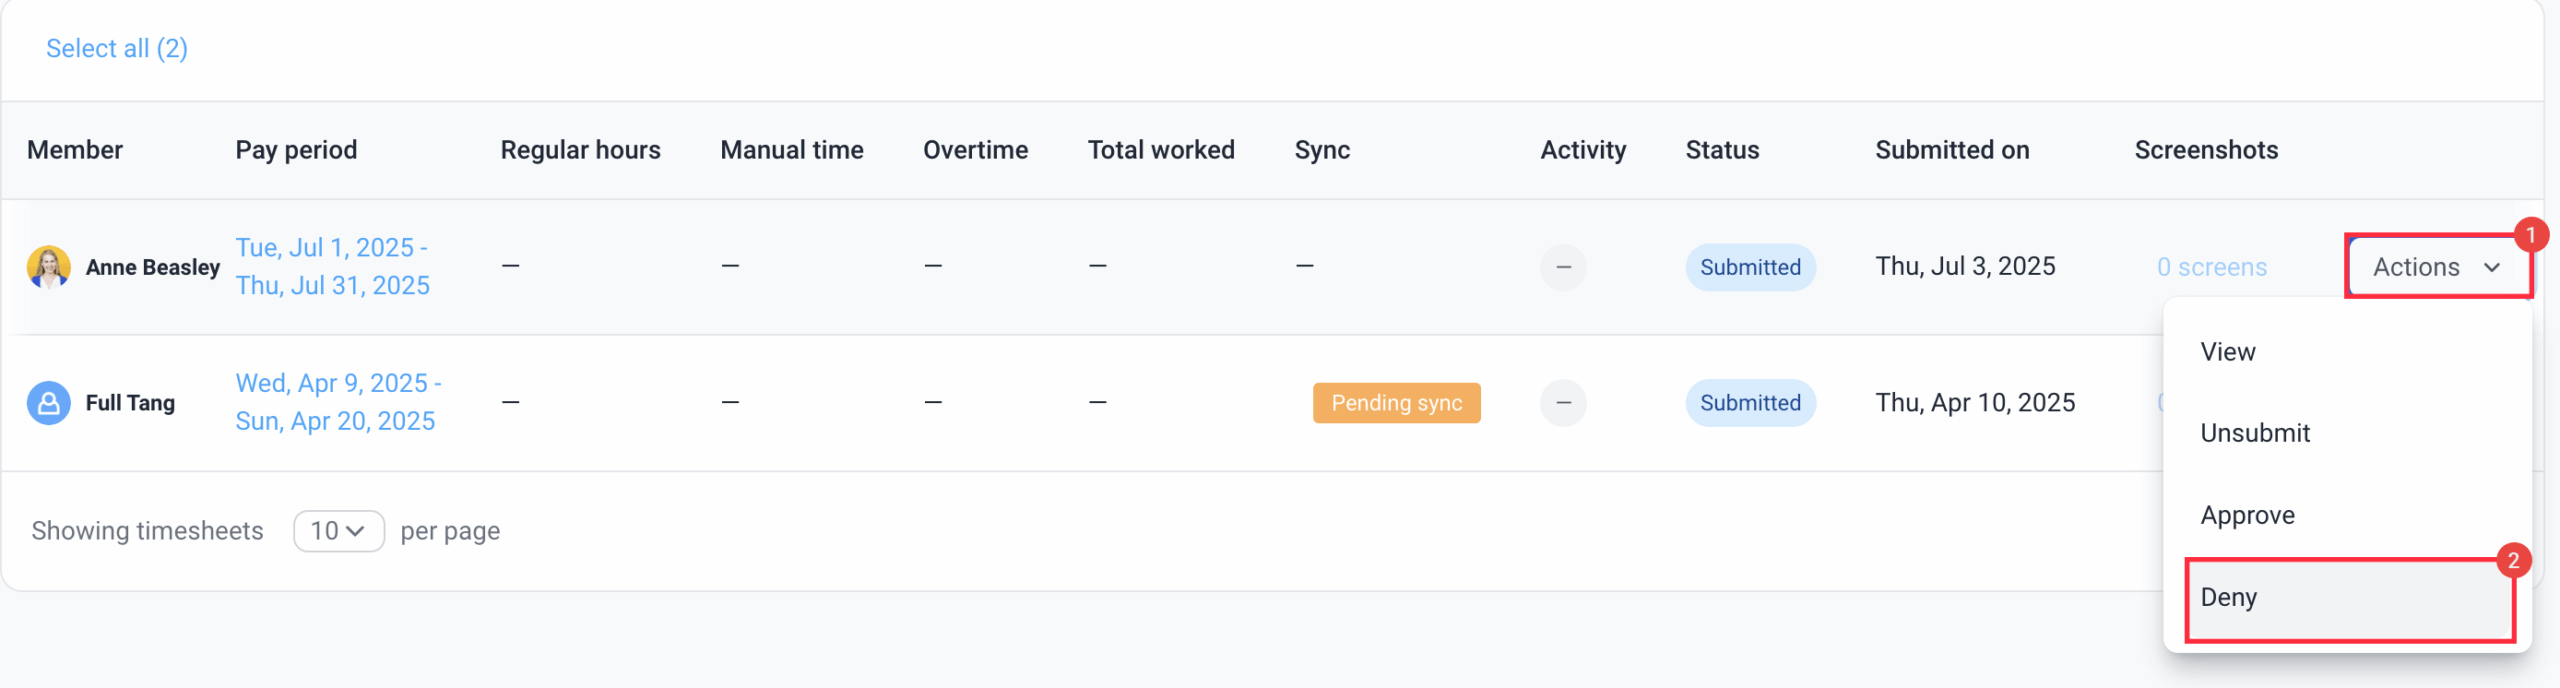
Approving timesheets
To approve a timesheet:
Step 1
Navigate to Timesheets > Approvals.
Step 2
Click on Actions > Approve next to the timesheet you wish to approve.
Editing timesheets
To edit your team member’s timesheets:
Step 1
Navigate to Timesheets > Approvals.
Step 2
You will automatically be taken to the Open tab, where you’ll see all of your teams open timesheets awaiting review.
Step 3
To view the contents of each timesheet, either:
- Click on the Pay period, or
- Click on Actions > View.
Step 4
Click on the Actions button to decide what you wish to do with each time segment. You can edit/split/delete time entries. This feature is only available when the modify time setting is enabled for you.
Denying timesheets
To deny timesheets:
Step 1
Navigate to Timesheets > Approvals.
Step 2
Click on Actions > Deny.
FAQs
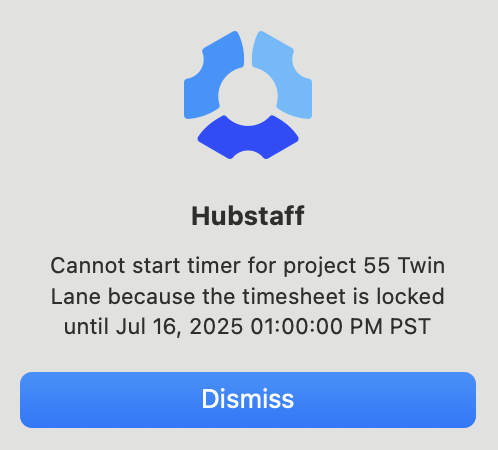
What happens if I submit my timesheet early?
For example, if your pay period is January 15 – January 30th, and you submit your timesheet on January 18, you will no longer be able to track time and you will receive an error when attempting to track time telling you that you cannot start the timer for the project because the timesheet is locked.
What happens if I don’t submit my timesheet?
If you don’t submit your timesheet, and your organization has the require timesheet approval setting enabled – you will not be paid when the pay period ends. Please contact your organization owner in case this occurs.
I can see a member’s time in Timesheets -> View & Edit, but they don’t appear in the Timesheet Approvals area. Why?
This usually means timesheet approvals haven’t been enabled for that member. To fix it:
- Navigate to People > Members.
- Click Actions > Edit payment details next to their name.
- Check that Require timesheet approval is enabled, then hit Save Changes.
Once enabled, their timesheet will appear in the Approvals queue. If you’ve confirmed this setting is already on and they’re still not appearing, see Adding and Editing Past Timesheets. The member’s timesheet approvals records may need to be created or corrected.