10 minutes
Sprints Overview in Hubstaff Tasks
Our Sprint feature allows organizations to manage tasks that require immediate attention. Sprints are time-bound phases which are usually one to seven weeks long. This provides organizations an overview of active projects, set weekly deadlines for tasks, and add existing tasks to Sprints.

You’ll find that Sprints are easy to set up and you can keep moving forward and get a bird’s-eye view of projects.
Getting Started with Sprints
How to enable Sprints
Step 1
First, let’s navigate to Sprints on the sidebar menu.

Step 2
Click on Try it out.

Step 3
Now you’re ready to configure your Sprint options. Set how long each sprint runs (e.g., 1 week up to 7 weeks), what day of the week the sprints start, and which projects are included on the sprint. You can also choose how many sprints you want to activate so you can plan ahead. You are allowed to activate up to 4 sprints.

Adding a project to a Sprint
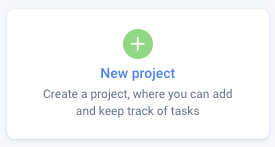
Step 1
Click on New Project.
Step 2
Select the Sprint project template by clicking Choose.

Step 3
Enter the Project Name, then make sure the Include in sprints option is checked. Select which organization you wish the project to belong to and the folder (if applicable). Click Create.

Once created, the tasks within the project will be included in the sprints page.
Adding tasks to Sprints
Step 1
Click on Add a task under the project list.
If you already have existing tasks, please skip to Step 3 (Item 7).

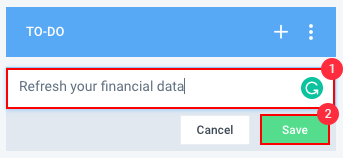
Step 2
Enter the task name, then hit Save. Click on the task name to open the task dialog box.
Step 3
On this screen, you can configure the task for your Sprint.

- Enter the task Description.
- Add Attachments (optional)
- Enable or add Checklists (optional)
- Post Comments or Comments with file attachment (optional)
- Add an Assignee – this user will be assigned to work on the task.
- Add a Follower/s – these users will be notified of any progress to the task including new comments.
- Choose the Sprint option this task appears in.
- Current – these tasks need to be completed within the current sprint.
- Next Sprint – these tasks need to be completed in the next sprint.
- Backlog – overdue tasks.
- Choose which Epic this task is added to.
- Add Labels (optional)
- Assign a Start date for the task.
- Assign a Due date for your task. This is the date you aim to complete the task by.
- The Worked section will show how much time was spent on this task.
- Specify an Estimate for your task. This is the estimated amount of hours you believe the task will take to complete.
- Assignee. Click the cross button to assign team members to the task.
- Sprint. Select the stage of the sprint you wish for the task to fall under. The options are None, Backlog, Future, and Current.
The Sprint Overview screen
Step 1
Navigate to Sprints on the sidebar menu.
Step 2
After clicking, you will be taken to the overview of your Current, Future, and Backlogged Sprints.

- Organization selection – choose which organization you wish to view Sprints for.
- Completed sprints – shows only completed sprints.
- Sprint settings – projects are included in the sprint and define the length of each sprint.
- Add a task – lets you add a task directly within the sprints page.
- Me / All / Members View – Filter tasks according to assigned team members. Tasks assigned to you will be displayed on the Me section. All will display all tasks regardless of assignees. Members will display all tasks that are assigned to your team but not yourself.
- Task Search – Search for any task using the search bar. Typing the name of the task will remove all others from view that do not contain the search term.
- Current Sprint – shows all tasks included in the current sprint period.
- Next Sprint – shows all tasks included in the next sprint period.
- Sprint Backlog – shows all overdue tasks from previous sprints.