15 minutes
Epics Overview in Hubstaff Tasks
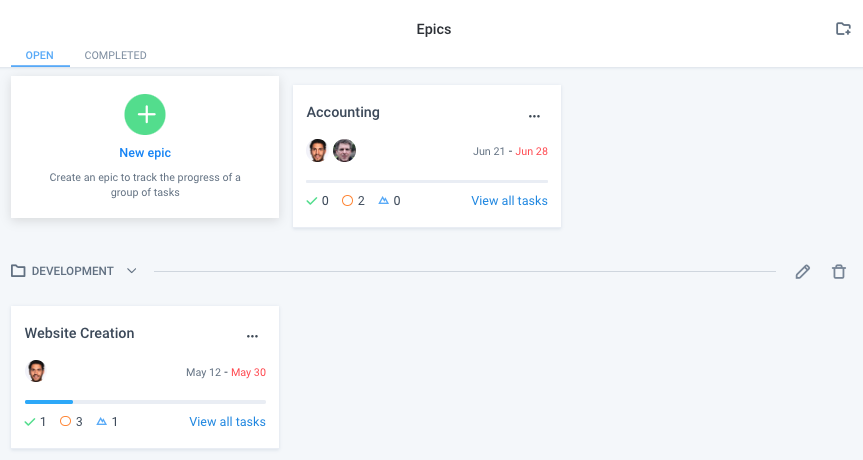
Epics are a great way to manage a set of tasks that are allocated to multiple projects and teams.
Using epics will organize those disparate tasks into a singular “Epic” view. For example, if you’re creating a website, and you have smaller tasks that involve multiple projects, teams, or departments, and falls into a larger task, i.e. designing a header (graphic design team), formatting CSS (developers), etc., it would be best to create one epic so you can manage all the tasks that fall into one larger task in one page.
Looking for more information about agile best practices and how Tasks can help your team achieve effortless iterative improvement? Check out Hubstaff’s guide to agile project management by clicking here.

Creating a new Epic
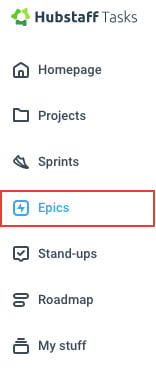
Step 1
Navigate to Epics on the sidebar.
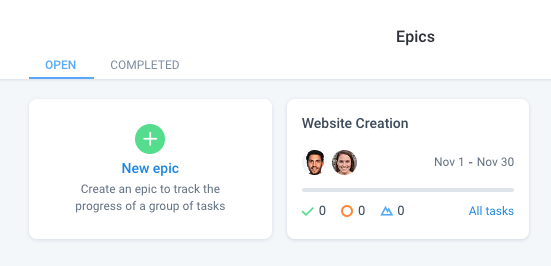
Step 2
Click on the New epic button under your organization name.

Step 3
The Create new epic dialog will appear. Add a name, description, folder (optional), start and due dates, assign an owner, then click on the Create button.

Step 4
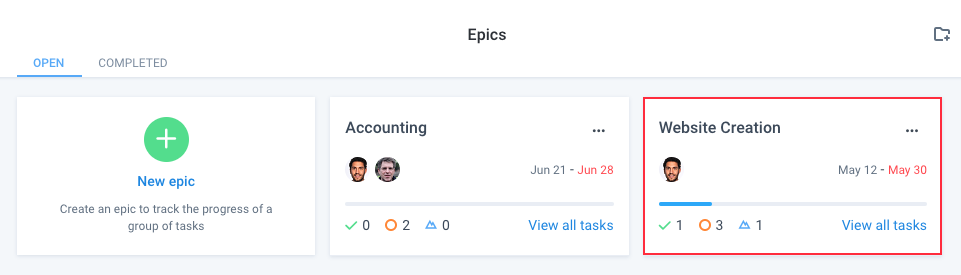
The new Epic is now created.
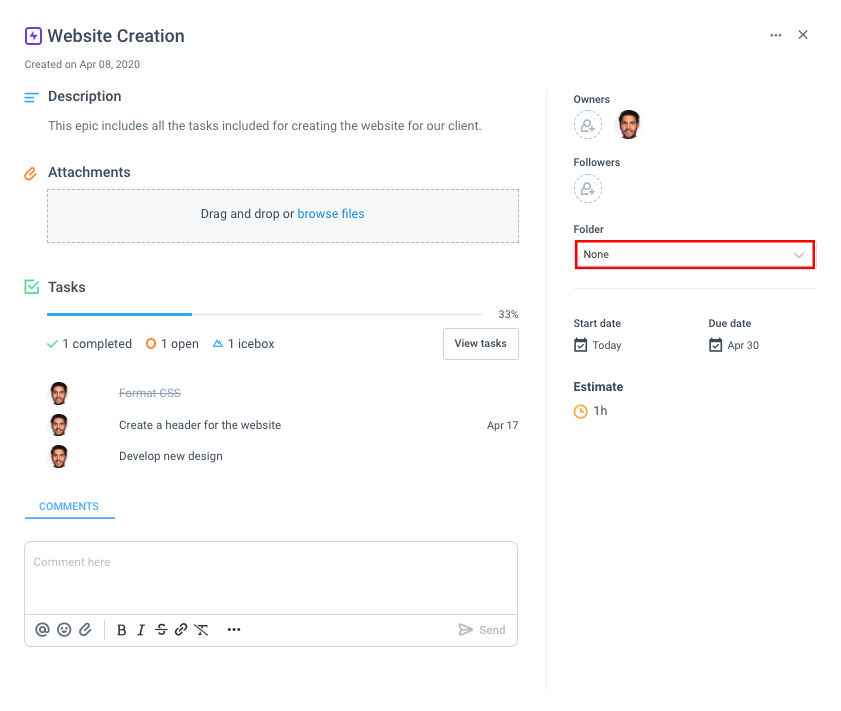
When we open the Epic, we’ll see the following information:
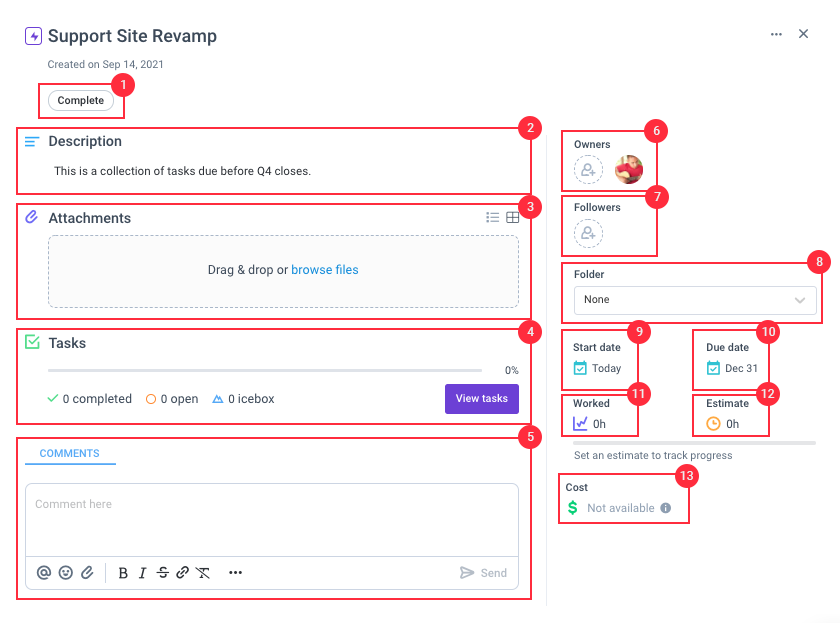
- Complete button – marks the epic as completed.
- Task Description
- Attachments
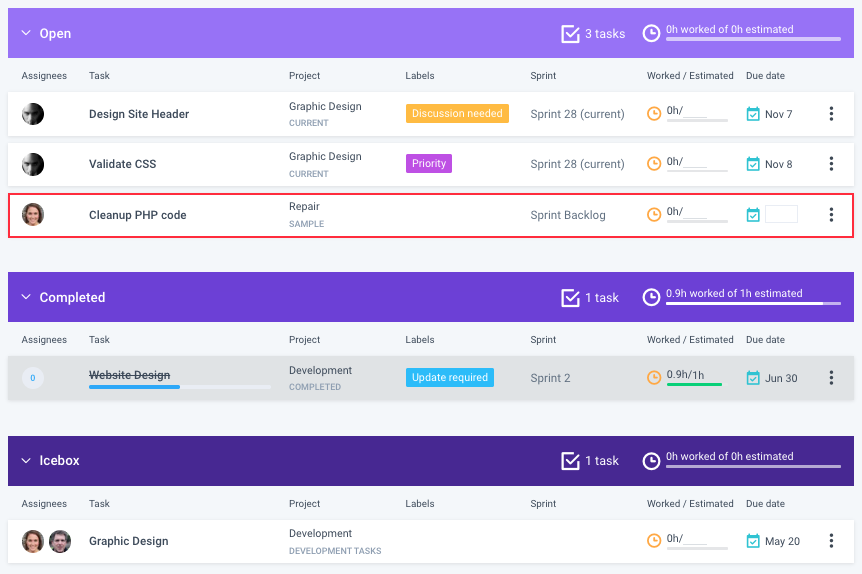
- Tasks – this section includes a progress bar for all of the tasks under the epic. This is based on the total number of completed tasks over all the tasks on the epic.
- Completed – count of completed tasks
- Open – count of currently active tasks
- Icebox – count of currently benched tasks (can be moved to open/completed)
- Comments
- Owners
- Followers
- Folder
- Start Date
- Due Date
- Worked – number of combined hours worked on the epic.
- Estimate – the estimated time to complete the epic.
- Cost – shows the total cost of the epic based on time worked multiplied by pay rates set for the employees.
Adding new tasks to an Epic
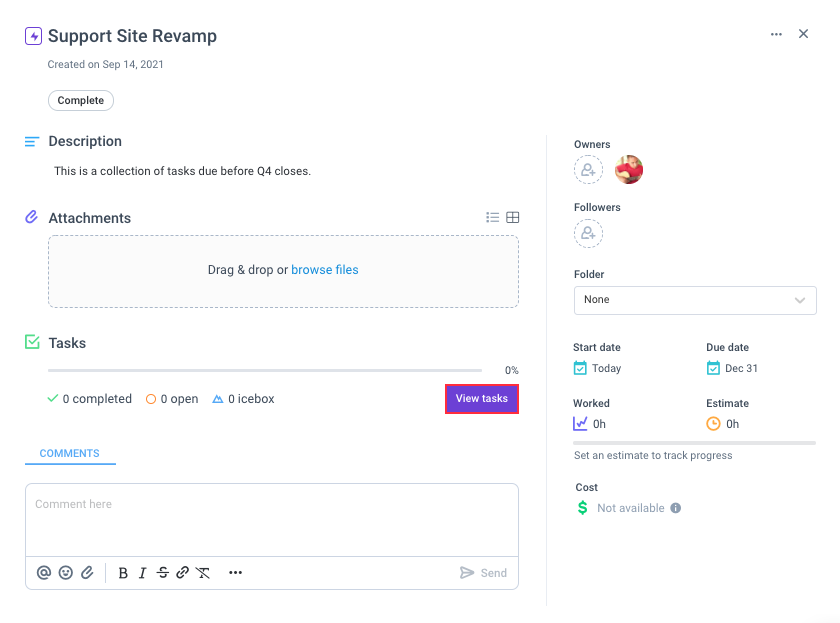
Step 1
Open the Epic page, then click on View Tasks.
Step 2
On the Epics page, click on Add a Task.
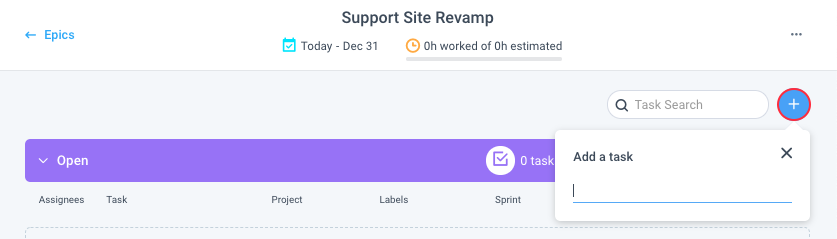
Step 3
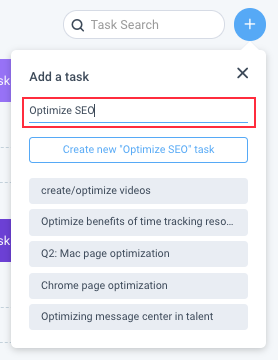
Provide the name for the new task then hit Enter or click the button below the task name.
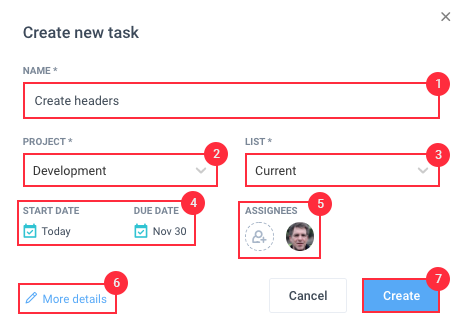
Step 4
Select the project name and the list under that project, then assign users to the task and hit Create. Optional: click on the More details section to add more information about the task.
Step 5
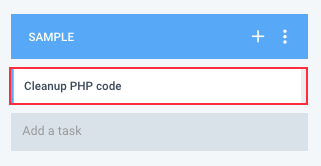
The new task will appear on the Open section of the Epics page. From here, you’ll also be able to add an estimated time to complete and a due date.

Adding existing tasks to an Epic
Step 1
Open the task.
Step 2
On the Epic dropdown, select the epic where you’d like to add the task.
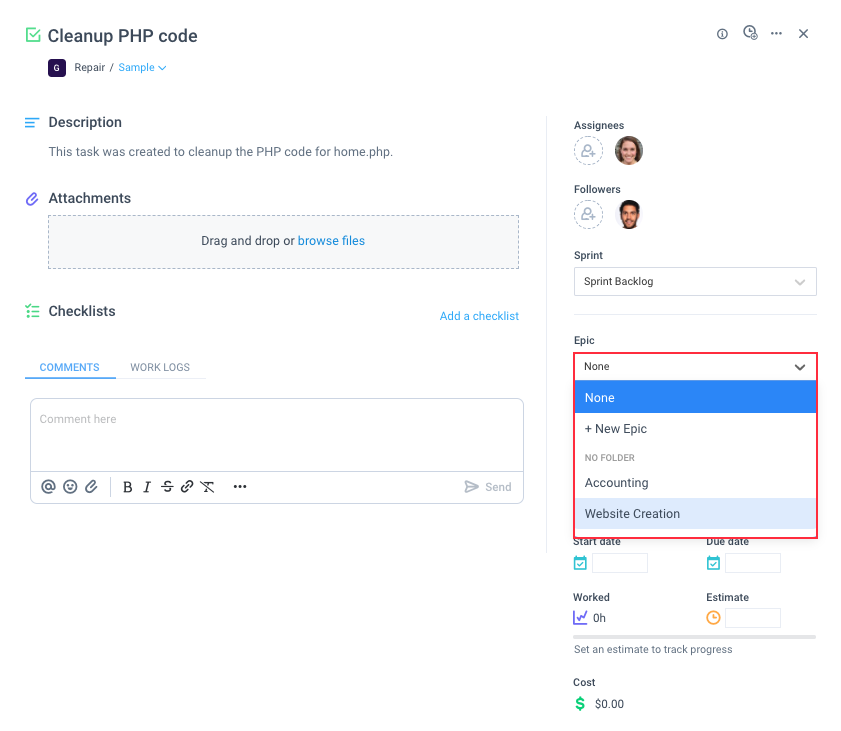
Step 3
The task will now appear on the Epic view.
Attaching files to an Epic
Step 1
Open the Epic.
Step 2
Drag a file from your computer, or click on Browse files to attach a file to the Epic.
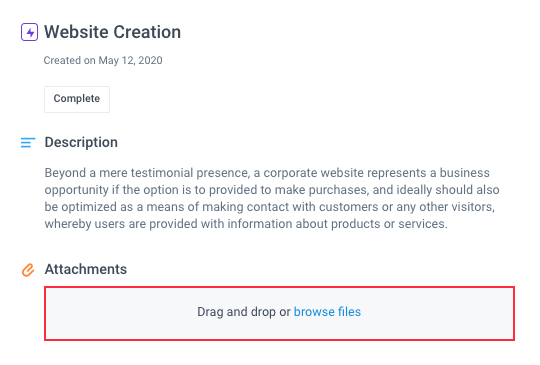
Step 3
Select a file then click on Open.

Step 4
The attached file will appear under the Attachments section of the Epic.

Moving an Epic to a folder
You can organize epics into folders within Hubstaff Tasks to add another level of organization. Here’s how you can arrange Epics into folders:
Step 1
Open the Epic.
Step 2
Select the folder from the Folder drop-down.
Step 3
The Epic will be moved to the selected folder.
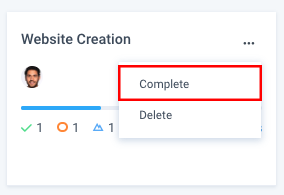
Marking an Epic as Complete
Step 1
Click on the menu button next to the epic name.
Step 2
Select the Complete option.
Deleting Epics
Deleting an Epic is permanent and once completed, the data can no longer be retrieved.
Step 1
Click on the menu button within the Epic.

Step 2
Select the Delete option.

Worked and Spent time on Epics
If you’ve added an Estimated time on each task linked to an Epic, you’ll be able to see if your team was able to meet the estimated work hours for a specific epic.
For example, if you have the following tasks:
| Task | Estimated time | Actual Time Spent |
| Epic Task 1 | 4 | 15.2 |
| Epic Task 2 | 5 | 20.1 |
| Epic Task 3 | 6 | 19.3 |
| Epic Task 4 | 3 | 12.2 |
| Total | 18 | 66.8 |
Your Epic will display the following bar on the Epics page:

Viewing Epic tasks in timeline view
You can view Epic tasks using our timeline which allows you to plan your tasks better. Here’s how you can do it:
Step 1
First, click on View tasks on the epic page.
Step 2
Click on the timeline button located on the top right corner of the epic page.

Step 3
Now you should see your tasks in the timeline view.
