18 minutes
Wise Payroll Setup
This guide helps teams process payroll seamlessly using Hubstaff’s Wise integration (formerly TransferWise).
If you are a team member (User) within your organization, and you need help setting up your Wise account to receive payments, please see our guide here.
Each individual Wise Payer account can only be used on one Hubstaff organization.
For more information about how to pay your team, click here.
Setting up Wise for Your Organization
Step 1
Navigate to the sidebar, then click Financials > Manage payroll.

Alternatively, you may navigate to Settings > Integrations, then choose Wise.

Step 2
Click the Connect button on the Wise integration.

Step 3
Make sure you meet the requirements for the setup and that you are logged in with your Wise account, then select Next.
Required steps before setup
Note: If you are a U.S.-based company sending money to recipients in USD, please contact Wise support to unlock that feature. See the details here.
-
- Ensure the Wise account is set up as a business account.
- Enable two-factor authentication for the account.
- Add a balance to your Wise account in your organization’s currency.

Step 4
After logging in, you’ll be asked to choose which account you’d like to connect. Please make sure to select your Wise business account – personal accounts cannot process payments.

Step 5
Click the Give Access button to provide Hubstaff authority to access your Wise account.

Step 6
Select your Wise business account on the Hubstaff integration page, then click Save.

Step 7
Select the Wise account you wish to connect to your payroll. Please note that only business accounts are eligible to make payroll payments.

Step 8
After choosing the Wise account, you can configure which users you’d like to add to your Wise payroll, then click Finish.

Step 9
Finally, navigate to your Wise integration’s Settings page to configure if the receiver or the sender pays the transfer fees.

Enable an Interest-earning Account
US-based users can start earning interest on their USD, EUR, or GBP accounts that they have open with Wise.
- Go to your USD, EUR, or GBP currencies. If you don’t have these currencies already, you can open a new currency
- Under Options, select Start earning interest, and follow the steps to confirm.
Authorizing Your Wise Payments in Hubstaff
Wise now enforces Strong Customer Authentication (SCA), a regulatory requirement that requires account holders to verify and approve payments before sending funds.
We’ve introduced a solution that lets you complete this authorization directly within Hubstaff. It adds only a few quick steps to your current payment workflow and requires completion just once per payment batch.
Here’s how it works:
Before you begin
Only certain roles in your organization can complete the authorization step and receive the verification code, so make sure the right person handles this.
The person who authorizes payments is typically the same individual who set up the Wise connection to Hubstaff for your organization.
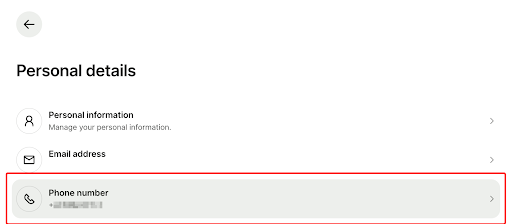
Also, ensure your Wise account includes a valid phone number to receive the verification code. Check this in Settings → Personal details in the Wise app.
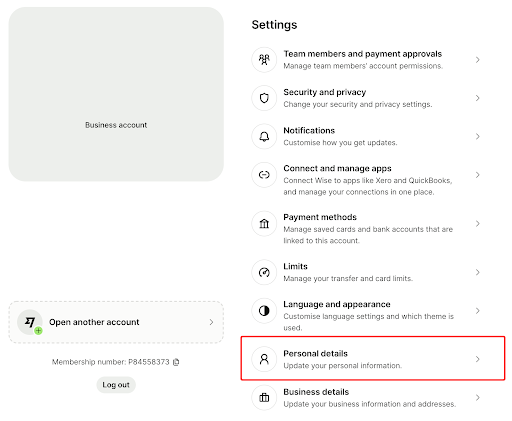
Next, add your Phone number.
Make sure your Wise integration is authenticated
This incident may interrupt the integration and require you to re-authenticate it. Don’t worry—you can complete the process in just one click. See the details here.
Creating a payment
Step 1
Complete this step only if you use the Manual Payments flow. If you use Automatic Payments, skip this step and proceed to Step 2 below.
Step 1.1
Navigate to Financials > Create Payments in your Hubstaff account. Select the team members you want to pay, then click the Create Payment button in the top right corner.

For more details on creating manual payments, please see our support article.
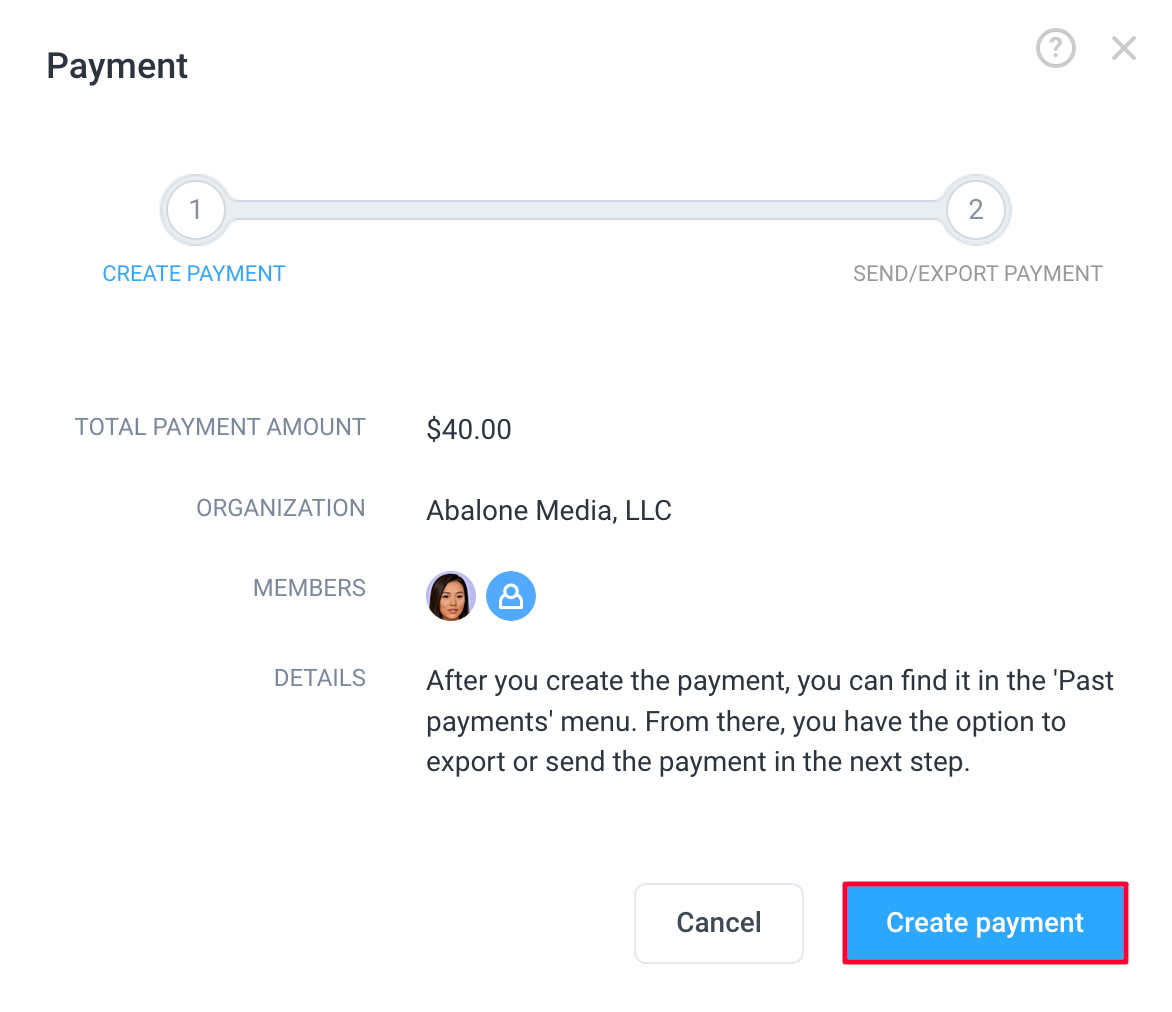
Step 1.2
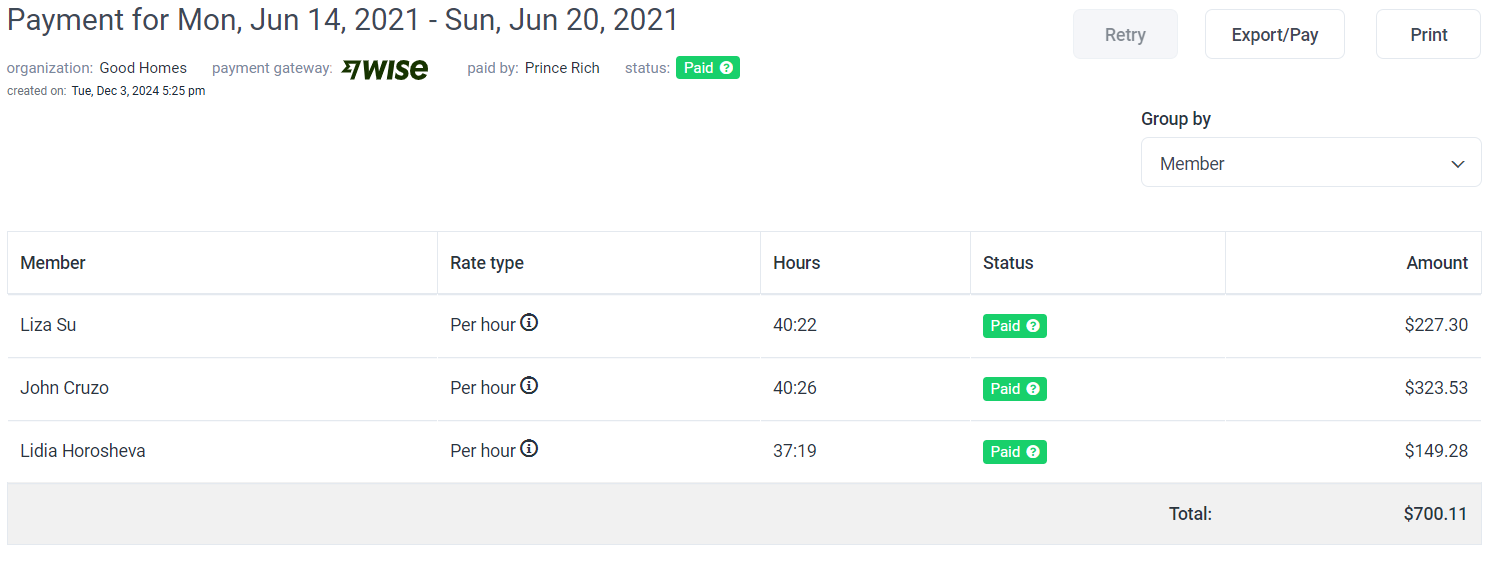
A confirmation dialog will appear showing the total payment amount, your organization name, and the selected members. Review the details and click Create Payment to proceed.
Step 1.3
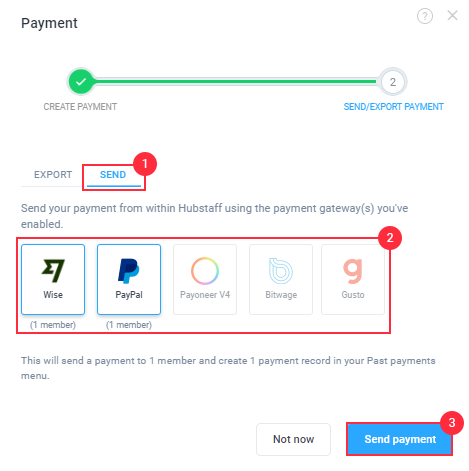
Send the payment via Wise. After you create the payment, Hubstaff will prompt you to send it. Choose Wise as your payment method, then click Send Payment.
Step 2
Authorize the payment – authorization is required for both manual and automatic payments.
Step 2.1.A
Initiate authorization. Within seconds of sending the payment to Wise, Hubstaff updates the status to Awaiting Authorization and displays a yellow banner at the top of the payment page—no refresh needed.
Click Authorize & Fund Payment on the right side of the banner.
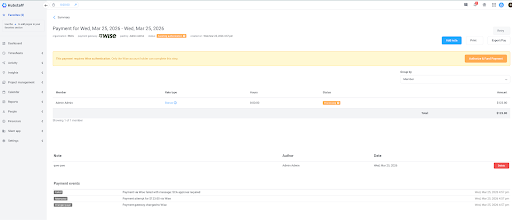
Note: Only the Wise account holder can complete this step. If needed, share the payment link with the authorized person on your team.
Step 2.1.B
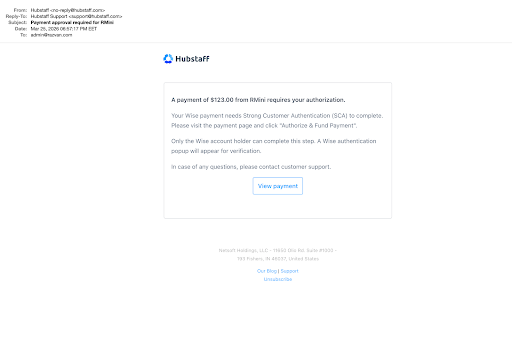
Email notification – At the same time, Hubstaff owners receive an email with the subject line “Payment approval required.” The email includes a View Payment link that opens the payment page directly if you are not already there.
Step 2.2
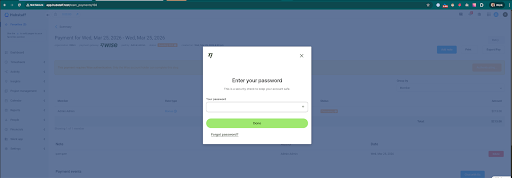
Enter Your Wise Password – A Wise pop-up will appear asking you to enter your Wise account password. Enter it and click Done.
Step 2.3
Enter Your Verification Code — After your password is accepted, Wise may prompt you to choose a verification method; select SMS or a voice call — whichever you prefer. Wise will send a 6-digit verification code to the phone number associated with your Wise account. Enter the code in the dialog and click Done.
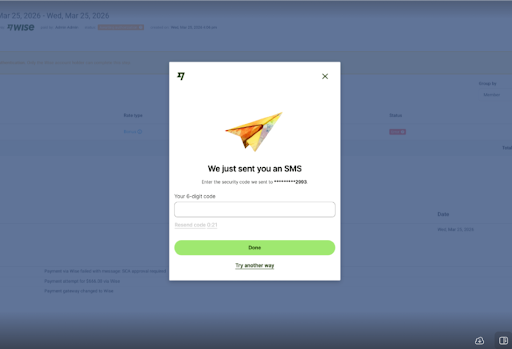
Once the code is accepted, your payment will be authorized and processed. No further action is needed.
Accepts: Bank transfers for deposits into the Wise balance. Business accounts are required to make transfers.
Transfer fees vary per country and currency. Typically, less than 1% of the total transfer amount. Please contact Wise support to learn more.
You will need to have at least one business account on your Wise to set up this payment account.
For instructions on adding a member to payroll, please visit our guide here.
Certain currencies might not support email transfers.
Users can’t make transfers to an email address or a primary account when sending from BRL, or if you are sending to PEN, BDT, COP, CNY, INR, UAH, or USD to a bank account outside the US.
Some business transfers are restricted by Wise. Click here to learn more.
The Wise API only supports email transfers. Bank transfers are not supported.
Companies based in the EU and the UK are required to complete an authorization step before each payment is sent. This is known as SCA (Strong Customer Authentication) and is a European regulatory requirement under PSD2 designed to reduce online payment fraud.