5 minutes
Adding members to the payroll
We recommend that you ask all team members using either Wise or PayPal to set up their personal default payment accounts before you proceed with the instructions below so that the user fields (name, email, currency) can auto-populate. For Bitwage and Payoneer, you will need to add them to payroll first before they can add their user details.
Step 1
Navigate to > Financials > Manage payroll, then click on the Add member to payroll button on the upper right side.


Step 2
Adding a single-user
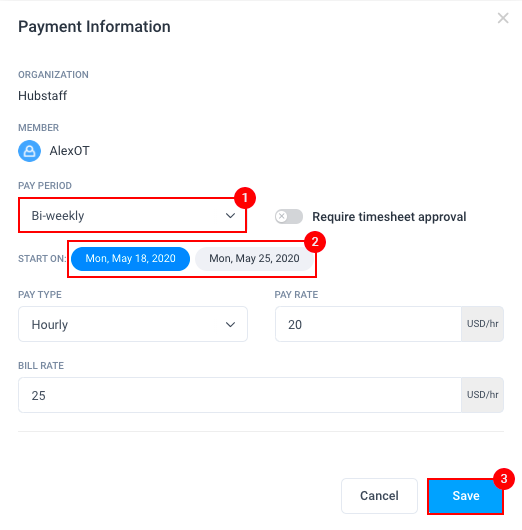
Enter the following information:

- Hubstaff Member – Your team member to be added to payroll
- Pay Period (Weekly, Bi-Weekly, Twice a month, Monthly)
- Require timesheet approval – works with the Timesheet Approval feature
- Pay Type – can be set to Hourly, or Fixed payments
- Pay Rate – the rate you’ll pay your employee
- Bill Rate – the rate you can bill your client
- User’s e-mail address on the payment gateway
- User’s name on the payment gateway
- Currency
- Hit Save to complete the setup.
After saving, your employee’s payroll account should be set up:

Sending invites to multiple users
To send invites, click on the Send Invites tab, choose the users you wish to add then, hit Send. If the team member already has their default payment method set up, you should see them added to the payroll (with a “disabled” status).