9 minutes
Connect your Wise account to Hubstaff as a team member
Connect a Wise payout method to Hubstaff to receive your payments without manual acceptance steps. This applies to any team member invited to payroll by an organization that uses the Wise integration.
Before you begin
- Your organization owner must add you to payroll and invite you to connect a Wise payout method. You’ll receive an email from Hubstaff prompting you to enter your credentials. If you haven’t received an invitation, contact your organization owner and ask them to invite you from Financials > Manage Payroll > Member level settings > Manage integrations.
- Have your Wise account information ready, including your Wise tag, or your local bank account details if you’d rather switch to direct bank payout.
- A Wise tag is a unique identifier associated with your personal Wise account. Wise provides a guide on how to find your Wise tag and how it can be used. To find your Wise tag on wise.com, click on your avatar/user in the top right; your tag will begin with an @.
How to connect your Wise payout method
Connecting your Wise account
Step 1
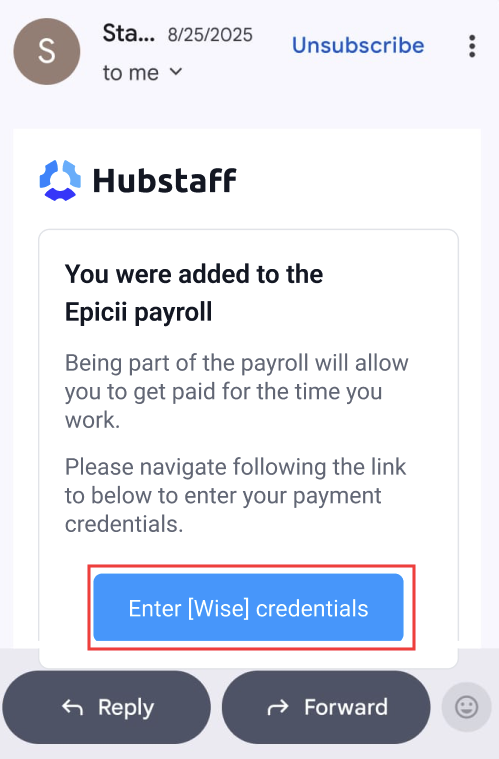
You will receive an email confirming that you were added to the payroll. Click on the Enter Wise credentials button.
Optional
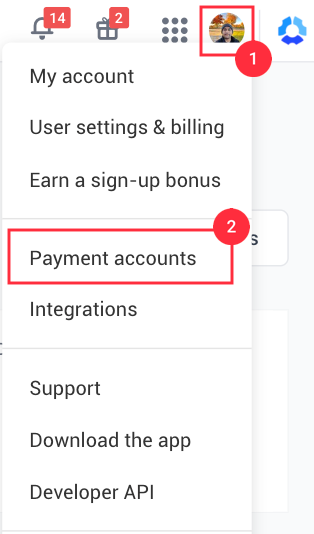
Once you’re invited to payroll, click your avatar in the upper-right corner, then click Payment Accounts.
Step 2
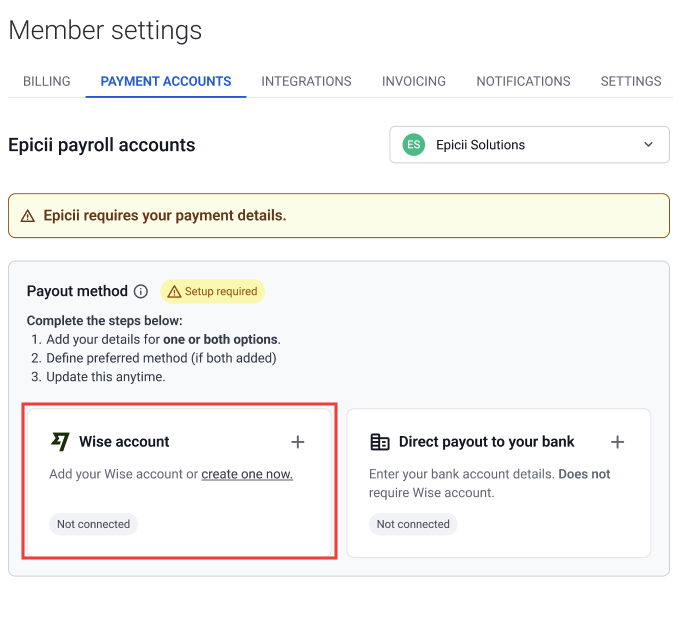
Find the Wise account card and click the + on it to open the form.
Step 3
Follow the prompts to enter your Wise account details and hit Save.

Optional
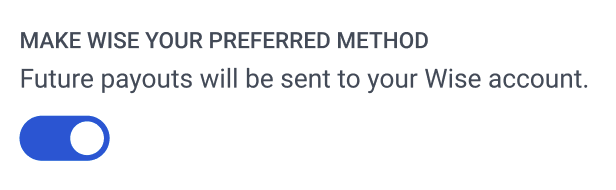
You can make this your preferred payout method by enabling the toggle.
Step 4
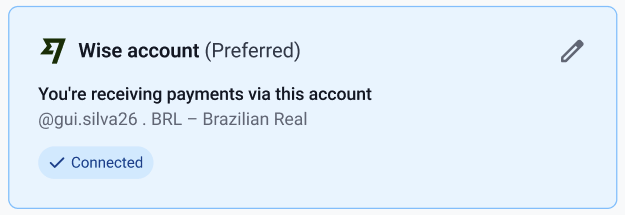
You will see your Wise account connected on the Payment accounts page.
Connecting your bank account details
Step 1
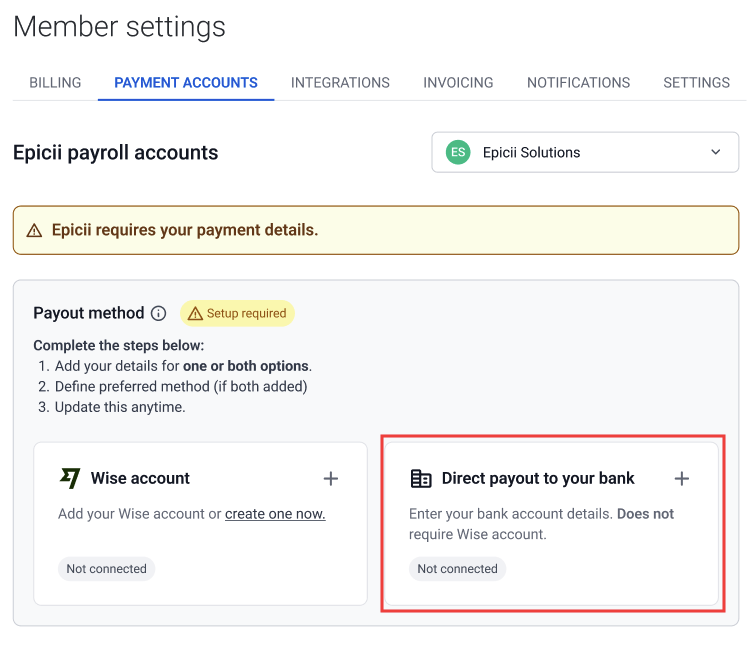
Find the card for the Direct payout to your bank and click the + on the card to open the form.
Step 2
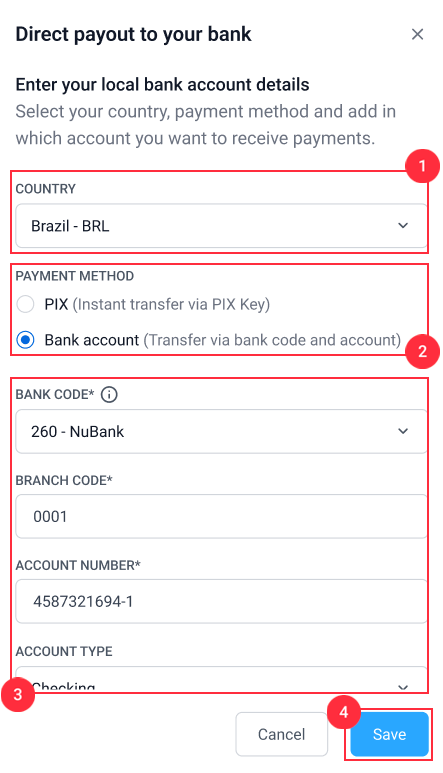
In the Direct payout to your bank dialog, enter your bank account information such as:
- Country
- Payment method: Available options vary by country — for example, Brazil offers PIX (instant transfer via PIX key) or a standard bank account transfer.
- Bank details: For a standard bank account, this includes Bank code, Branch code, Account number, and Account type.
- Click Save.
Optional
You can make this your preferred payout method by enabling the toggle.
Step 4
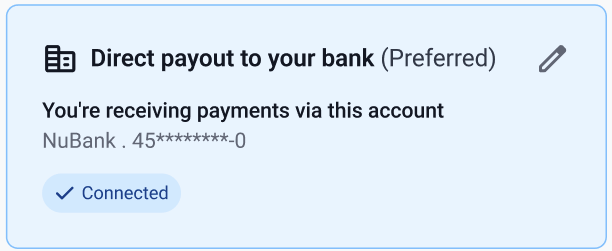
You will see your Wise account connected on the Payment accounts page.
Primary and backup payout methods
- Primary payout method — the method your organization uses to send your payments.
- Backup payout method — a second method selected by your organization that you can switch to later if needed.
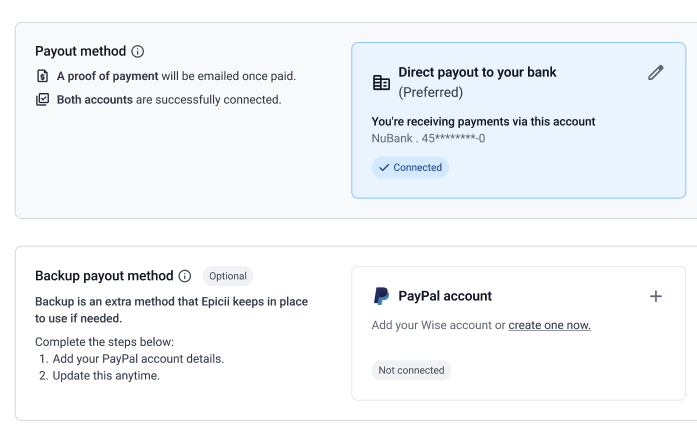
If you set up more than one primary-eligible method, choose your preferred one; that’s the account that actually receives funds. This is only applicable for the primary payout method.
Making changes to your account
- You can edit your saved payout details at any time from the Payment accounts page. Just click on the pencil icon next to either of the payout options, make the necessary edits, and hit Save.
- You can delete previously entered payment account information from this same page.