16 minutes
Managing Clients in Hubstaff
Adding clients allows you to bill your customers for hours worked within your Hubstaff organization. The clients you create will be connected directly with the invoicing feature. Please click here to read how to invoice clients.
The Clients feature caters to two primary functions:
- For organizational purposes, to categorize which projects belong to which Clients
- To invoice time tracked towards Clients, in conjunction with our invoicing feature. For more information about how to invoice your clients, please see our helpful guide here.
As shown below, the Clients section displays a list of your clients containing their budget details.

How to add a new client
Step 1
First, navigate to the Client section by clicking on Project management > Clients from the side menu bar.

Step 2
To add a client, press the Add client button.

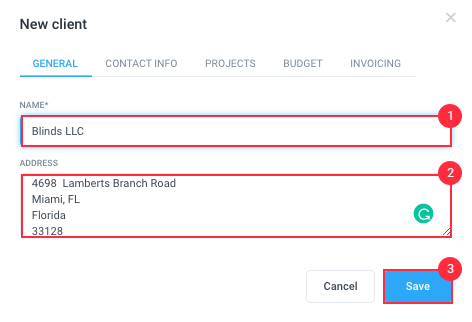
Step 3
A pop-up window will appear where you can enter the details of your new client. Under the General tab, enter the name and address of the client that will appear within Hubstaff and in outgoing invoices. At any point during the setup, you can hit Save and return to the Clients page to add more details.
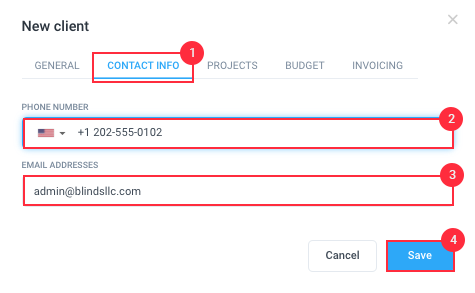
Step 4
Click the Contact Info tab, then fill in your client’s phone number and email address. Client invoices will be sent to the client’s registered email. Hit Save, or continue to the next tab.
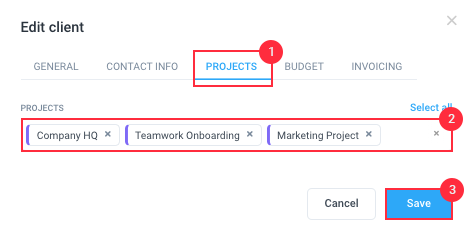
Step 5
Navigate the Projects tab, then select the associated and billable projects to this client. Hit Save, or continue to the next tab.
Step 6
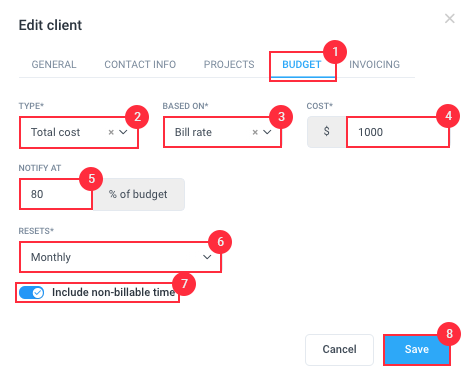
Navigate the Budget tab, then define the following:
- Type – can be total cost or total hours logged to the project.
- Based on – a choice between pay rate and bill rate.
- Cost/Hours – based on your selection for the Type, this can be the total cost or total hours logged to the project.
- Notify at – set a percentage of the budget where you’ll be notified via email.
- Resets – can be never (choose start date) or monthly.
- Include non-billable time – enable to include non-billable time.
Hit Save, or continue to the next tab.
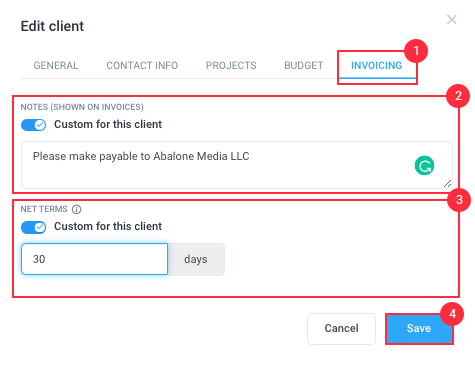
Step 7
On the Invoicing tab, keep the Notes and Net Terms options disabled to pick up the automatic settings here, or enable them to add your custom notes and terms.
OPTIONAL
To set up recurring invoices, on the INVOICING tab, click Custom under the Auto invoicing section to enable recurring invoices, then fill in the following information:

- Amount based on – bill clients based on the hourly bill rates, or a fixed price every automatic interval.
- Frequency – select the intervals the invoice will be sent. Invoices can be sent monthly, weekly, and bi-weekly.
- Delay sending – add a specific delay to your automatic invoices.
- Send a reminder to pay after due – this sends an email reminder to clients when an invoice has not been settled after a specific number of days.
- Line items – define the line item format.
- Include non-billable time – this includes all non-billable times logged to projects associated with a client.
Importing clients
Now you can import your clients to Hubstaff via .CSV, .XLS, or .XLSX, making it easier to bulk upload your project list into your Hubstaff organization. To do this, follow these steps:
Step 1
Firstly, navigate to Project management > Clients.
Step 2
On the Clients page, click on the Import clients button.
![]()
Step 3
On the dialog box, click on Download the template here to see the specific format before uploading your CSV file.

Step 4
Open the CSV file. The file will include these rows and columns:
- Project name
- Billable – Yes or No
- Record activity? – Yes or No
| Name | Billable? (Yes/No) | Record activity? (Yes/No) |
|---|---|---|
| EXAMPLE NAME 1 – REMOVE OR CHANGE | Yes | Yes |
| EXAMPLE NAME 2 – REMOVE OR CHANGE | Yes | No |
| EXAMPLE NAME 3 – REMOVE OR CHANGE | No | No |
Replace the data with your projects and settings, then save the CSV file.
Step 5
Go back to the Import projects dialog, click Browse files, or drag the CSV you just saved to the dialog box.

Step 6
After successfully uploading the CSV file, click Import.

Step 7
Finally, you’ll receive a notification that the file is being processed, and you will get an email when ready.

This process usually takes a minute, but may increase depending on the number of projects you’re attempting to import. Below is a sample email upon completion of the import.

Searching clients
To look for clients, type your keyword on the client search bar at the top of the page.

Edit an existing client
Step 1
First, navigate to the client section by clicking on Project management > Clients from the menu bar.
Click on Actions and then Edit.

Step 2
To edit a client click on Edit client.
This will allow you to edit factors such as the name, email address, address, and the selected projects of your client.

Archiving clients
Step 1
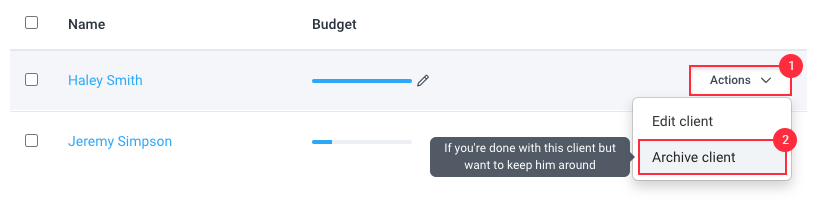
To archive, navigate to the client section by clicking on Project management > Clients from the menu bar.
Click on Actions and then Archive.
Click OK to archive the client.

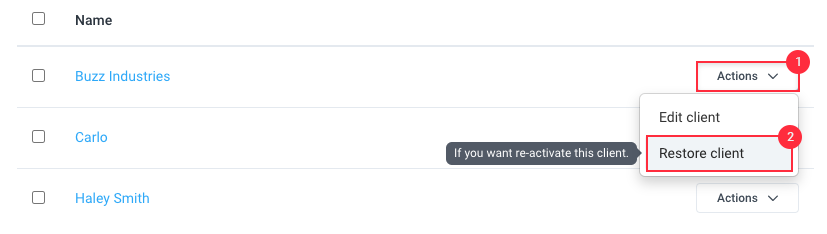
How to restore a client
Step 1
You can restore a client by going to the Client page and clicking the ARCHIVED tab.

Then select Actions and Restore client.