9 minutes
Viewing/Managing organization payroll payment integrations
All payroll and payment account management is now handled from the Manage Payroll page. To access it, go to Financials > Manage Payroll. From here, you can manage the payroll payment integrations used to pay your team.
This article explains how organization owners and organization managers with the Manage financials permission can view, configure, and manage payroll payment integrations for their organization.
Viewing member payout methods
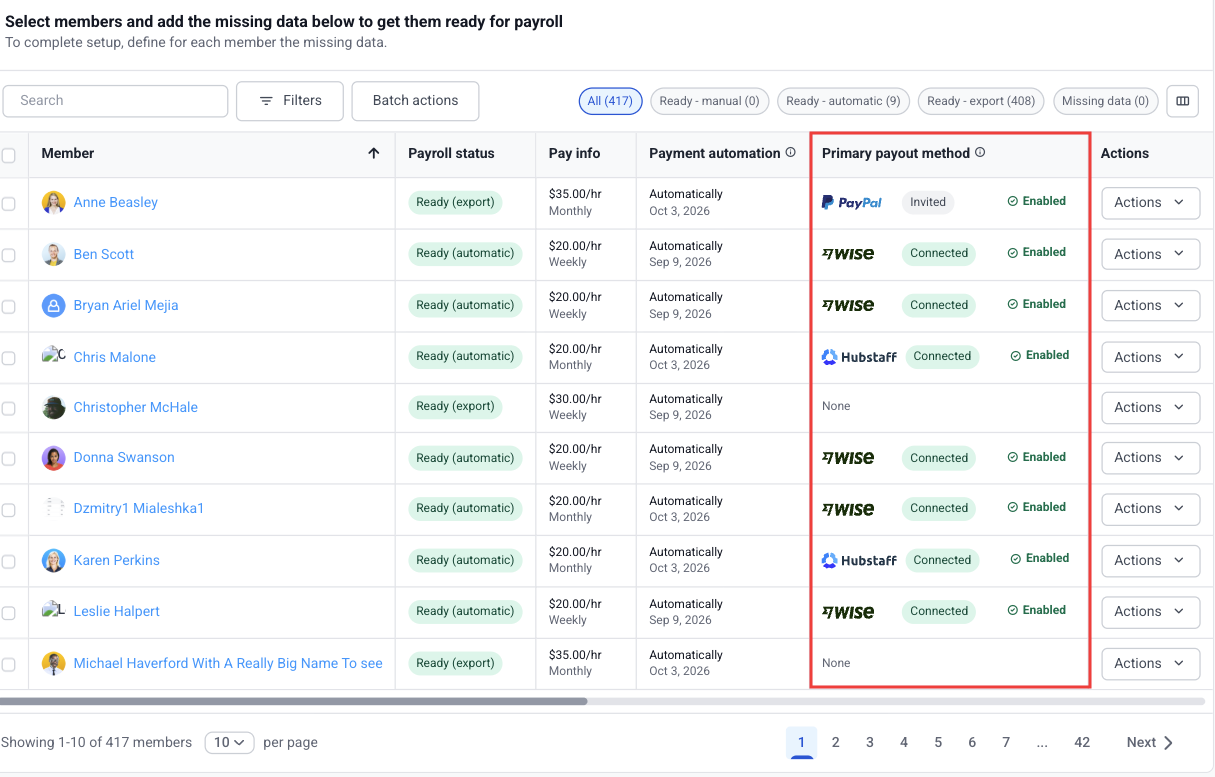
From the Manage payroll page, in the Member settings section, the integrations columns show each member’s payment setup status:
| Column | Meaning |
| Primary payout method | This integration will be used for the member’s next payment. It will show as connected or invited. |
| Backup payout method | A secondary payout method that a member can switch to as the primary. |
| Payment automation | Shows if the payroll is set to run automatically. |
Setting a primary payout method for a member
Each member can have only one primary payout method active at a time. This is the payment account Hubstaff will use when payroll runs.
To set a primary payout method for a member:
Step 1
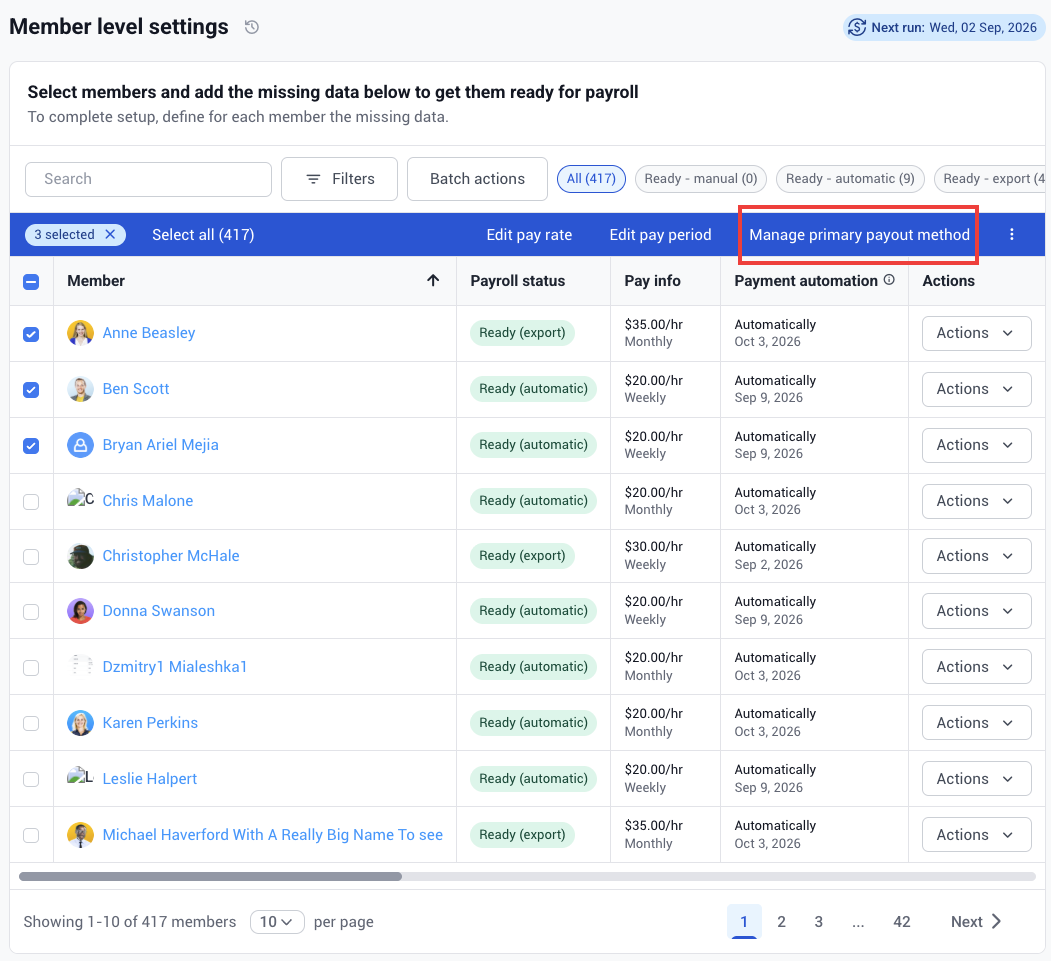
Find the member(s) in the members table and click on the checkbox next to their name(s). On the actions banner that appears, click on Manage primary payout method.
Step 2
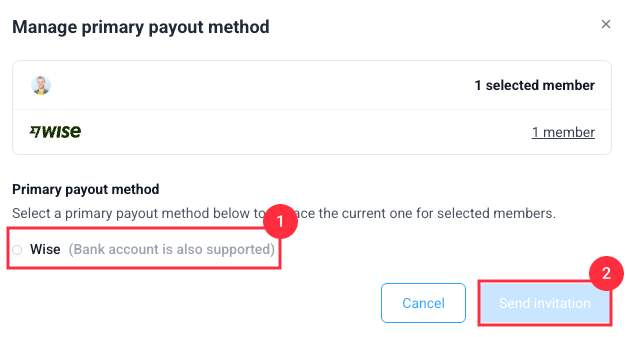
Select which payment provider will be used as the primary payout method for the selected members and click Send invitation.
Enable or disable payroll for team members
Step 1
From the left-hand side menu, go to Financials > Manage Payroll.
Step 2
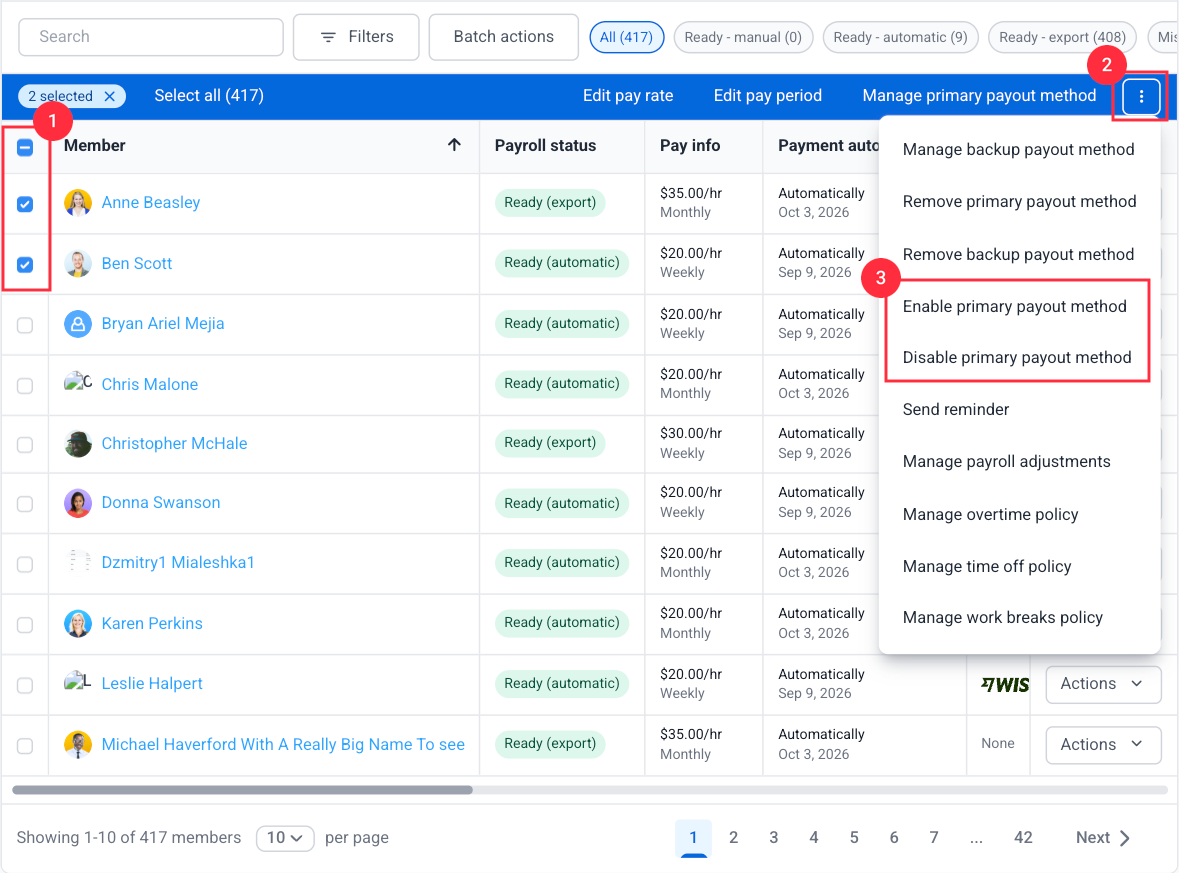
From the Member level settings, select the member(s) you want to enable/disable payroll for. On the actions banner that appears, click on the three-dot icon. Then, click on either Enable or Disable primary payout method.
Step 3
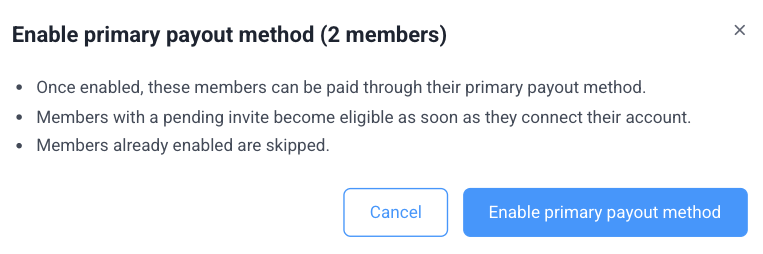
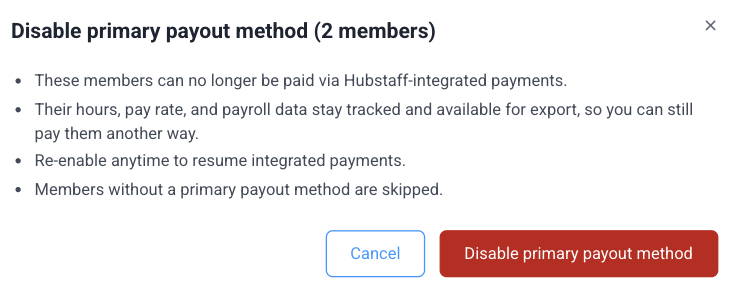
In the dialog, confirm the action. Click the button to either enable or disable the primary payout method.
Enable
Disable
Manage payroll integration settings
Step 1
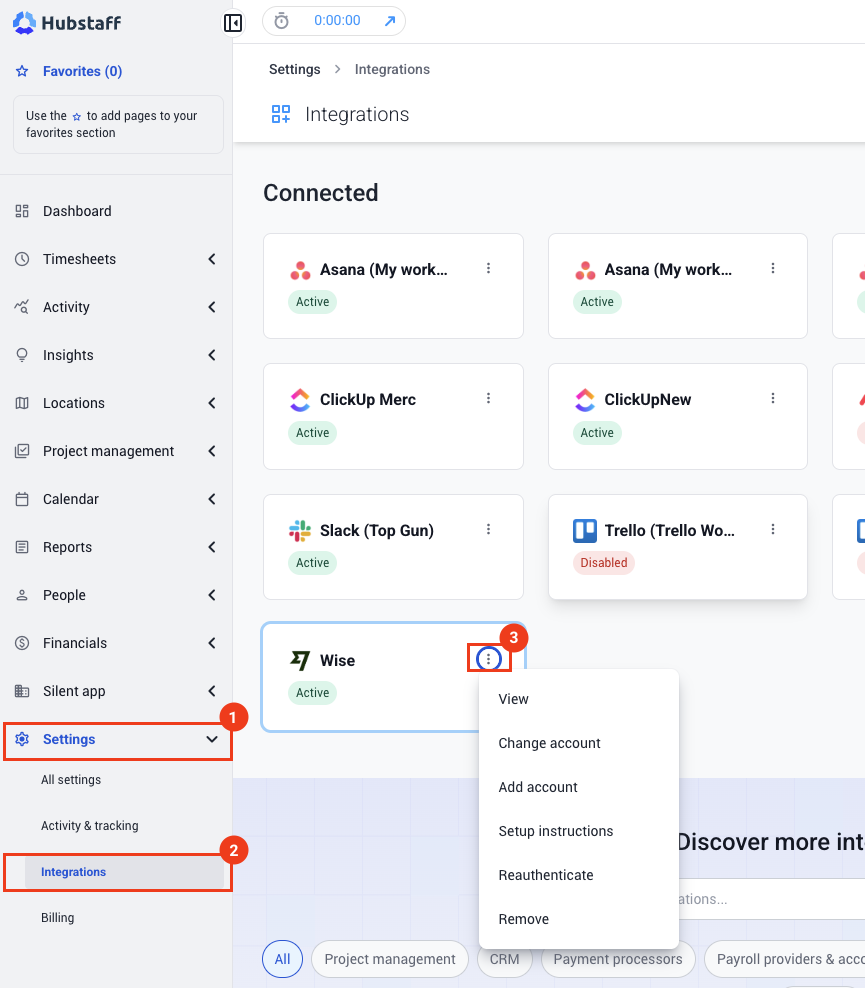
Go to Settings > Integrations. Then, look for your connected payment integration and click on the three-dot icon.
Step 2
After clicking the three-dot icon, a menu window will open up.
The following options will be available to edit your existing payment integration:
-
- View – if you want to view your payroll members and settings
- Change account – if you need to change the current company/ payment account on your payment integration account to another one.
- Add account – if you would like to add a new company/payment account to your payment integration account
- Setup Instructions – for setting up the integration
- Reauthenticate – reauthenticate your payment integration account
- Remove – remove your payment integration
OPTIONAL
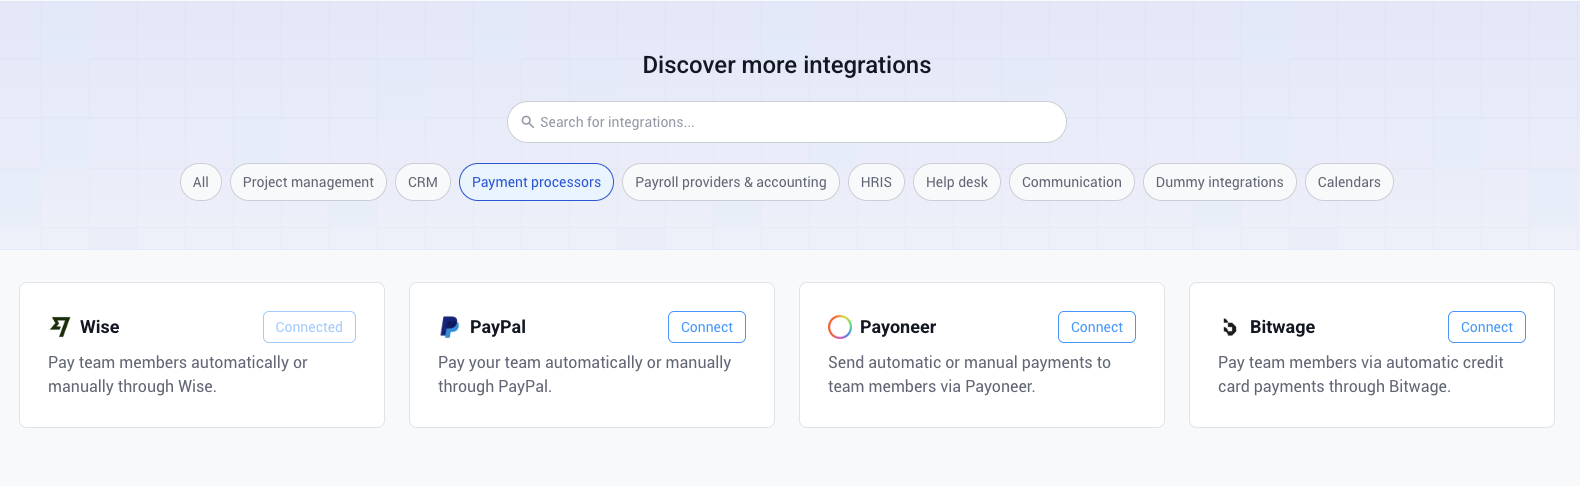
You can also set up a payment integration for the first time from Settings > Integrations.
Scroll down to discover more integrations. Click on the Payment processors tab, click Connect next to your preferred payment provider, and follow the prompts to complete the setup.
- If you do not see Change account or Add account under your payment integration after clicking the three-dot icon, this means that it does not support multiple payment accounts.
- For frequently asked questions regarding how to manage payroll accounts, please refer to our automatic payroll FAQs here.
- For an in-depth article comparing different payment options, click here.