18 minutes
To-dos in Hubstaff
To-dos are tasks that can be assigned to team members to track time on a specific part of an overall project in Hubstaff. Time tracked to to-dos can be viewed in reports or included in invoices to know how much time was spent on each to-do.
Once a project is linked with an integration, the simple to-dos are automatically removed. They are still available on reports if any time was tracked on them, but they will no longer show up in the Hubstaff application. If a project is unlinked from an integration, then the simple to-dos are restored automatically and are once again available for use.
Looking for a project management software app? Check out Hubstaff Tasks. Tasks is Hubstaff’s kanban-style agile project management tool that makes managing tasks and projects easier.
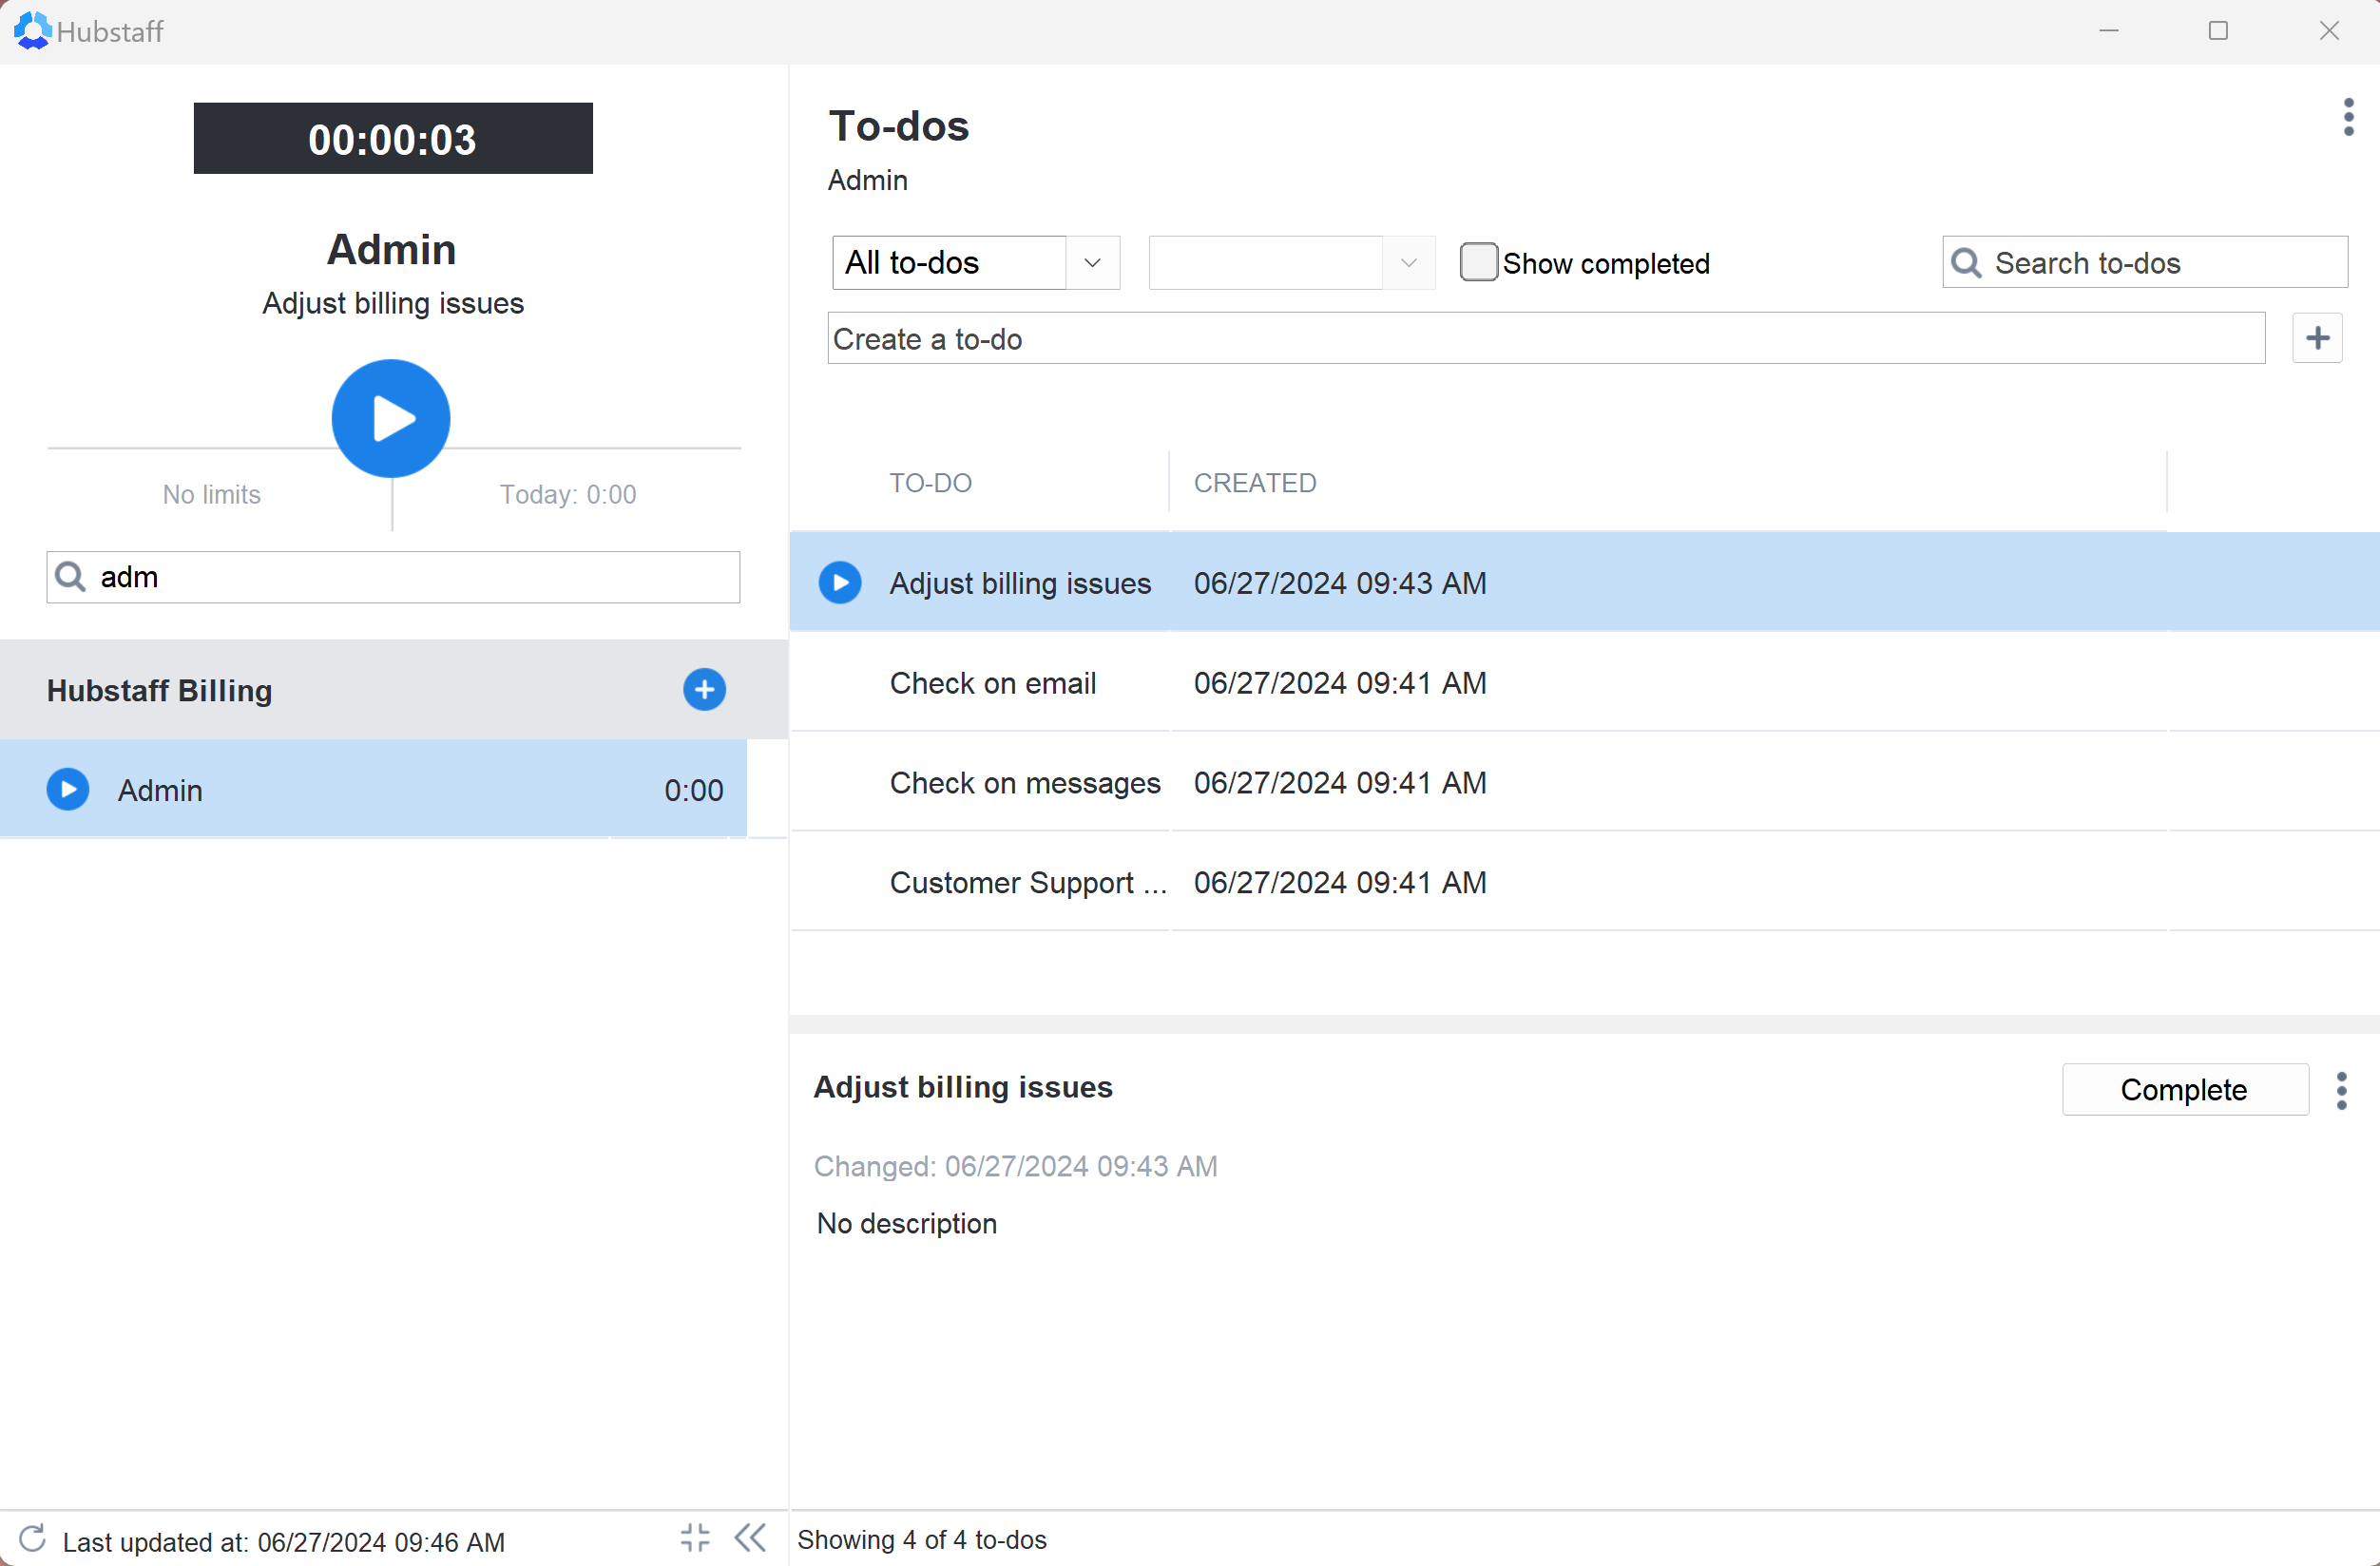
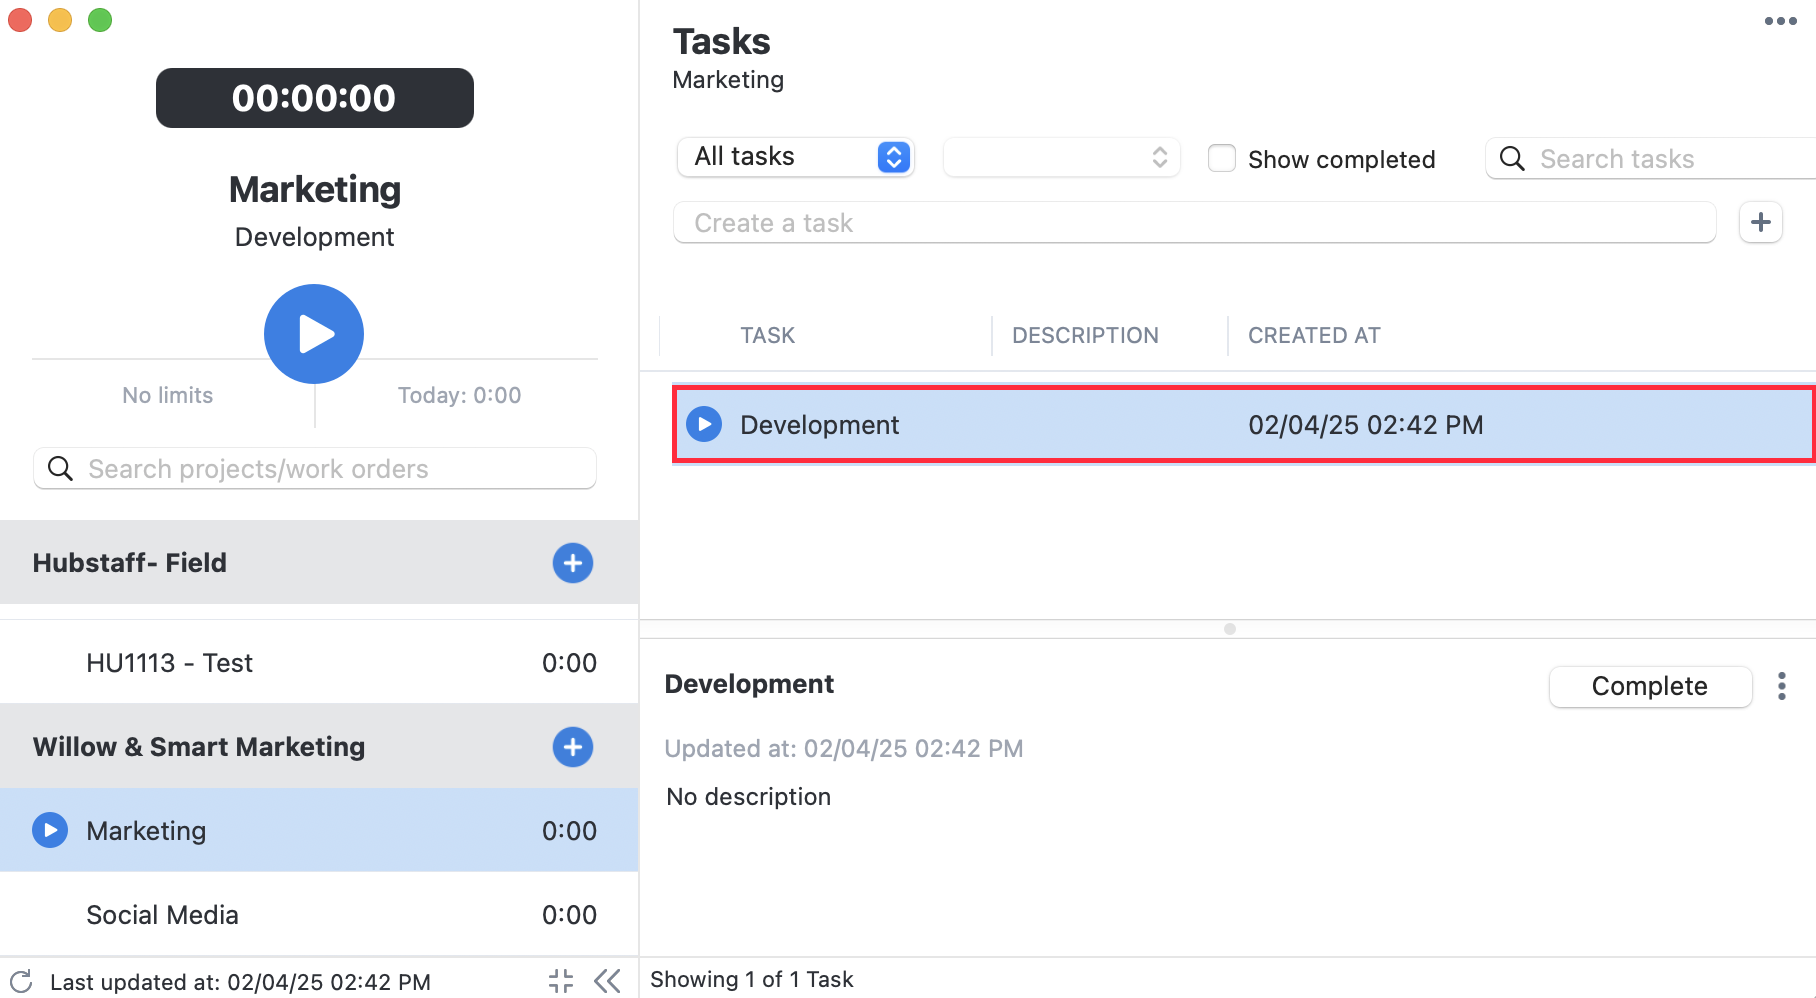
A to-do assigned to a team member on the Hubstaff time tracker.
Simple to-dos
Our built-in to-dos feature allows you to create, edit, or delete a task from the to-dos page and from the desktop app without having to integrate with one of our third-party project management tools.
Adding a to-do through the web
Follow these steps to add a to-do from the web dashboard:
Step 1
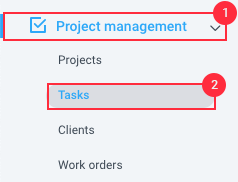
Navigate to Project management > Tasks on the left sidebar.
Step 2
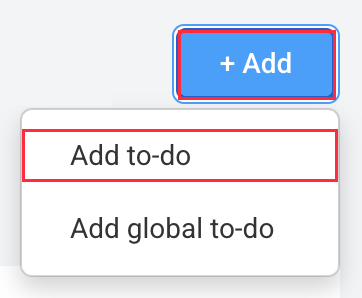
Select the project name from the Project drop-down, then click on Add a to-do.
Step 3
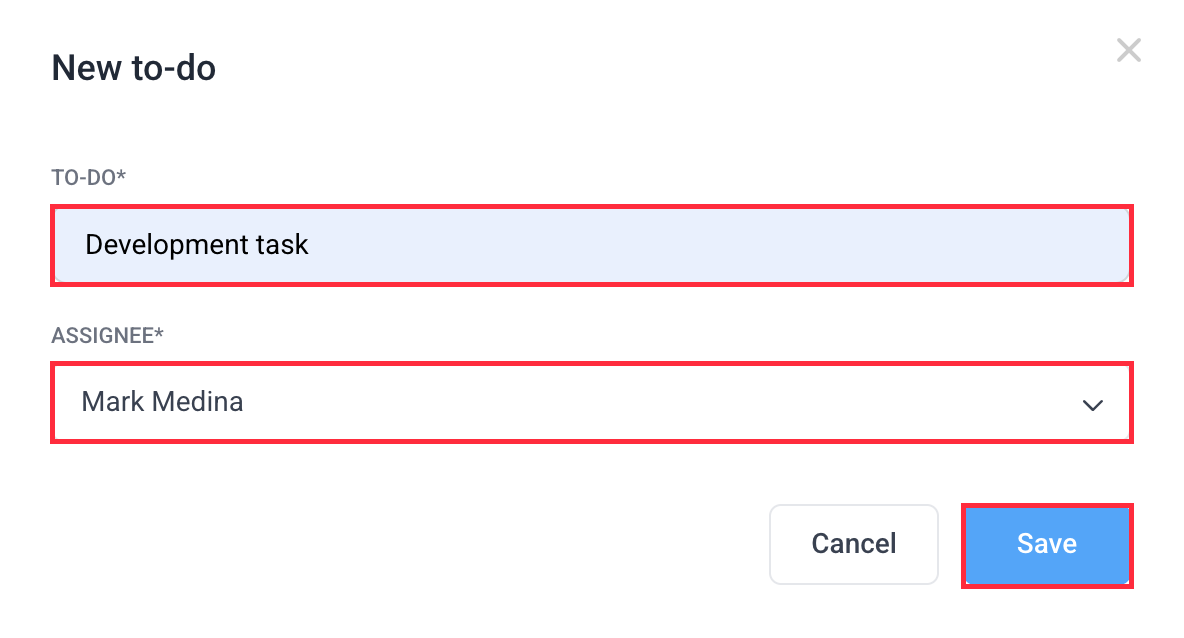
Enter the to-do name, then assign it to a team member, then hit Save.
Step 4
You’ll see the to-do assigned to your team members on the list of to-dos for that project.

Your team member will also see the to-do assigned to them on the timer.
Editing a to-do through the web
Step 1
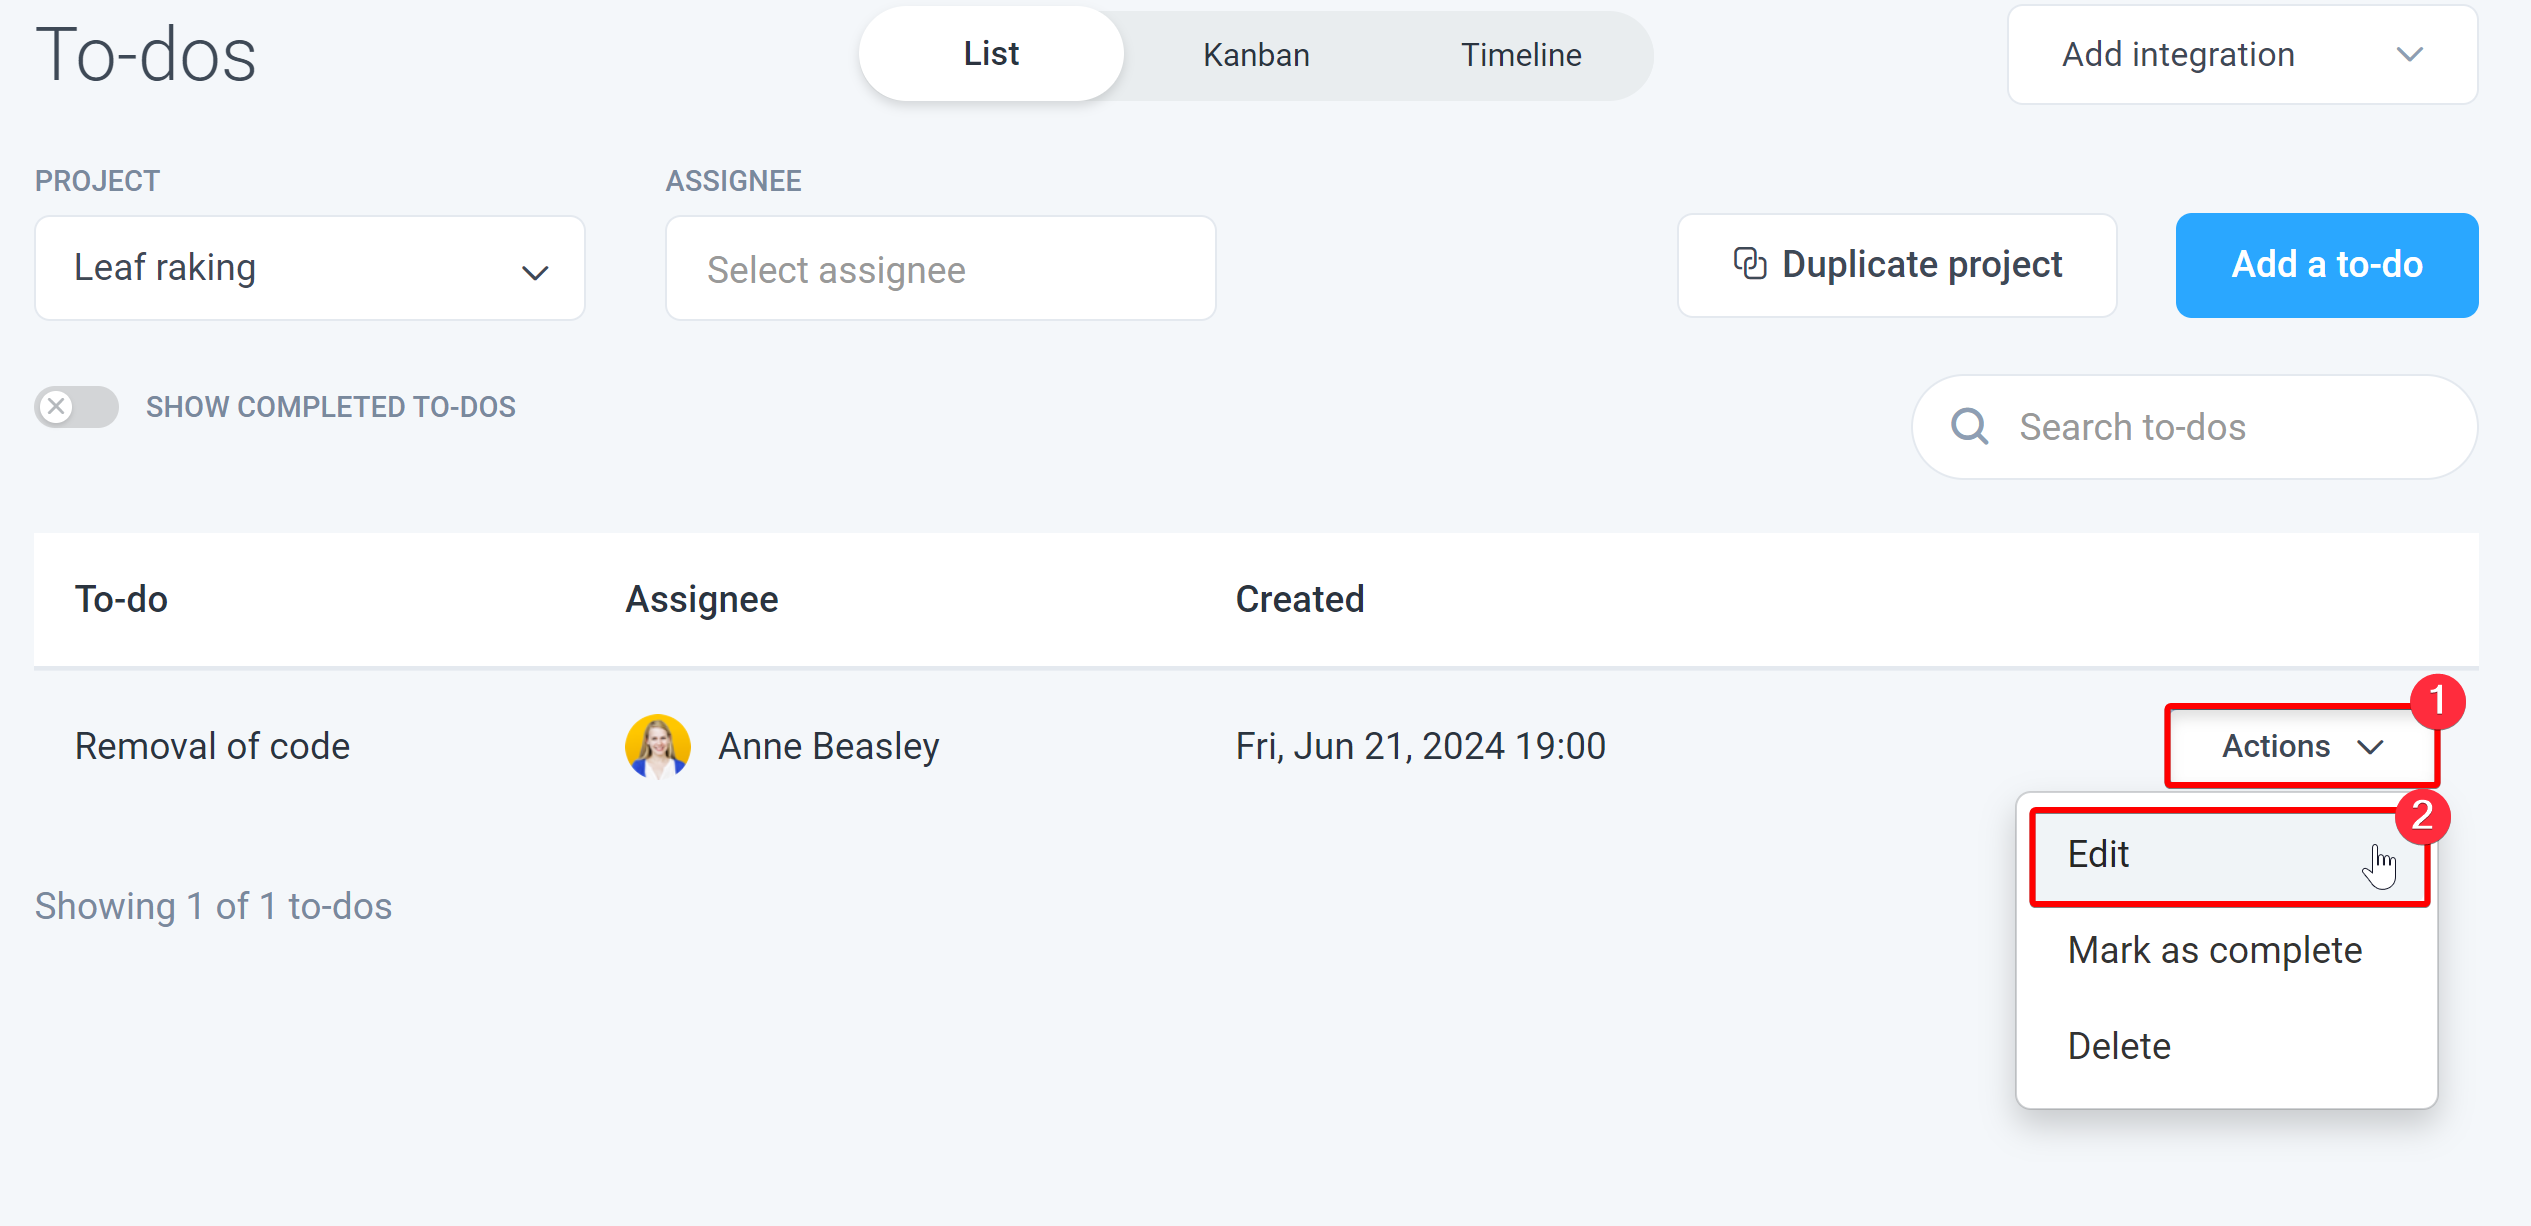
On the Actions drop-down menu next to the to-do, select Edit.
Step 2
Edit the information for your to-do and click Save.

Deleting a to-do from the web
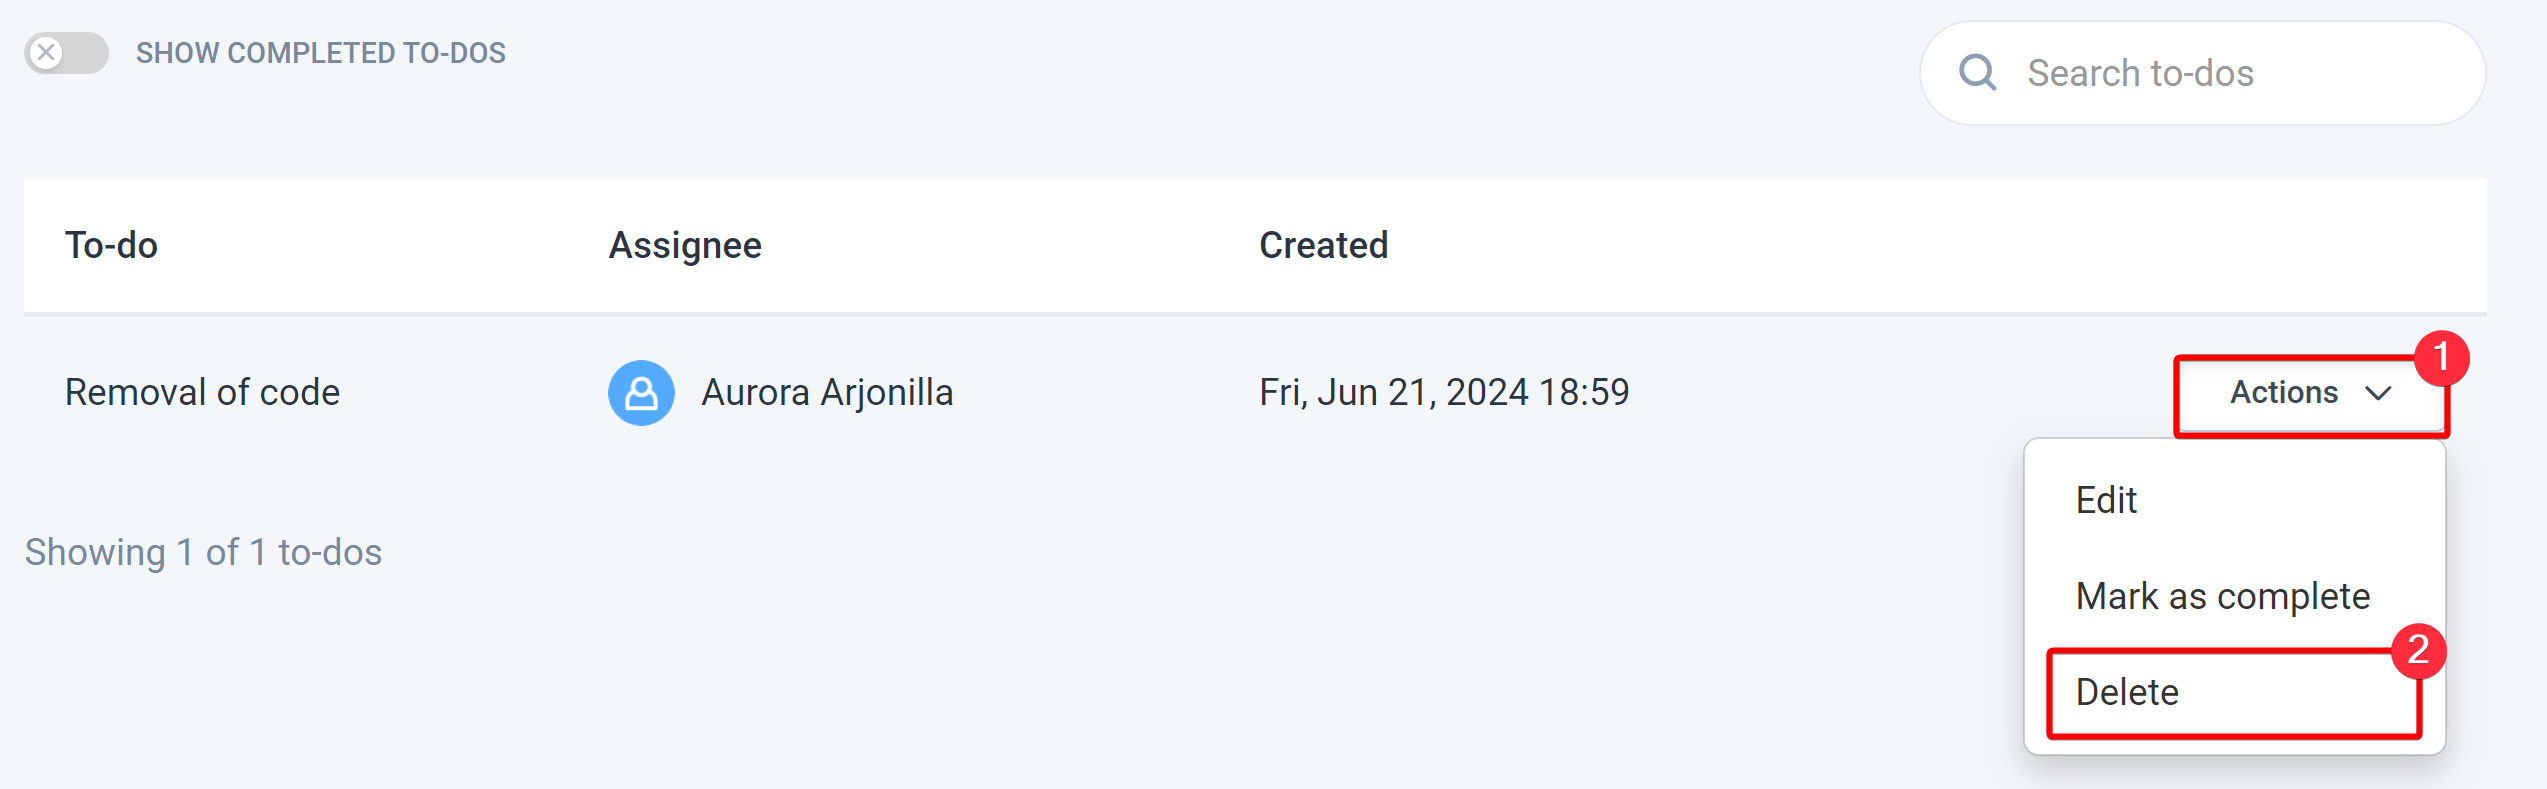
On the Actions drop-down menu next to the to-do, select Delete.
Adding a to-do through the desktop application
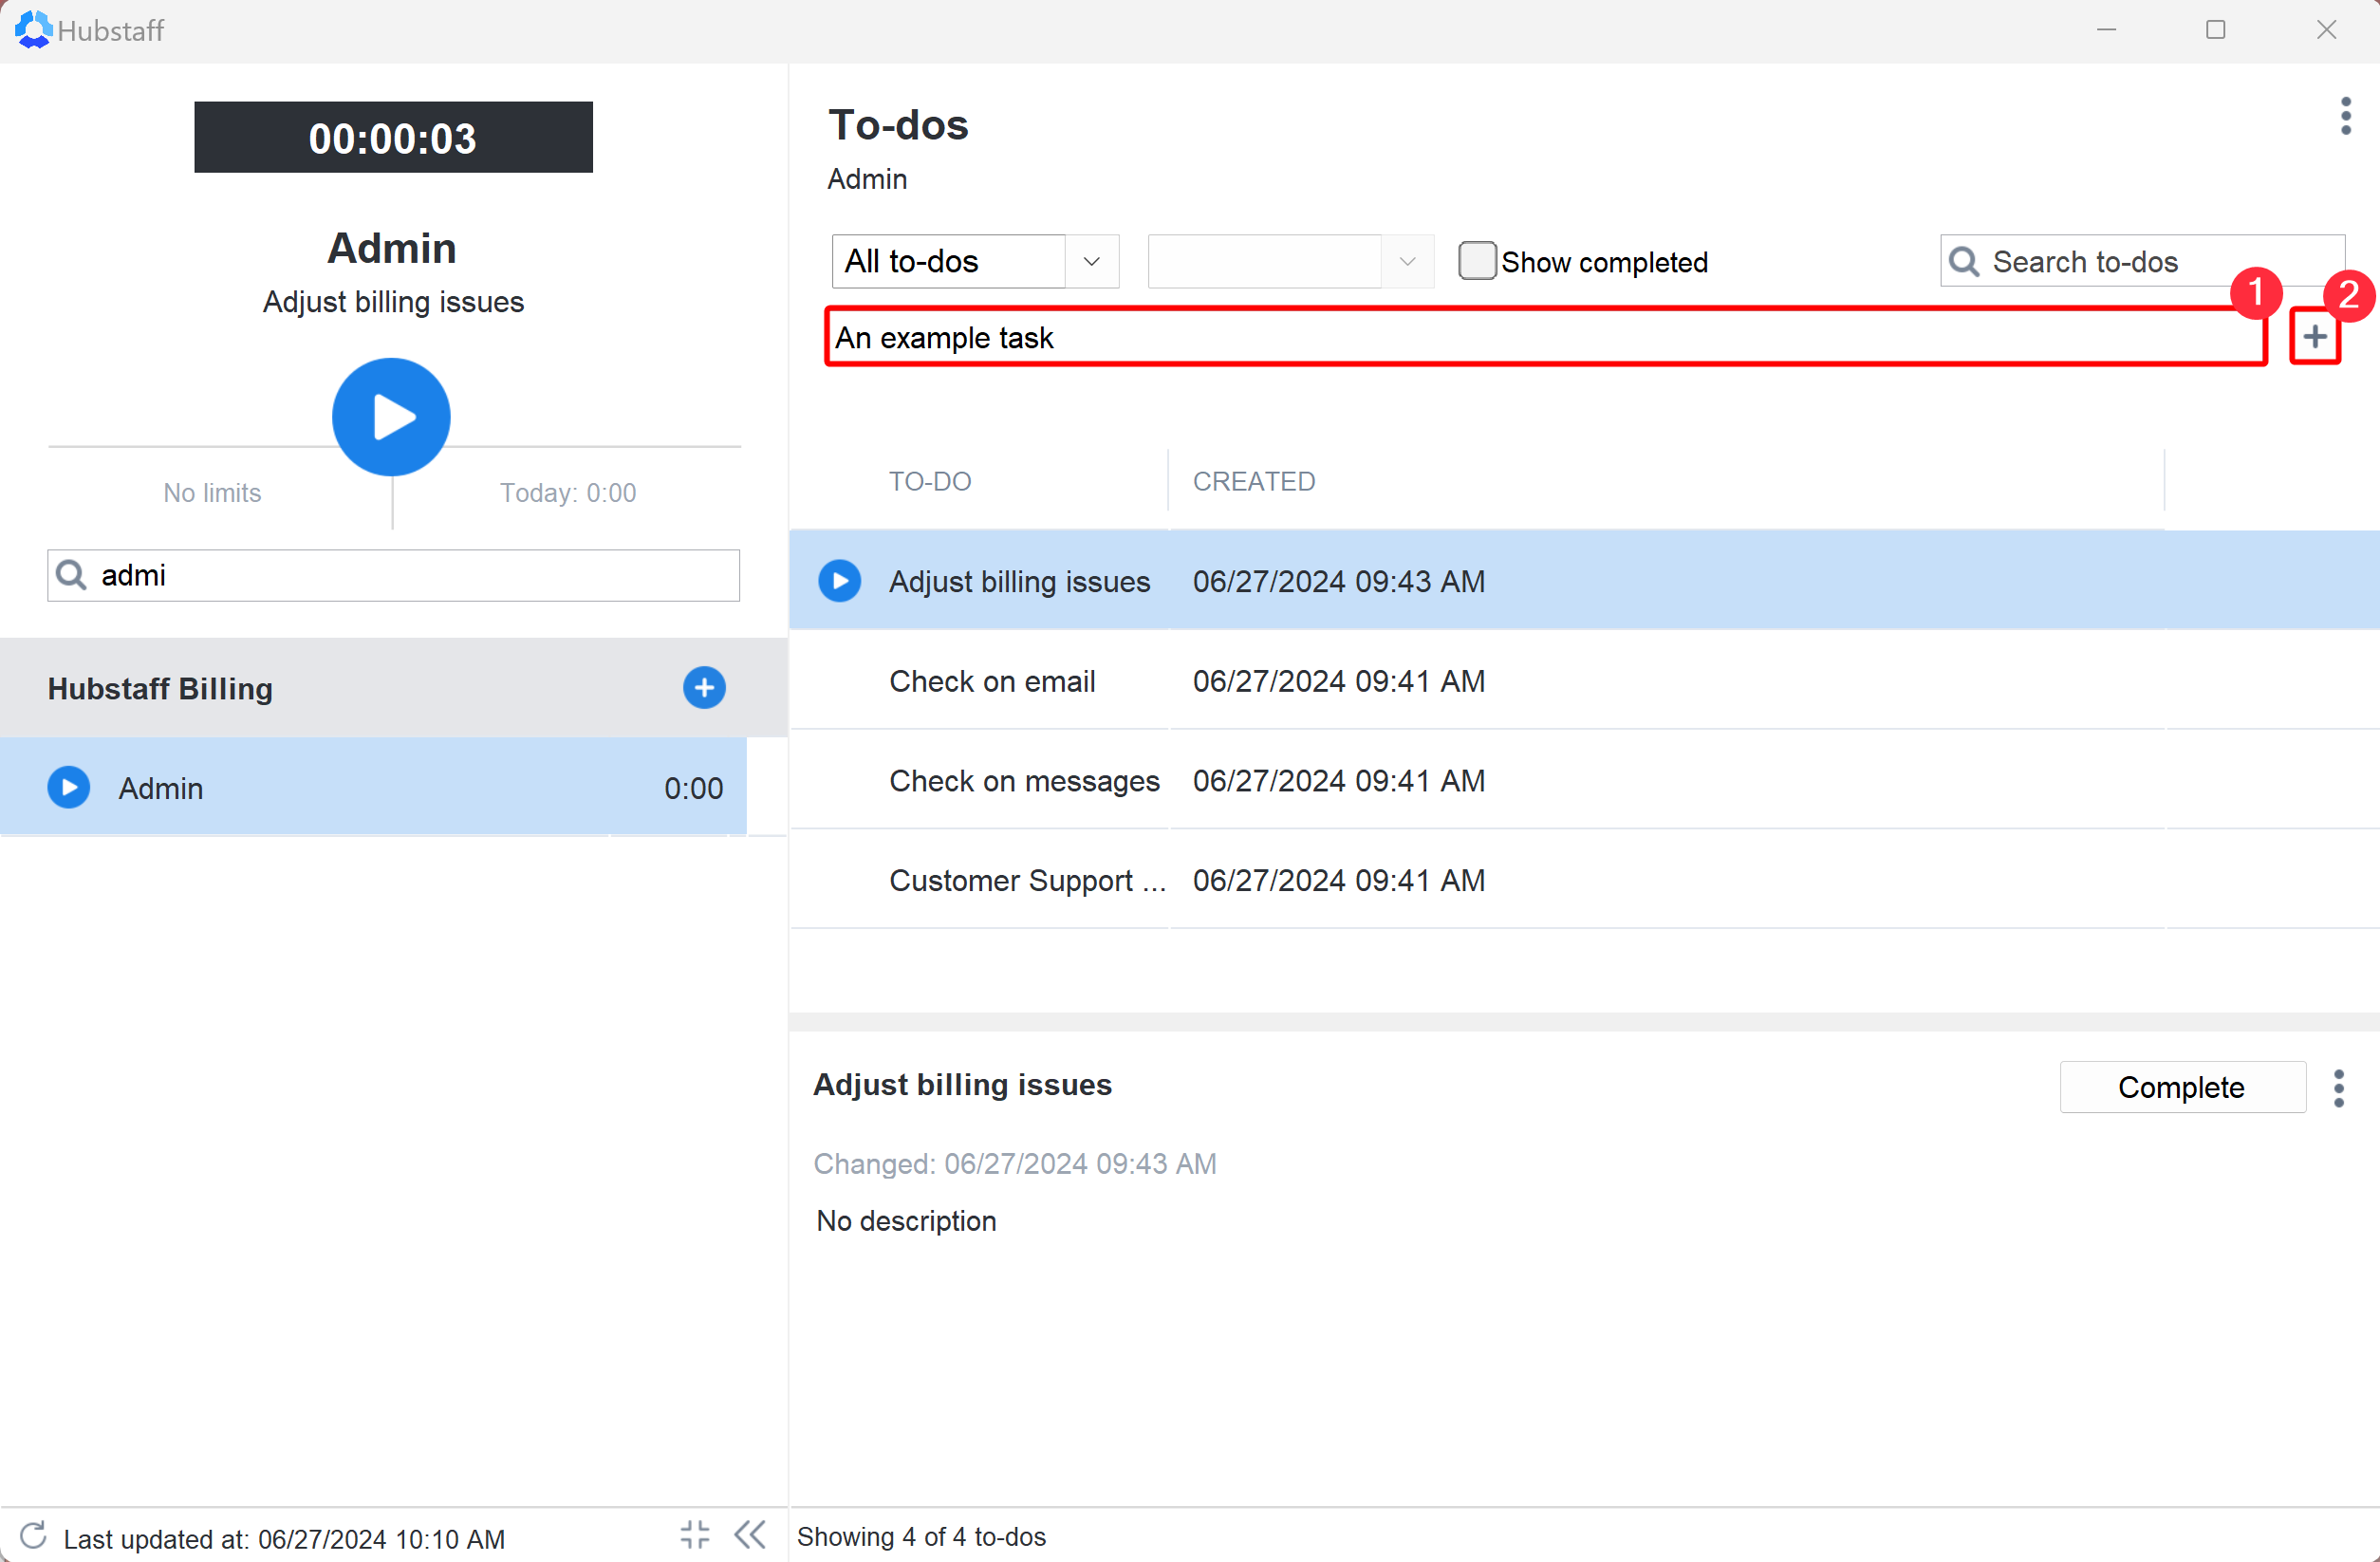
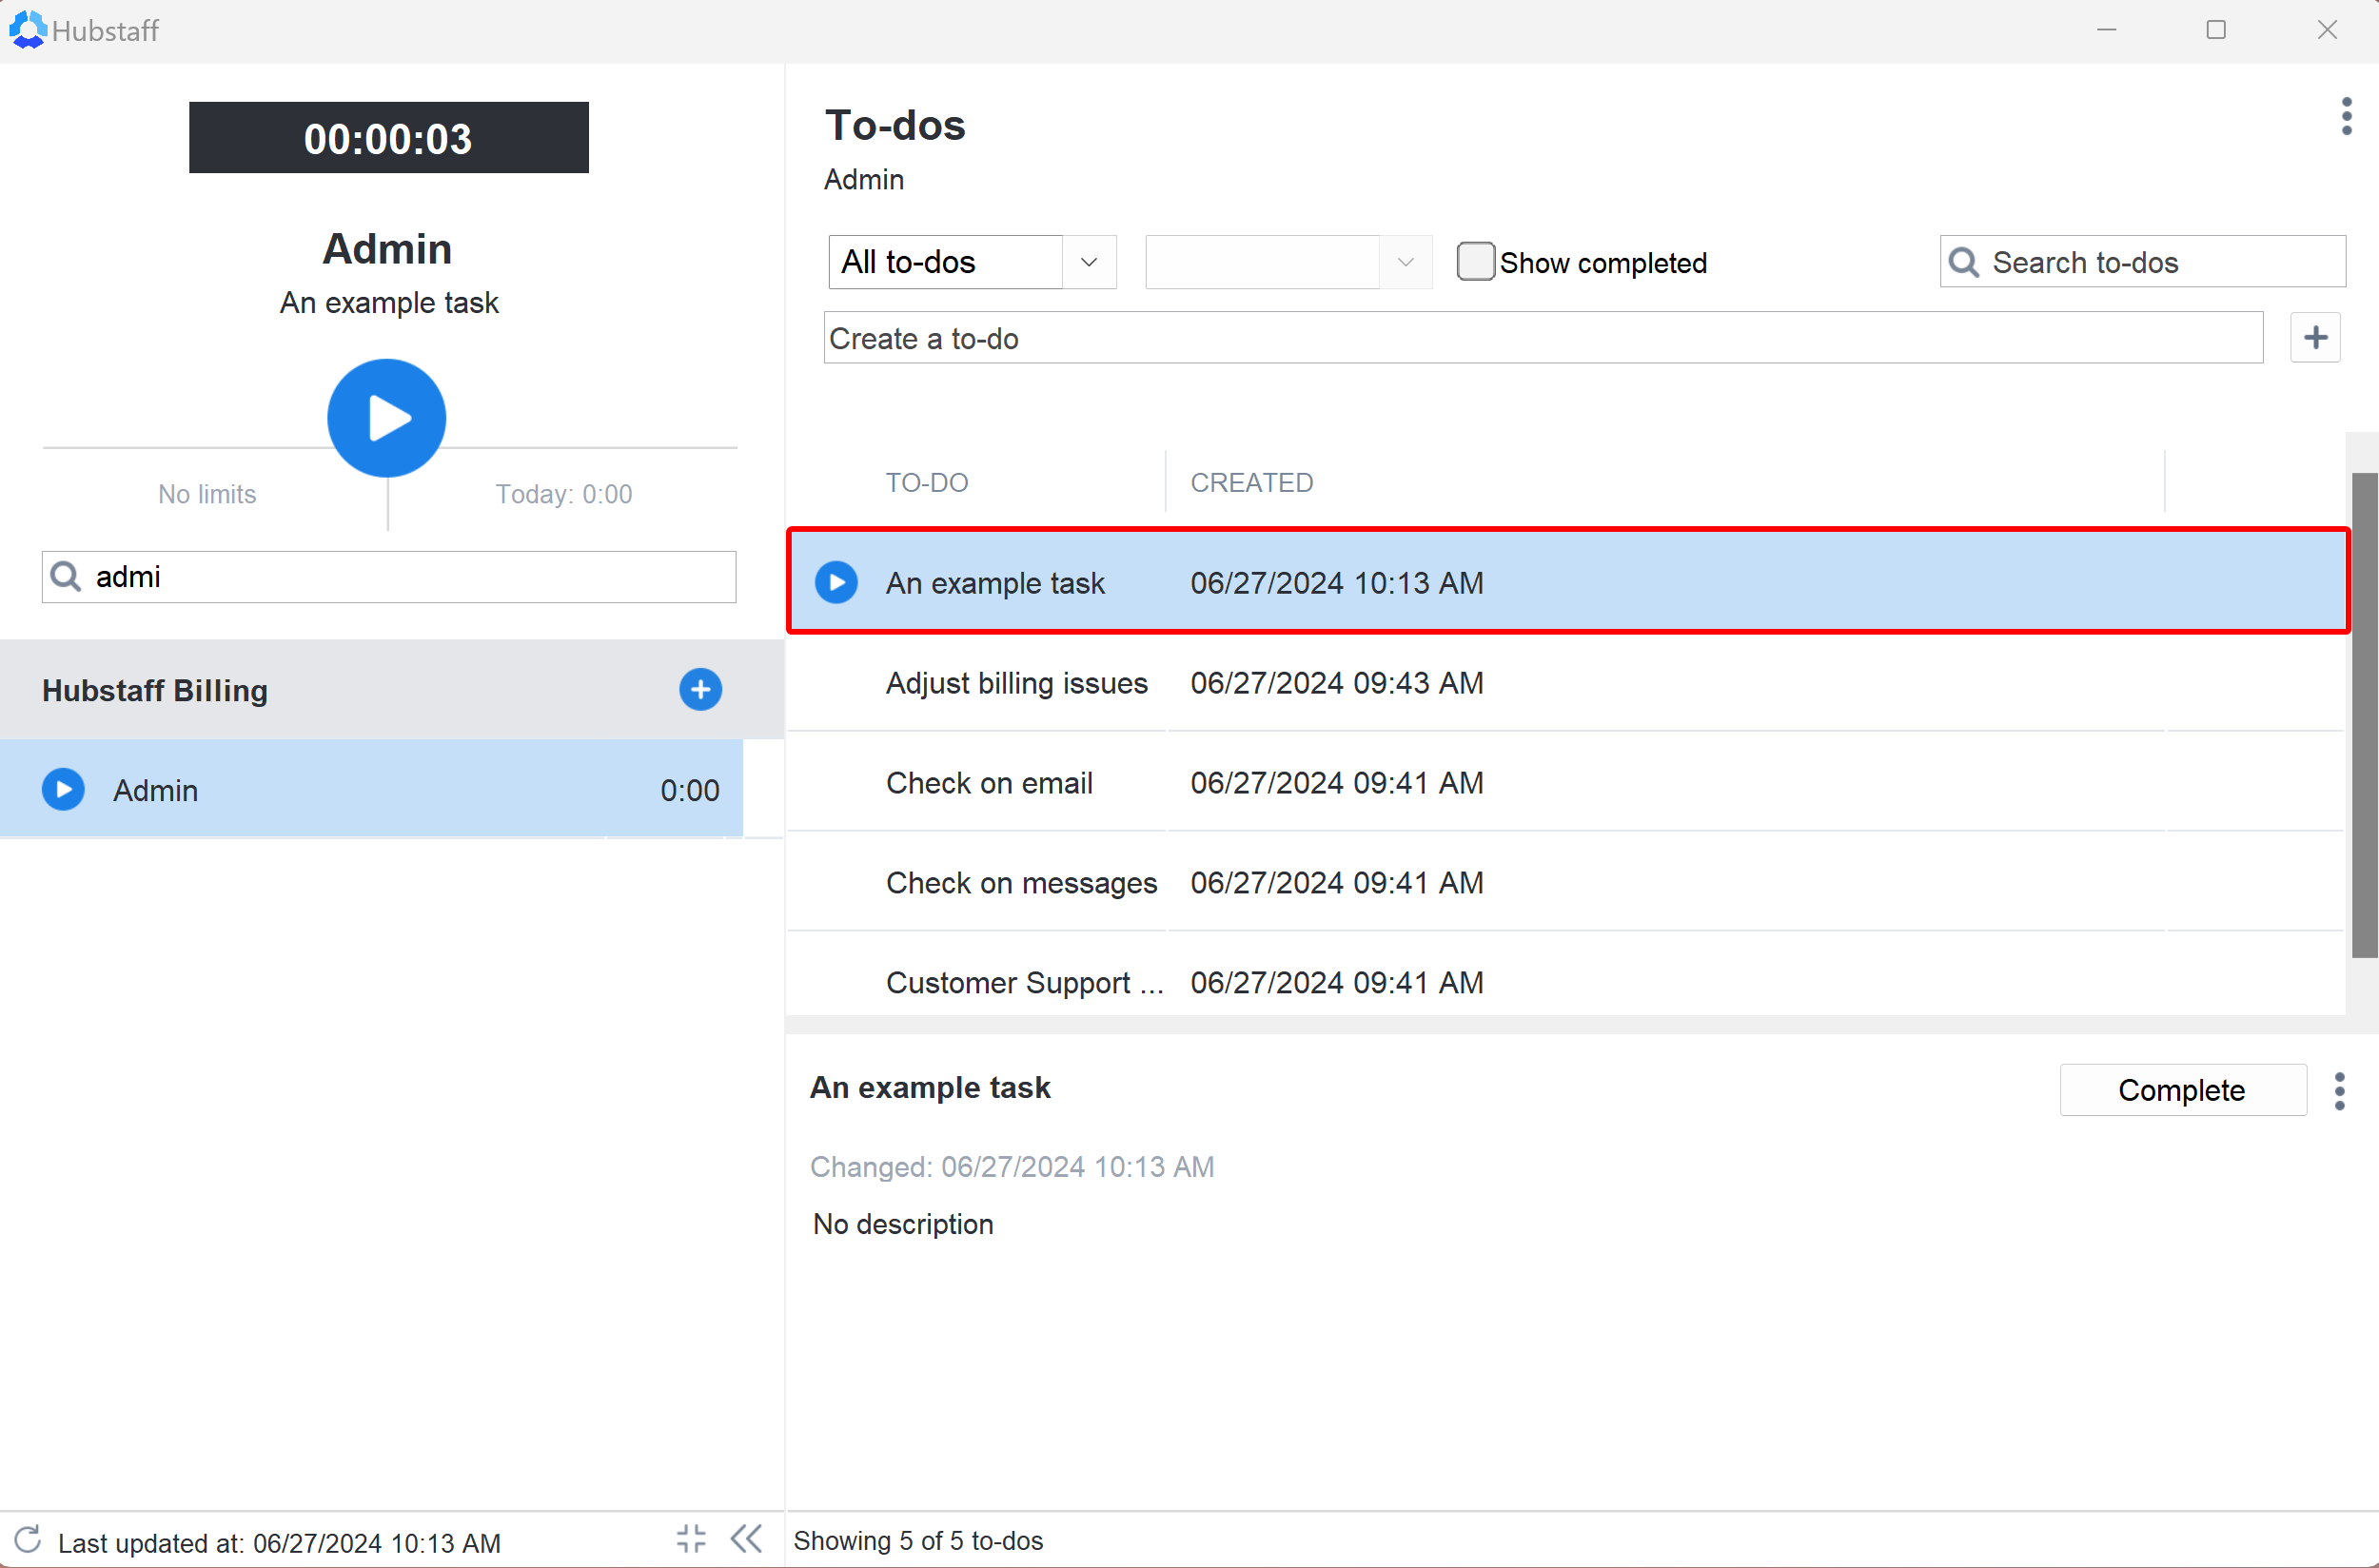
Open your application and select your project. It will highlight blue. Enter the title of the to-do you are currently working on in the “Search to-dos” box.
Step 1
Click the Create a to-do box, or the (+) add icon. Press the enter key once you are done entering the information.
After you have done this, the to-do will be ready to go in your application and on the web where you can track, edit, or delete it.
Editing a to-do through the desktop application
Step 1
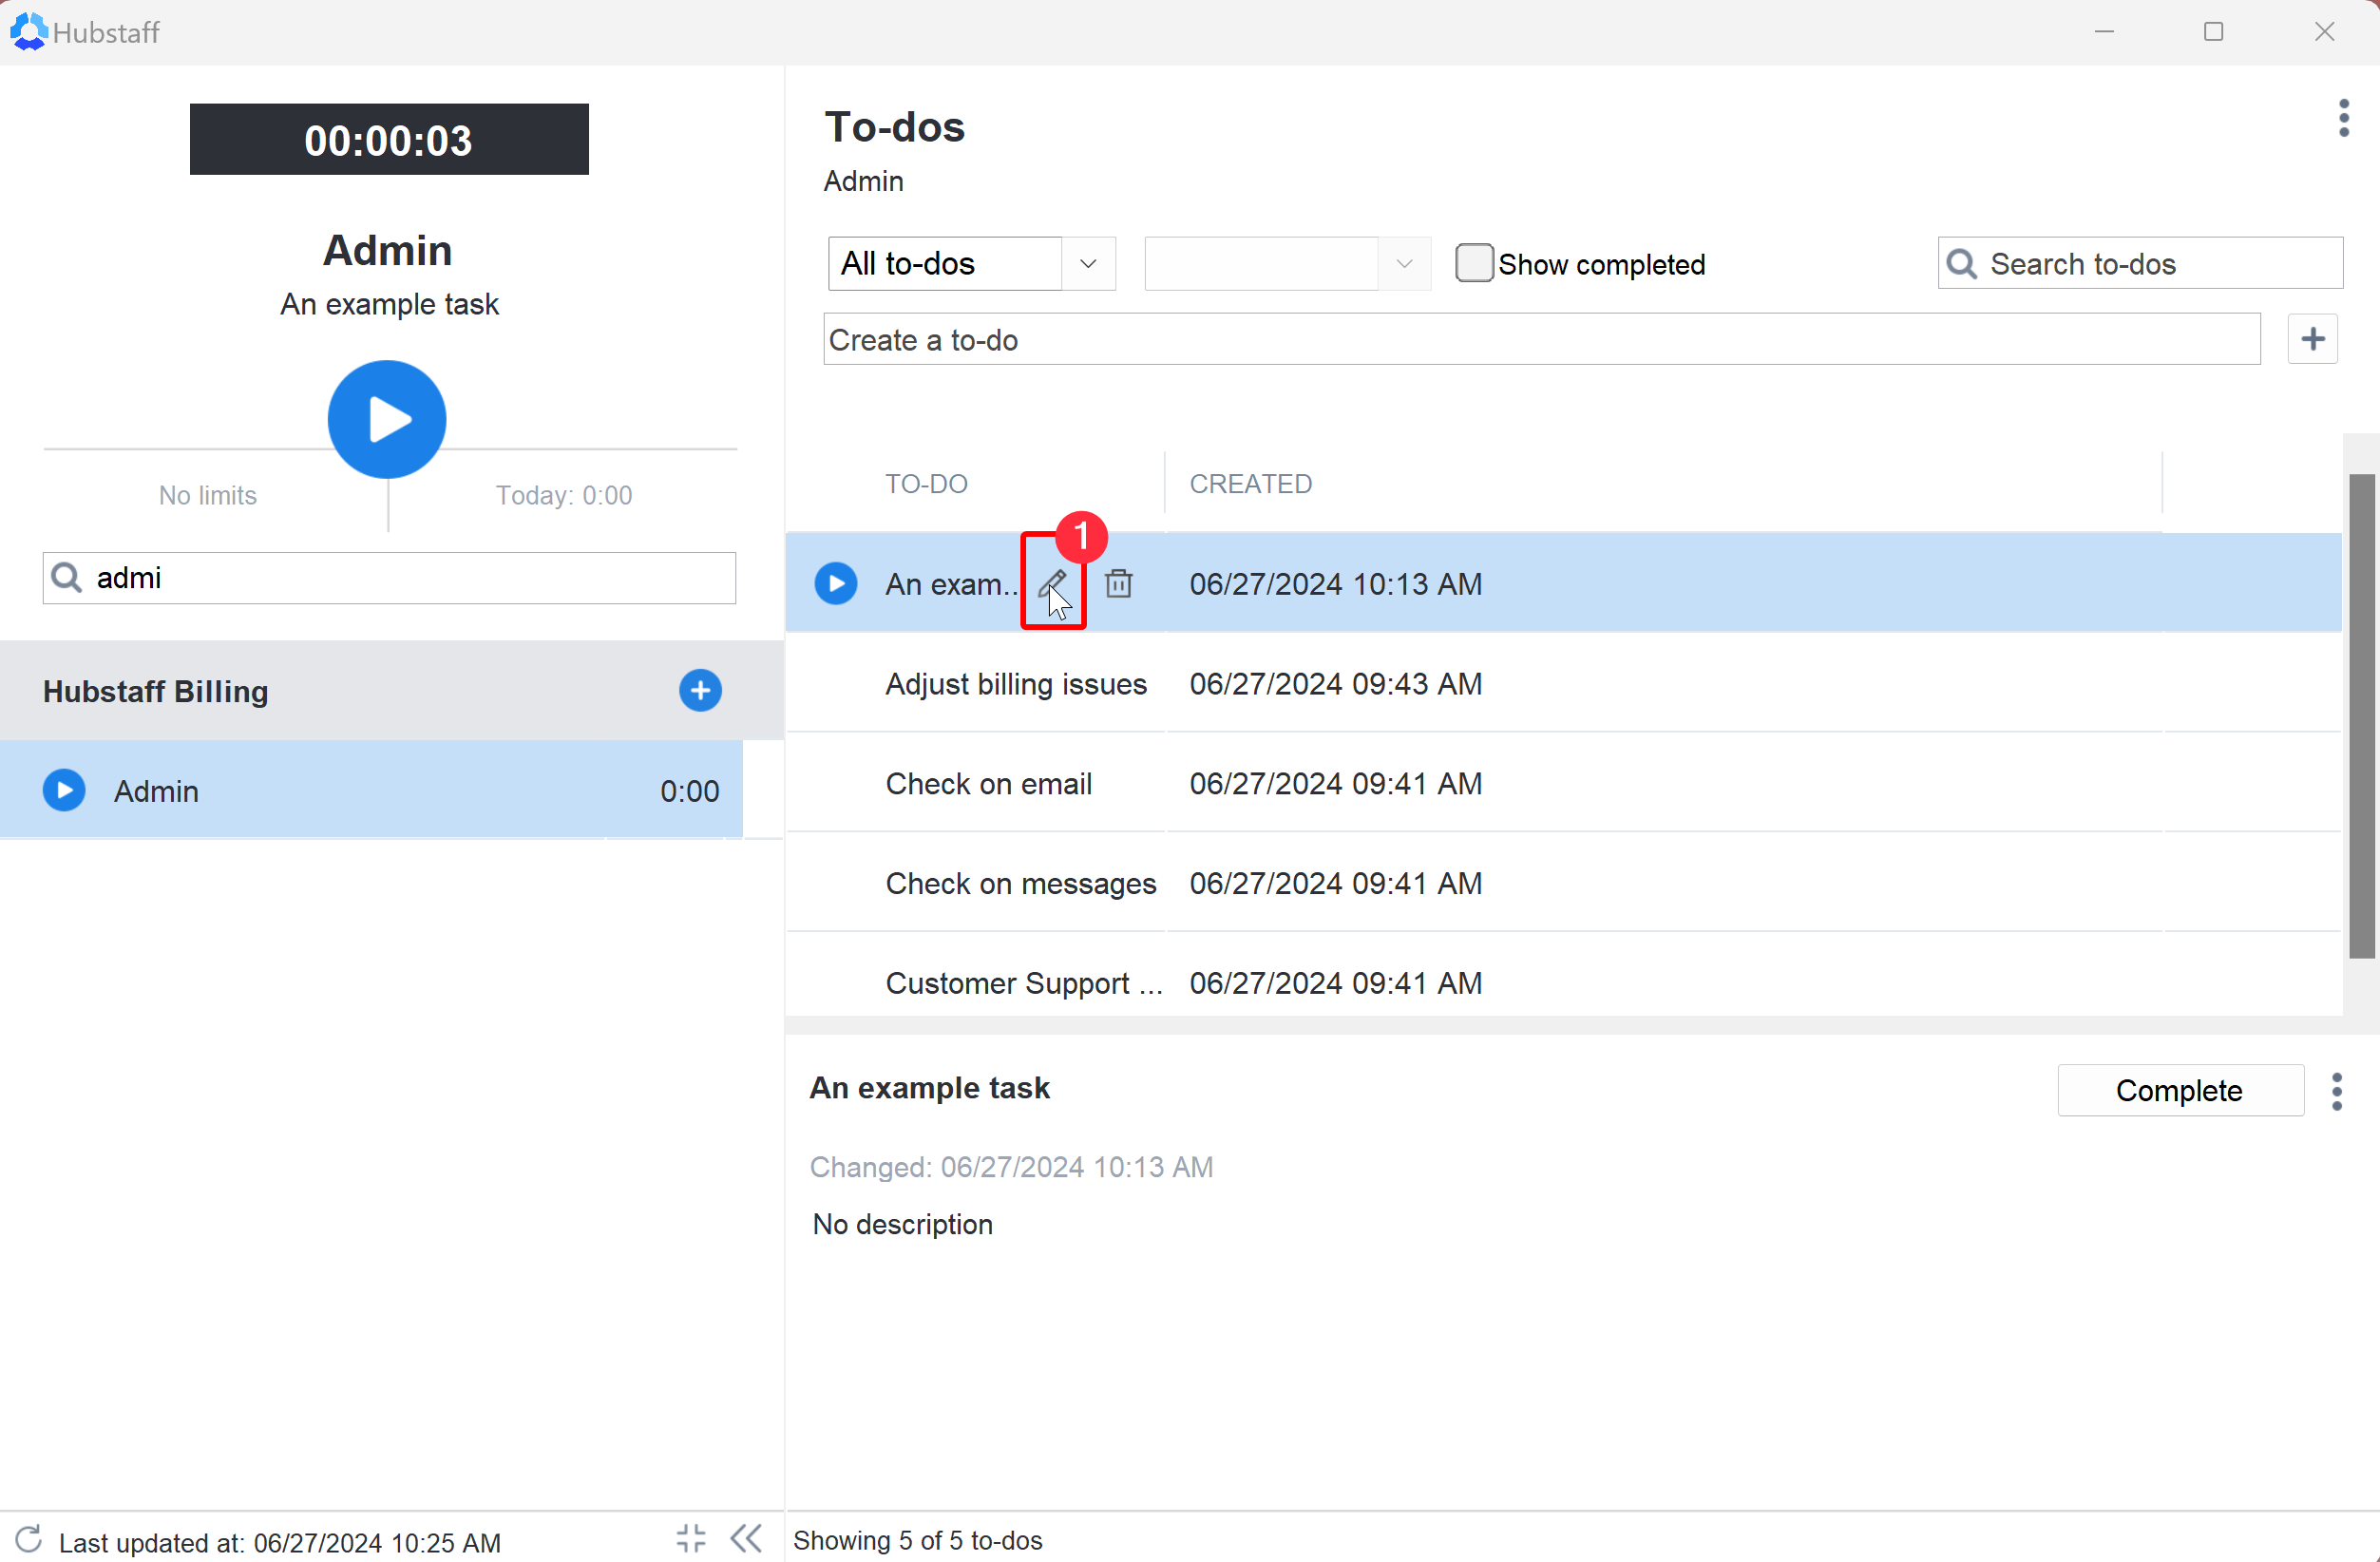
On the desktop app, hover over the to-do and click on the pencil icon.
Step 2
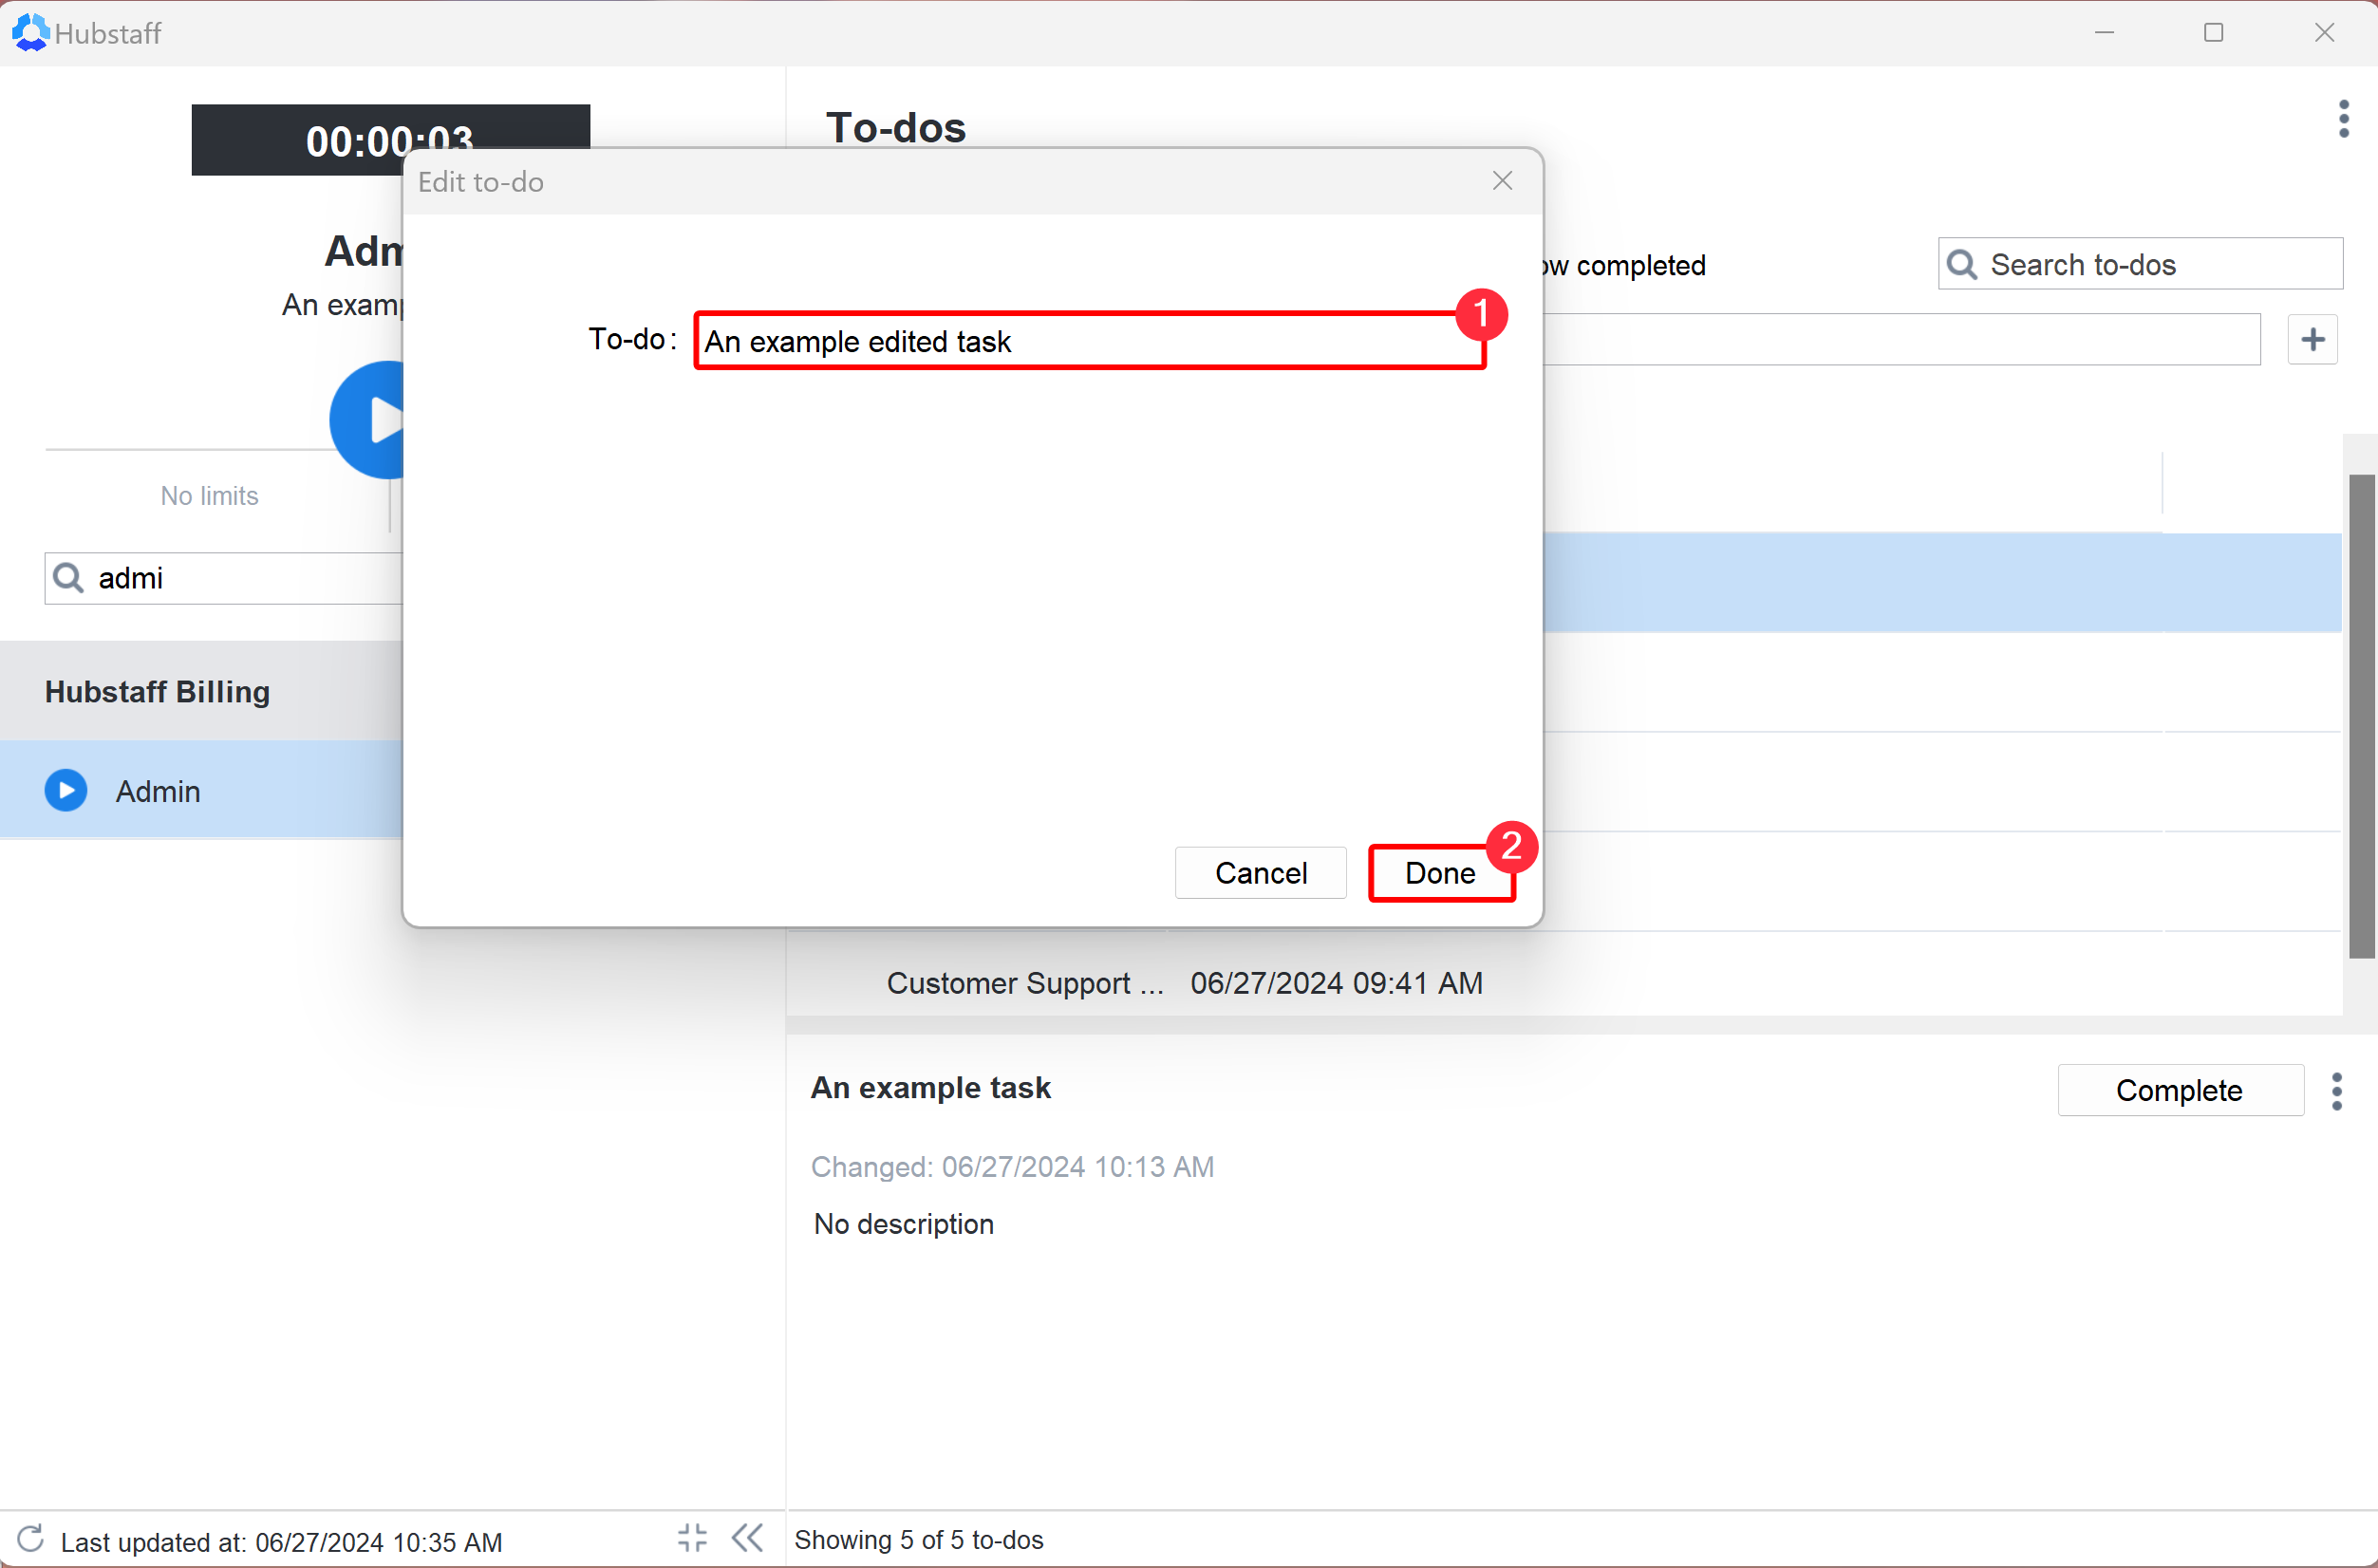
A pop-up will appear where you can make your changes to the to-do and then click Done. The updated to-do will be displayed on the desktop app.
Deleting a to-do through the desktop application
Step 1
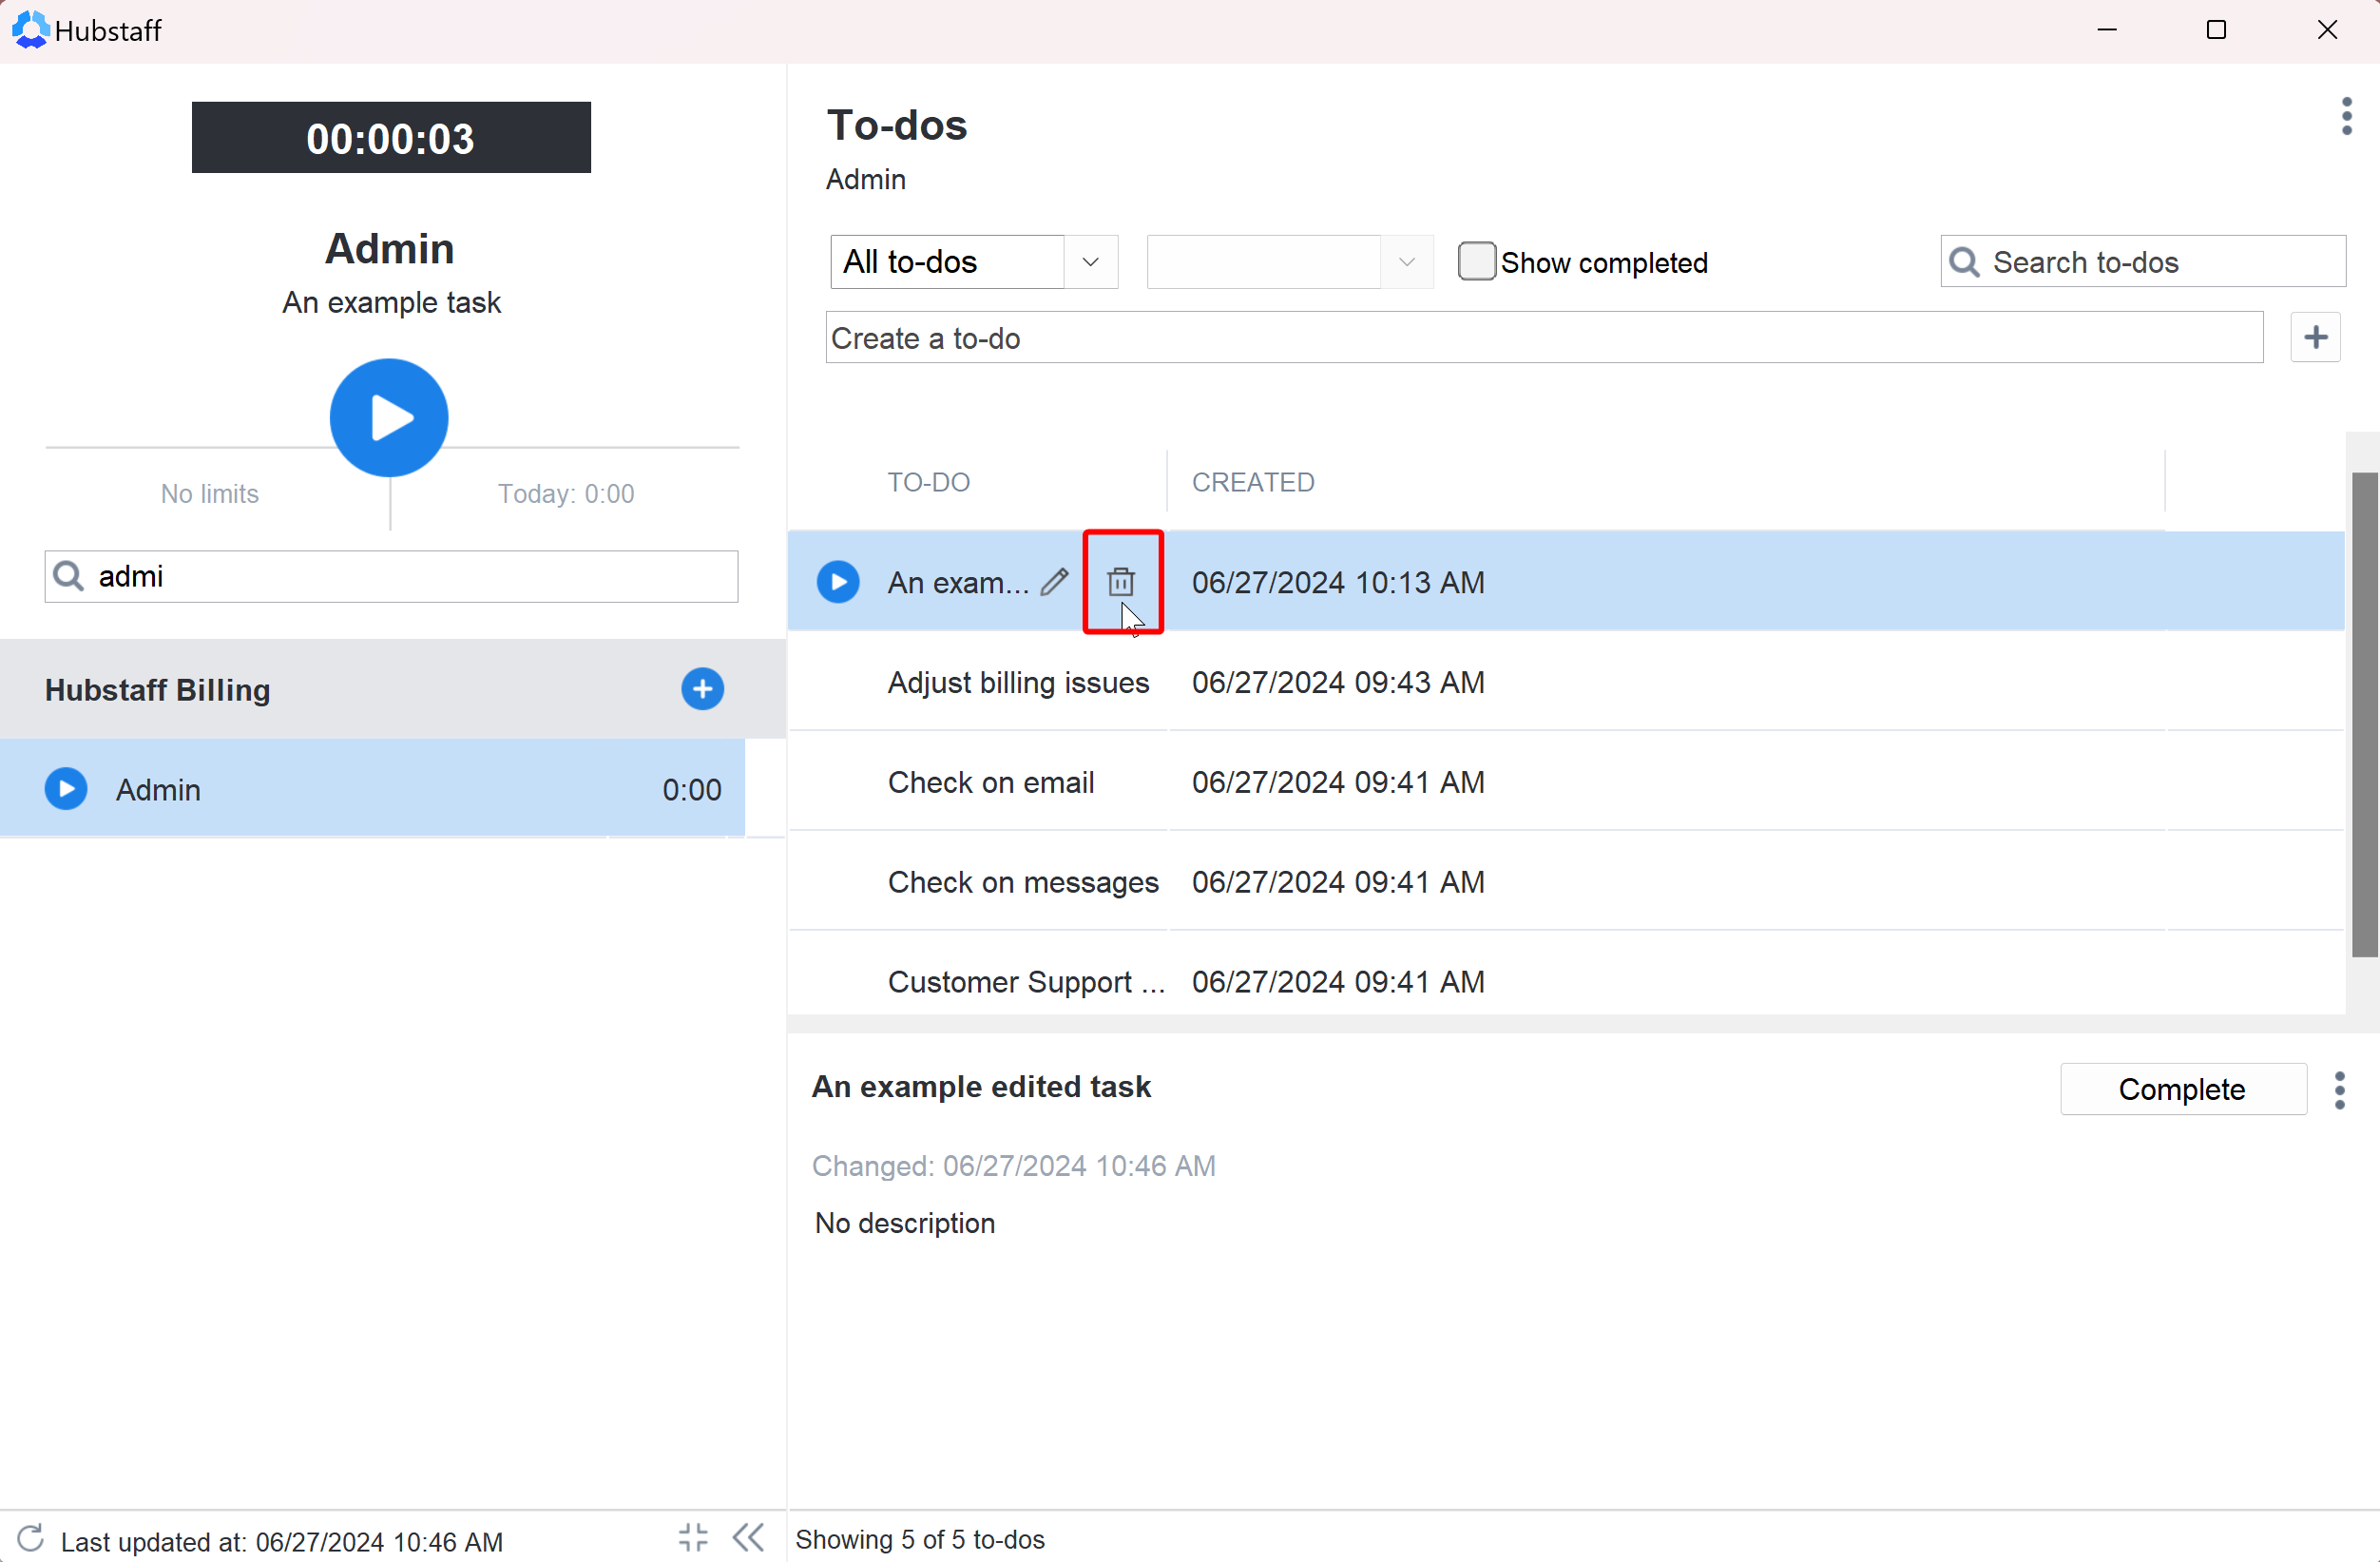
On the desktop app, hover over the to-do and click on the delete icon. A prompt will appear asking for delete confirmation. Once confirmed, the to-do will be deleted permanently.
Global to-dos
Adding a global to-do
Global to-dos are to-dos that can be assigned to multiple projects at once and automatically shared with all members of those projects. They are ideal for recurring activities where you want every team member to be able to track time to the same to-do without having to set it up project by project.
Global to-dos cannot be marked as complete by anyone — they remain available for time tracking indefinitely.
Once a global to-do is assigned to a project, it automatically appears in the timer for all members of that project. Members select it the same way they would any other to-do.
To add a global to-do:
Step 1
Navigate to Settings > Organization > Projects & to-dos > Global to-dos > Add a global to-do.

Step 2
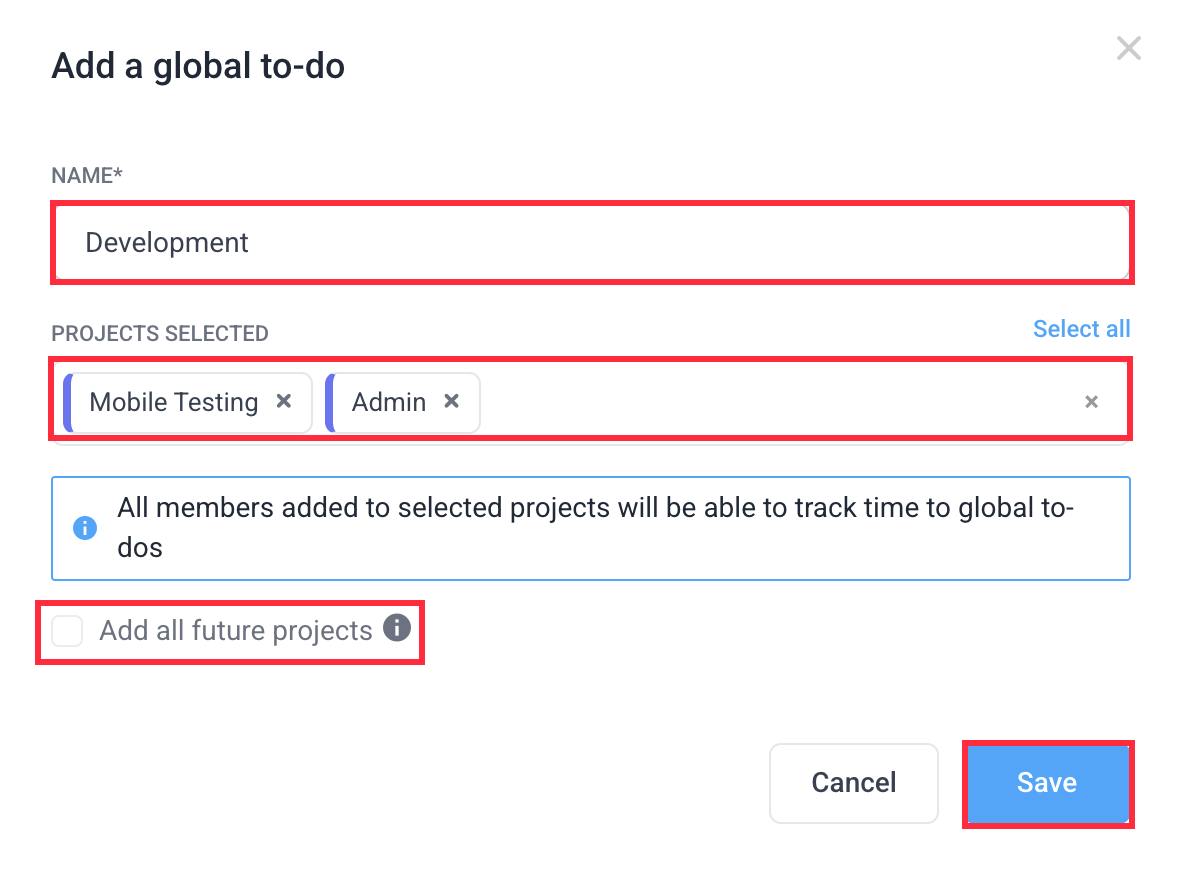
Add a to-do name (names must be unique across all global to-dos). Choose the projects the to-dos are assigned to, all members of each selected project will automatically gain access. Optionally, check “Add all future projects” to automatically include this global to-do in any new projects created going forward. Existing projects are not affected by this option. Then click Save.
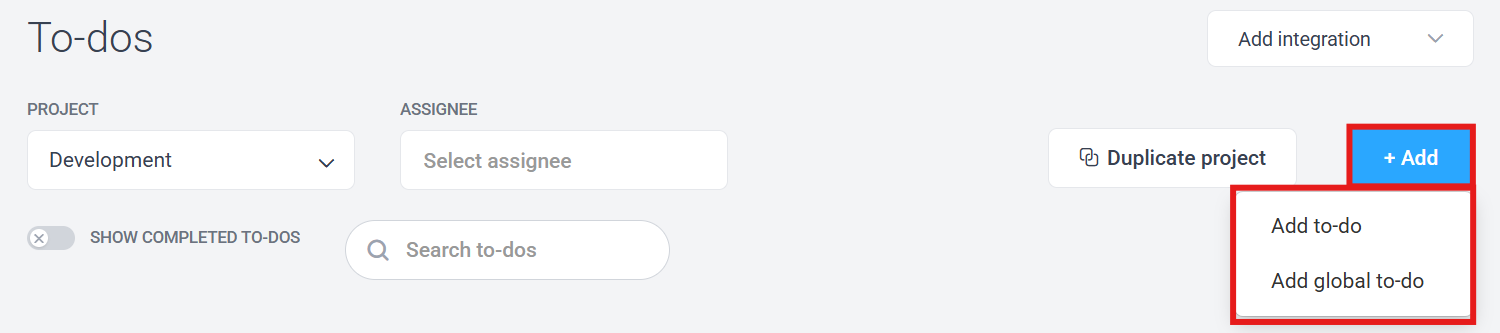
You can also add a global to-do directly from the Project management > Tasks page. Select the Project and Click Add > Add global to-do > then select from your existing global to-dos.
If a global to-do is already assigned to the current project, it will be unavailable for selection.
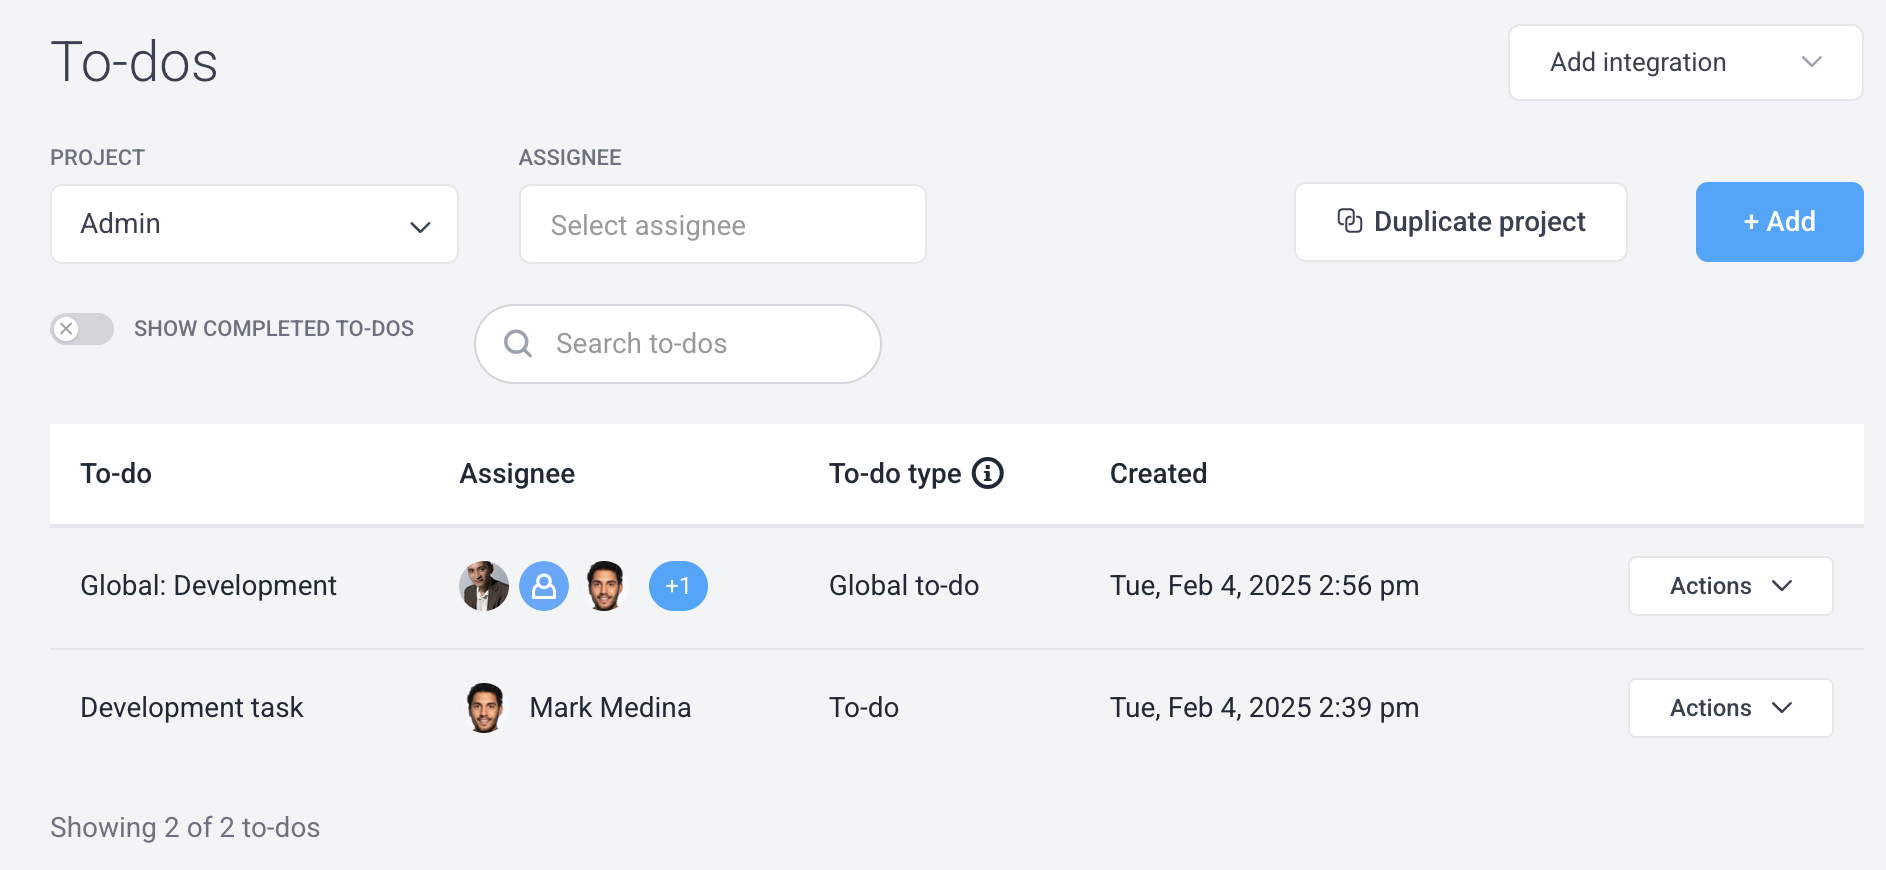
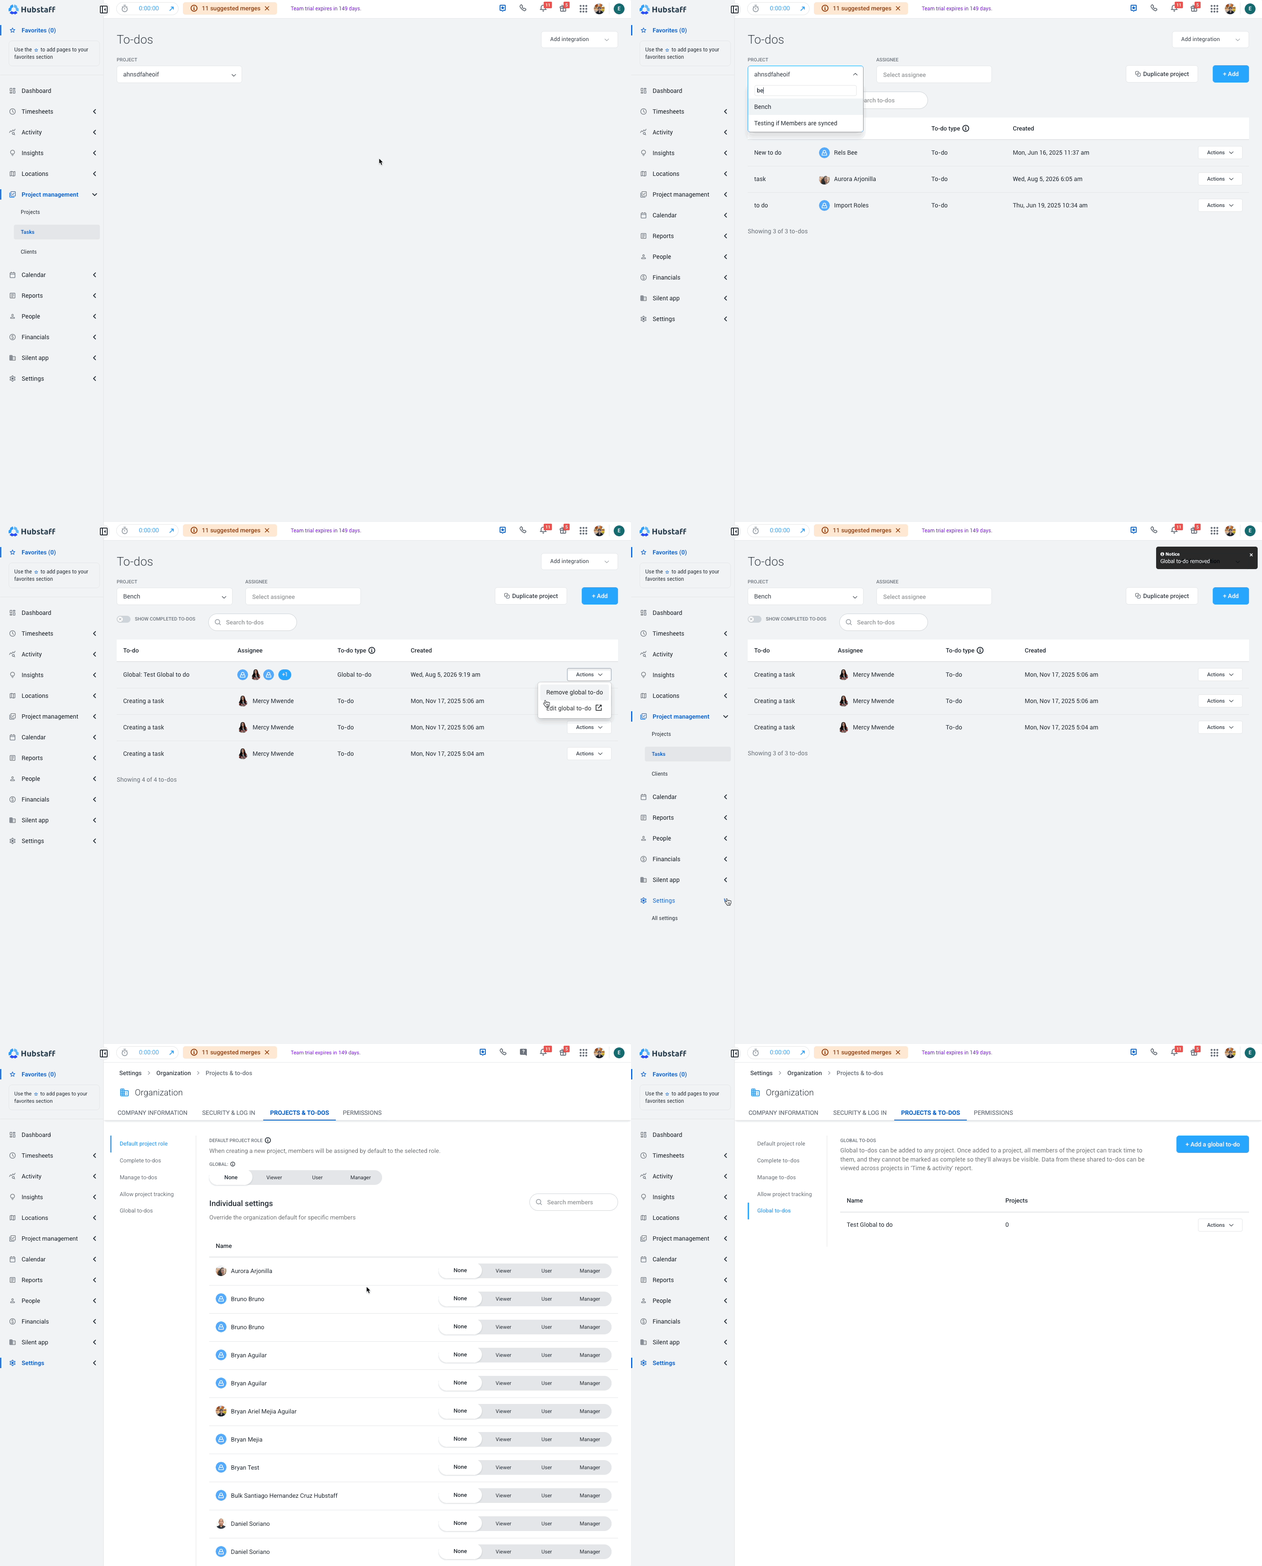
You will then see the global to-do appear on the projects you have chosen (via Project management > Tasks). When viewing Project management > Tasks, you’ll notice a To-do type column that labels each to-do as either Global or Single. Global to-dos appear at the top of the list. The ⓘ icon next to the column header explains what each type means.
Editing global to-dos
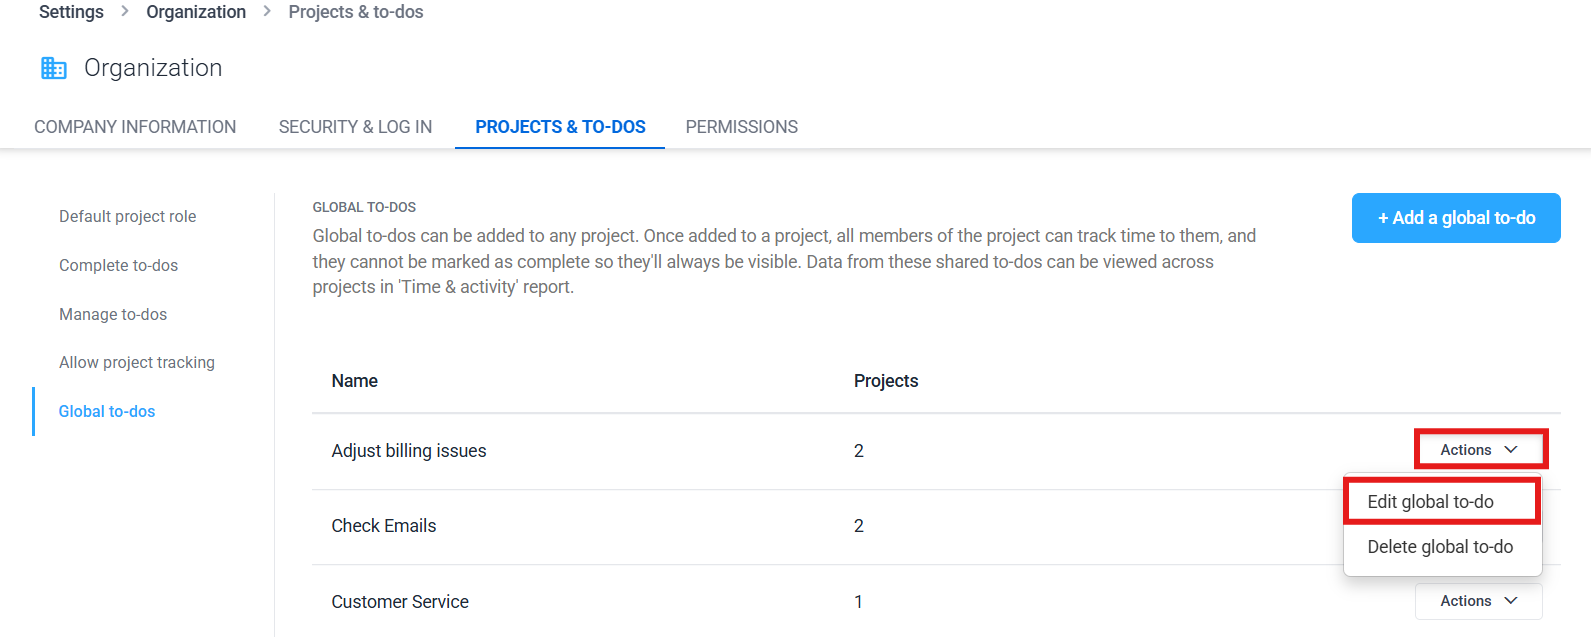
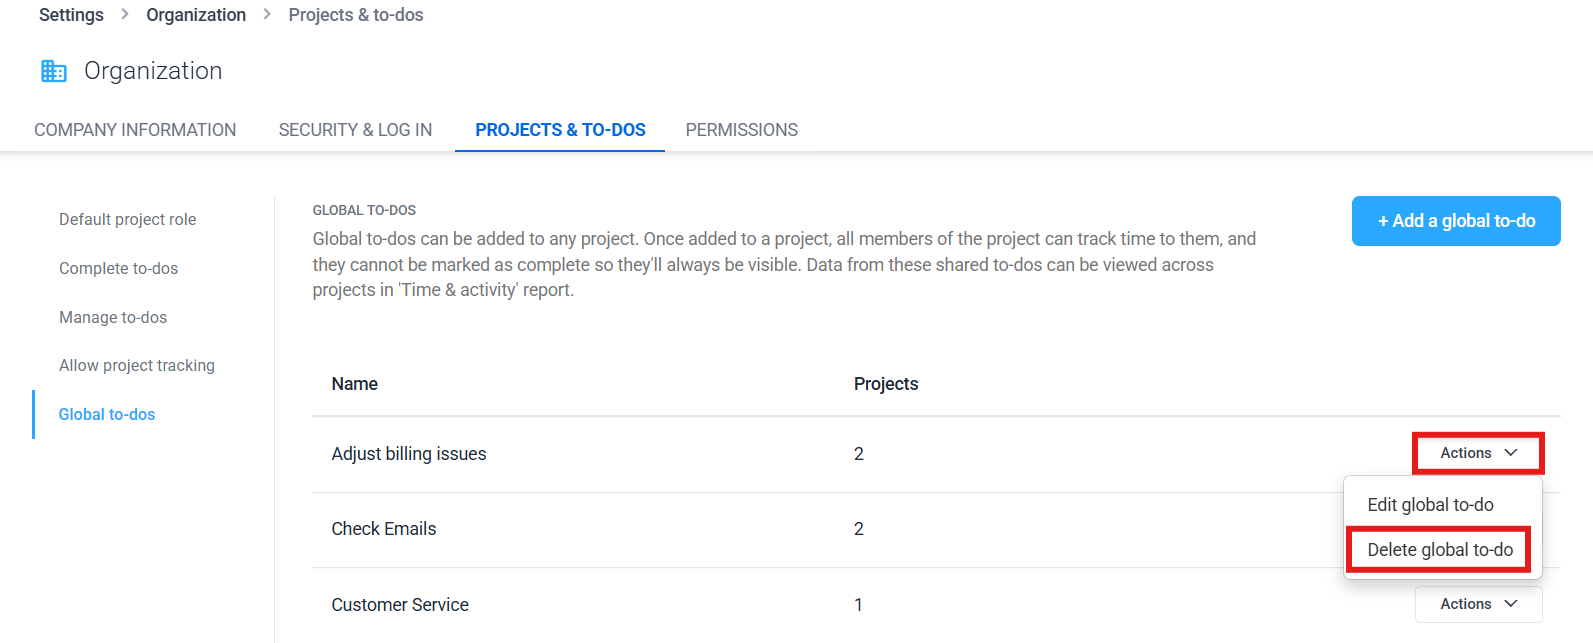
All global to-dos are listed under Settings > Organization> Projects & to-dos > Global to-dos. The table shows the to-do name, the number of Projects its currently assigned to, and an Actions dropdown.
Step 1
Click on the Actions drop-down menu next to the to-do, select Edit global to-do.
Step 2
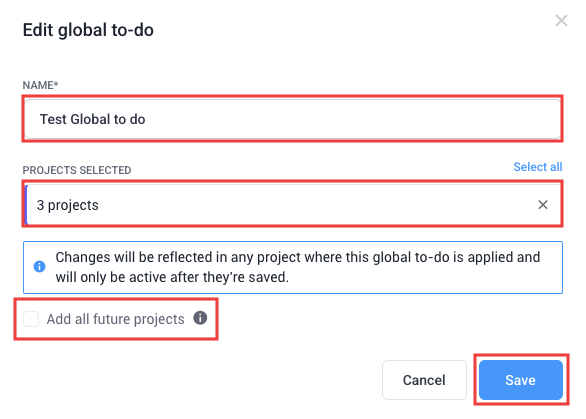
Edit to update the to-do name, change which projects it’s assigned to, or toggle the Add all future projects option. Removing a project from a global to-do is not retroactive — existing time tracked to it is preserved and the to-do is simply no longer shown in that project going forward.
Removing global to-dos
Global to-dos can be removed from specific projects in two ways:
1. From the Edit global to-do dialog displayed when going to Settings > Organization > Projects & to-dos > Global to-dos > Actions drop-down menu next to the to-do, select Edit global to-do.
2. From the Project Management > Tasks page, select the project from the dropdown, then go to Actions > Remove global to-do > click on the “Remove” button to confirm.
Deleting global to-dos
Step 1
Click on the Actions drop-down menu next to the to-do, select Delete global to-do.
Step 2
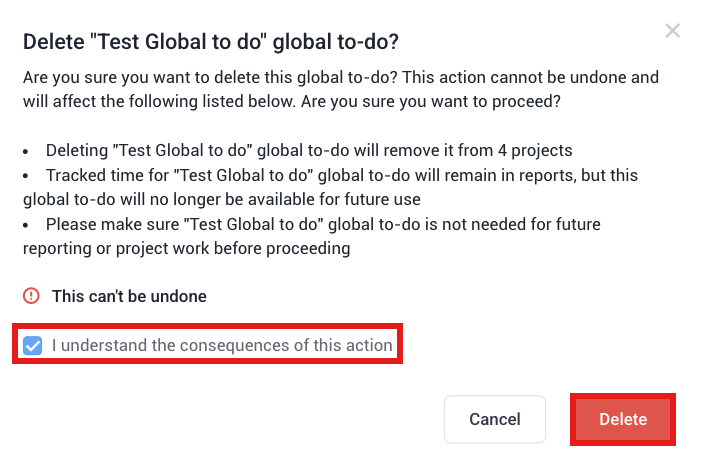
Mark the checkbox to confirm and delete. This action is not retroactive — any time already tracked to it is preserved in reports. If the to-do name is no longer used in any other global to-dos, it is also removed from the master list.
Time tracked to a global to-do is aggregated into a single line item across all projects in reports. This means if the same global to-do exists in multiple projects, you’ll see one combined total rather than separate rows per project.