9 minutes
Timeline View in Hubstaff Tasks
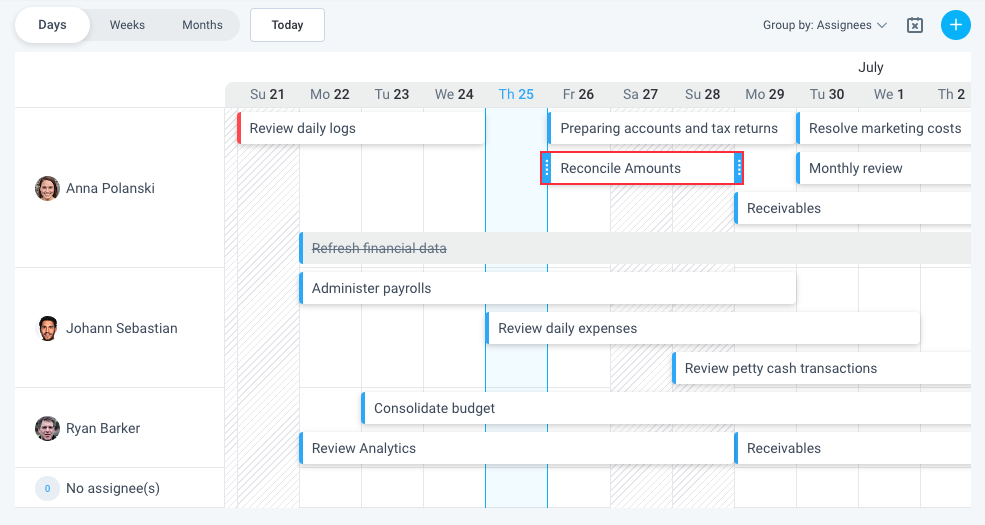
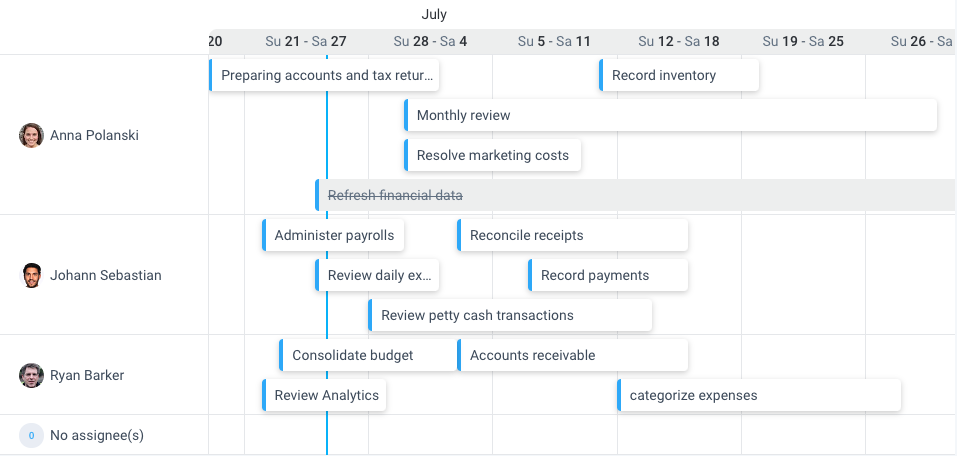
Hubstaff now offers a Timeline view similar to a Gantt style chart, where tasks are displayed in chronological order to show you exactly what tasks will happen when, the target completion date of a task, and which users the tasks are assigned to.
The timeline view makes it easier for you to visualize and organize projects, estimate timelines, and manage your team’s workload.
How to Switch to the Timeline View
Step 1
Open an existing project.
Step 2
Click on the Timeline view button located towards the upper right corner of the project page.
Step 3
The timeline view will be displayed.
Only tasks with start and due dates are included in the timeline view.
Task Status
You can distinguish the task status based on how tasks are displayed within the timeline.
Active tasks will appear with a blue label.
![]()
Overdue tasks will have a red label.
![]()
Completed tasks will appear with a strikethrough.
![]()
Hubstaff Tasks considers a task (to-do) as Overdue if the due date is today or the next day (tomorrow).
Switching Between Different Views
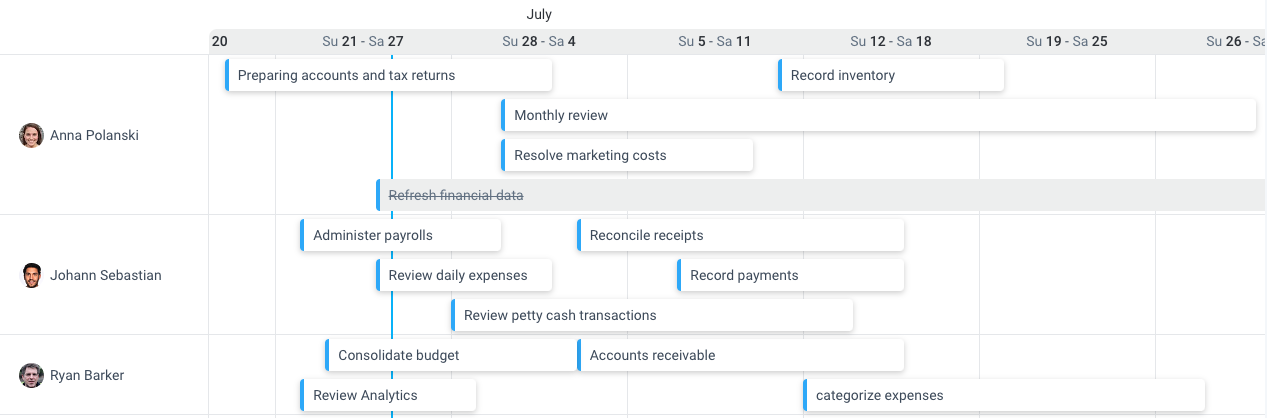
Date View
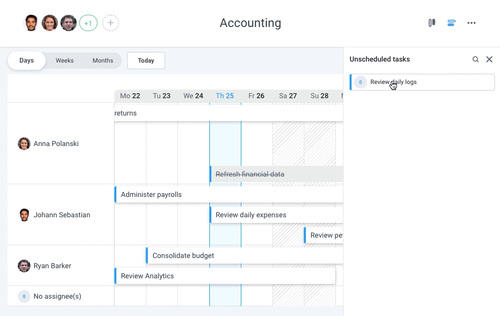
You can view the data in Days, Weeks, or Months by toggling the date setting on the top left corner:

Days
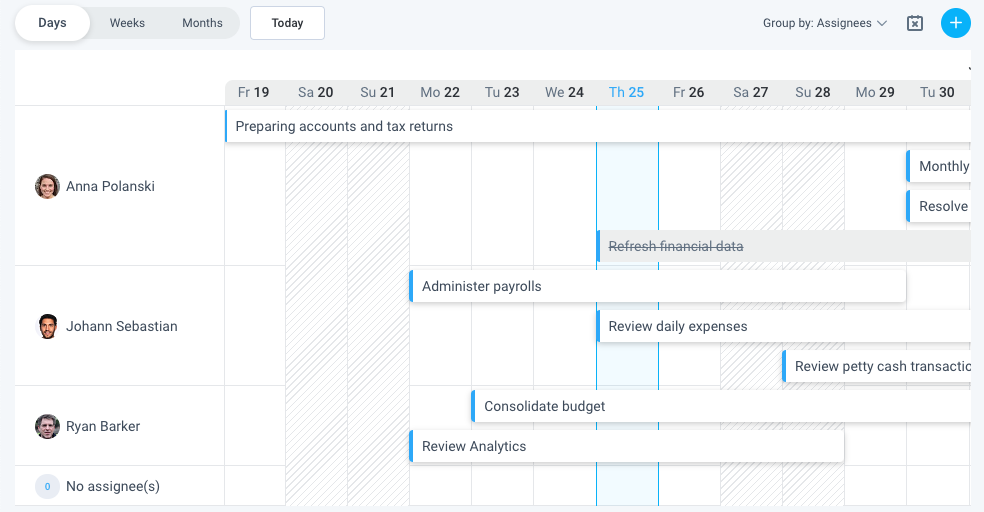
Weeks
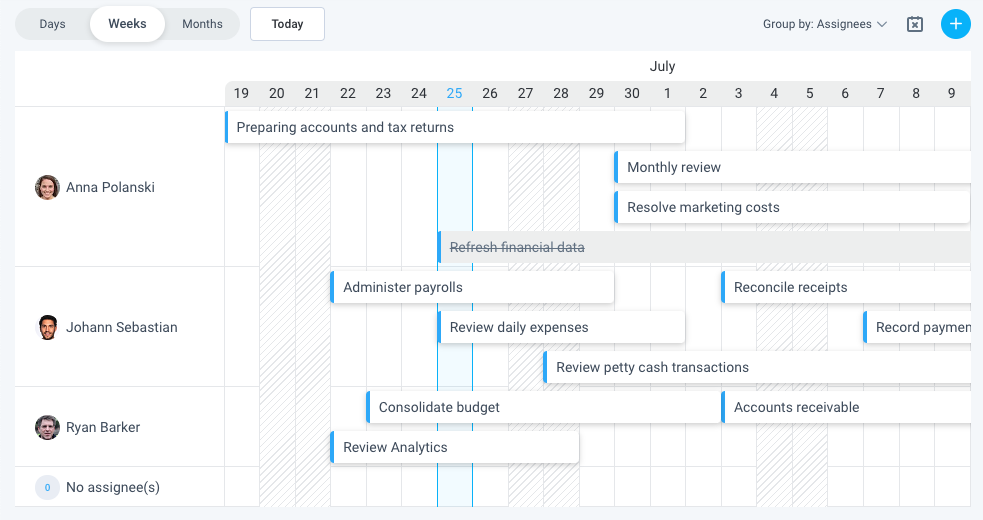
Months
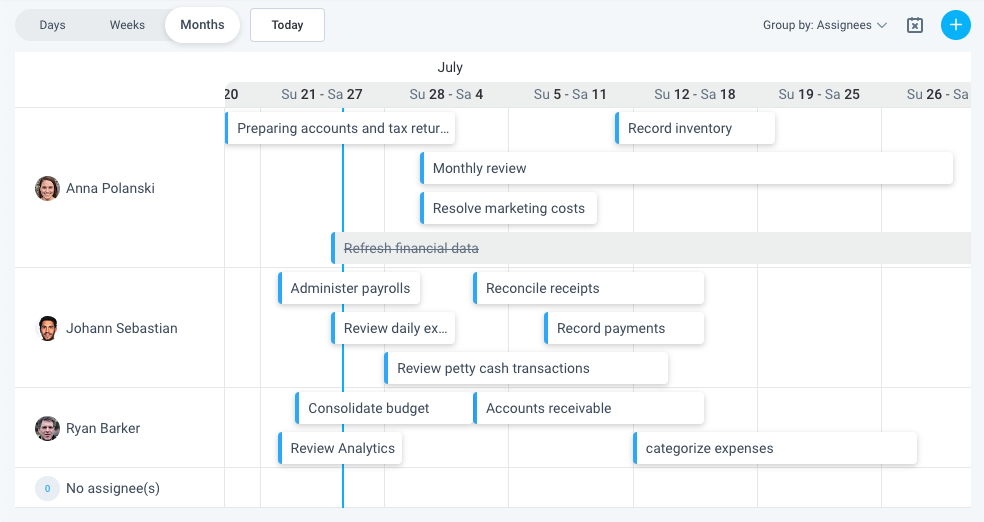
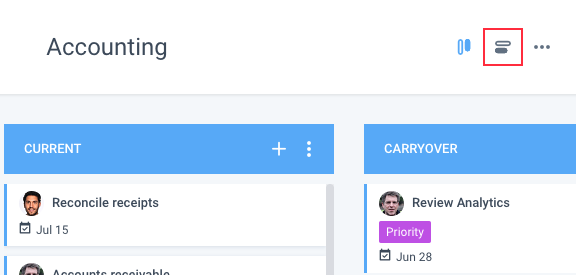
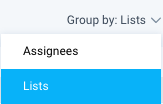
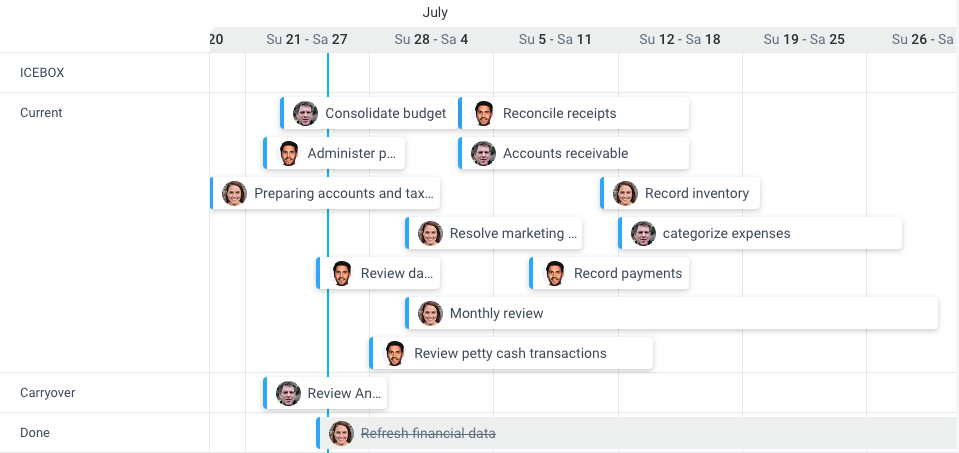
Group by View
You can group the displayed tasks either by Assignees or by Lists.
Viewing them by Assignees lets you know what tasks are assigned to that person, which will also help you visualize their workload.
Viewing them by Lists lets you manage tasks based on their progress according to your list workflows.
Drag and Drop Unscheduled Tasks
You can also drag and drop unscheduled tasks, meaning tasks without start and due dates into the timeline view. Follow the steps below to get started:
Step 1
Click on the Unscheduled Tasks button located on the top right corner of your timeline.

Step 2
Drag the unscheduled task and drop it into your timeline. Drag the right side of the task to add a start date, and the left side of the task to assign a due date.
Adding a Task Directly from the Timeline View
You can also add tasks directly from the timeline view making adding tasks on the fly easier.
Step 1
Click the Add Task button located on the top right side of your timeline.

Step 2
You’ll see the New task window. Fill in the task name, list name, start and due dates, and add assignees then click on the Create button.
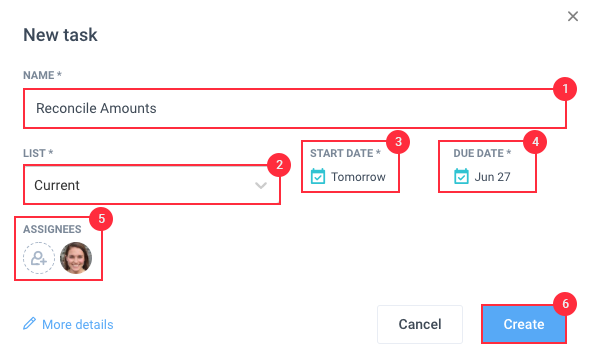
Step 3
The new task will be added to your timeline on the current date.