3 minutes
Installing the Windows timer application
Below are the instructions on how to install and sign in to the Windows timer application:
Download Hubstaff for Windows Here
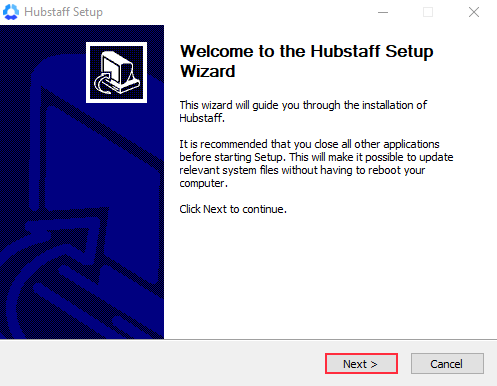
Step 1
After downloading the installer, run it, then go through the standard installation steps.
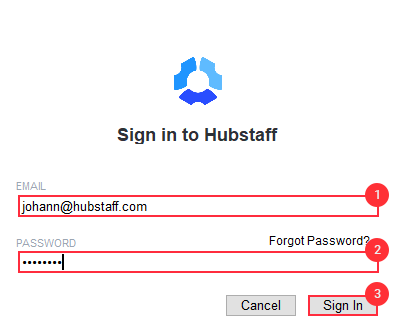
Step 2
After installing, it will prompt you to sign in. Enter your Hubstaff account email address and password.
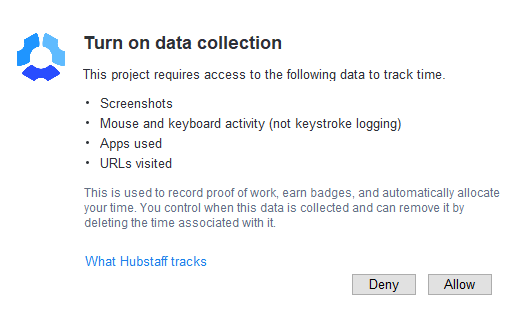
Step 3
Before you start tracking time, you’ll be asked to allow the app access to activity data on your machine. Click Allow to continue.
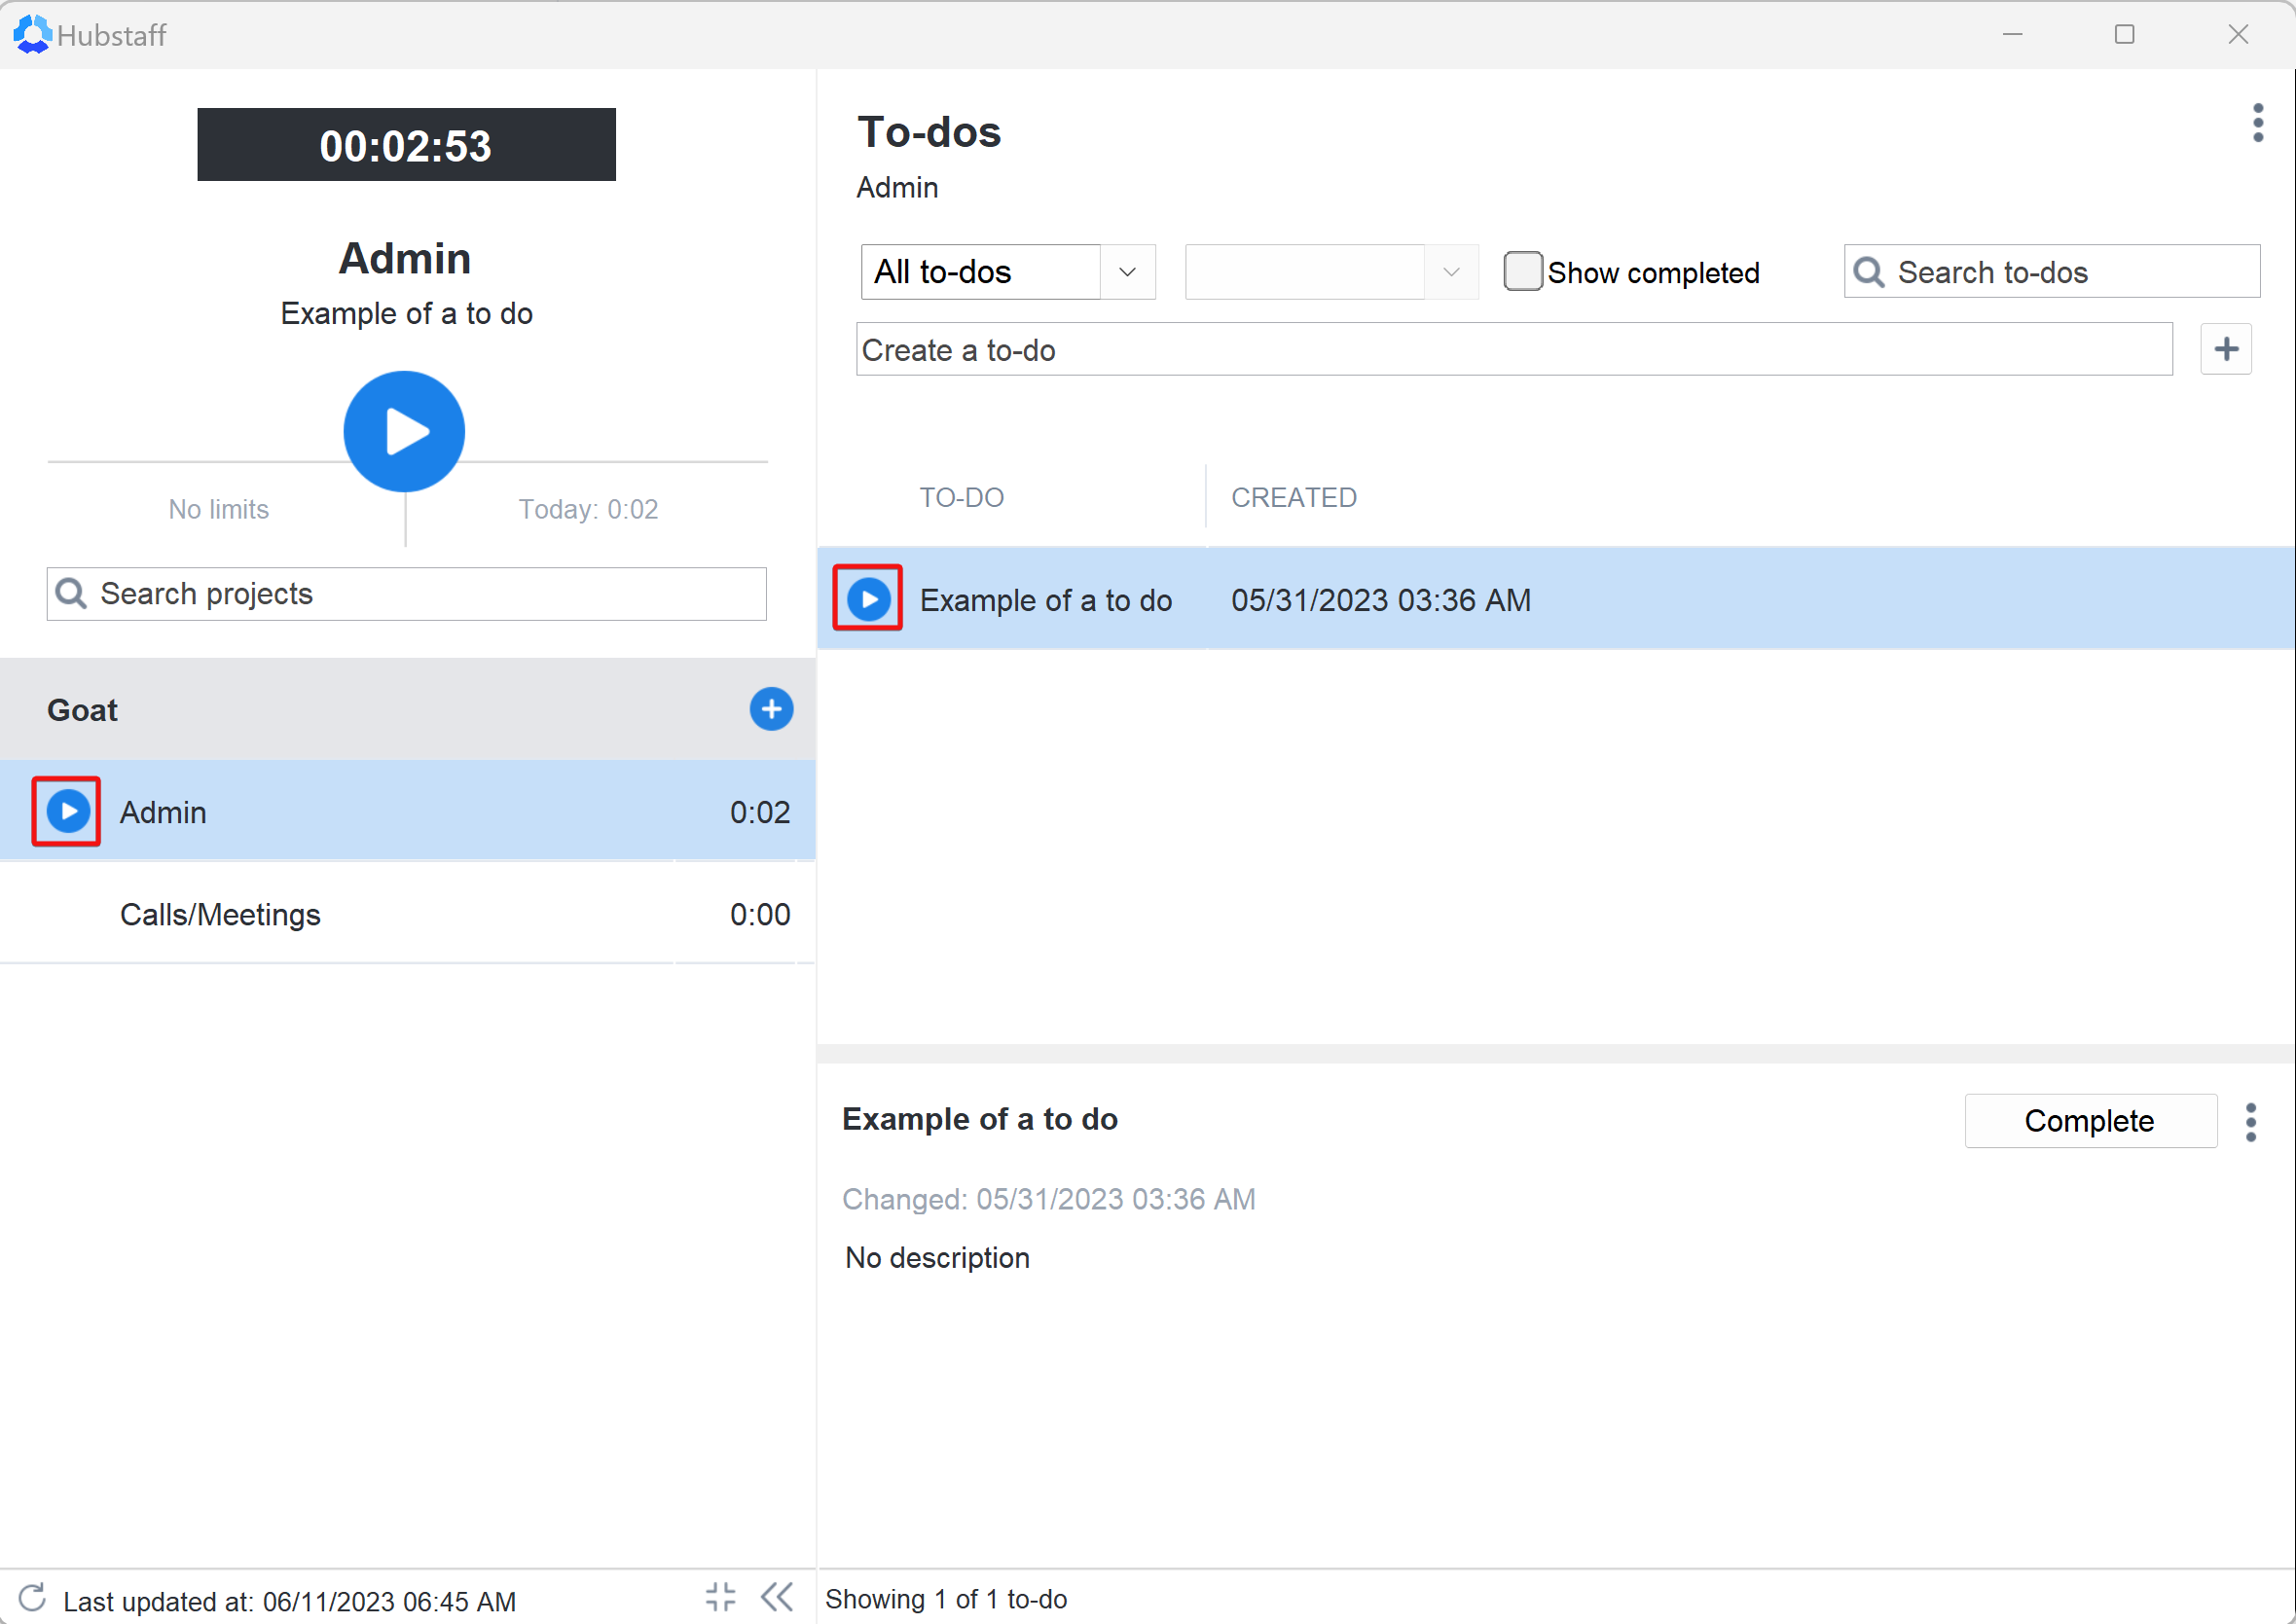
Step 4
Upon signing in, the app will display all the projects you’re assigned to. Just click on a project, or a task under that project, then hit the play button to begin tracking time.
The “Check for updates” option will be grayed out if your organization is currently managed with enterprise deployment. Please contact your system administrator to install updates.