4 minutes
Installing the Chrome timer extension
Installing the Chrome extension is easy. Once installed, you’ll be able to track time to your integrated tasks directly from the integration site and capture screenshots**.
How to install the Chrome extension
Step 1
The first step is to visit the Chrome Web Store on the device you’re adding the app to. Then search for “Hubstaff” in the search bar, and click on Hubstaff Time Tracker.
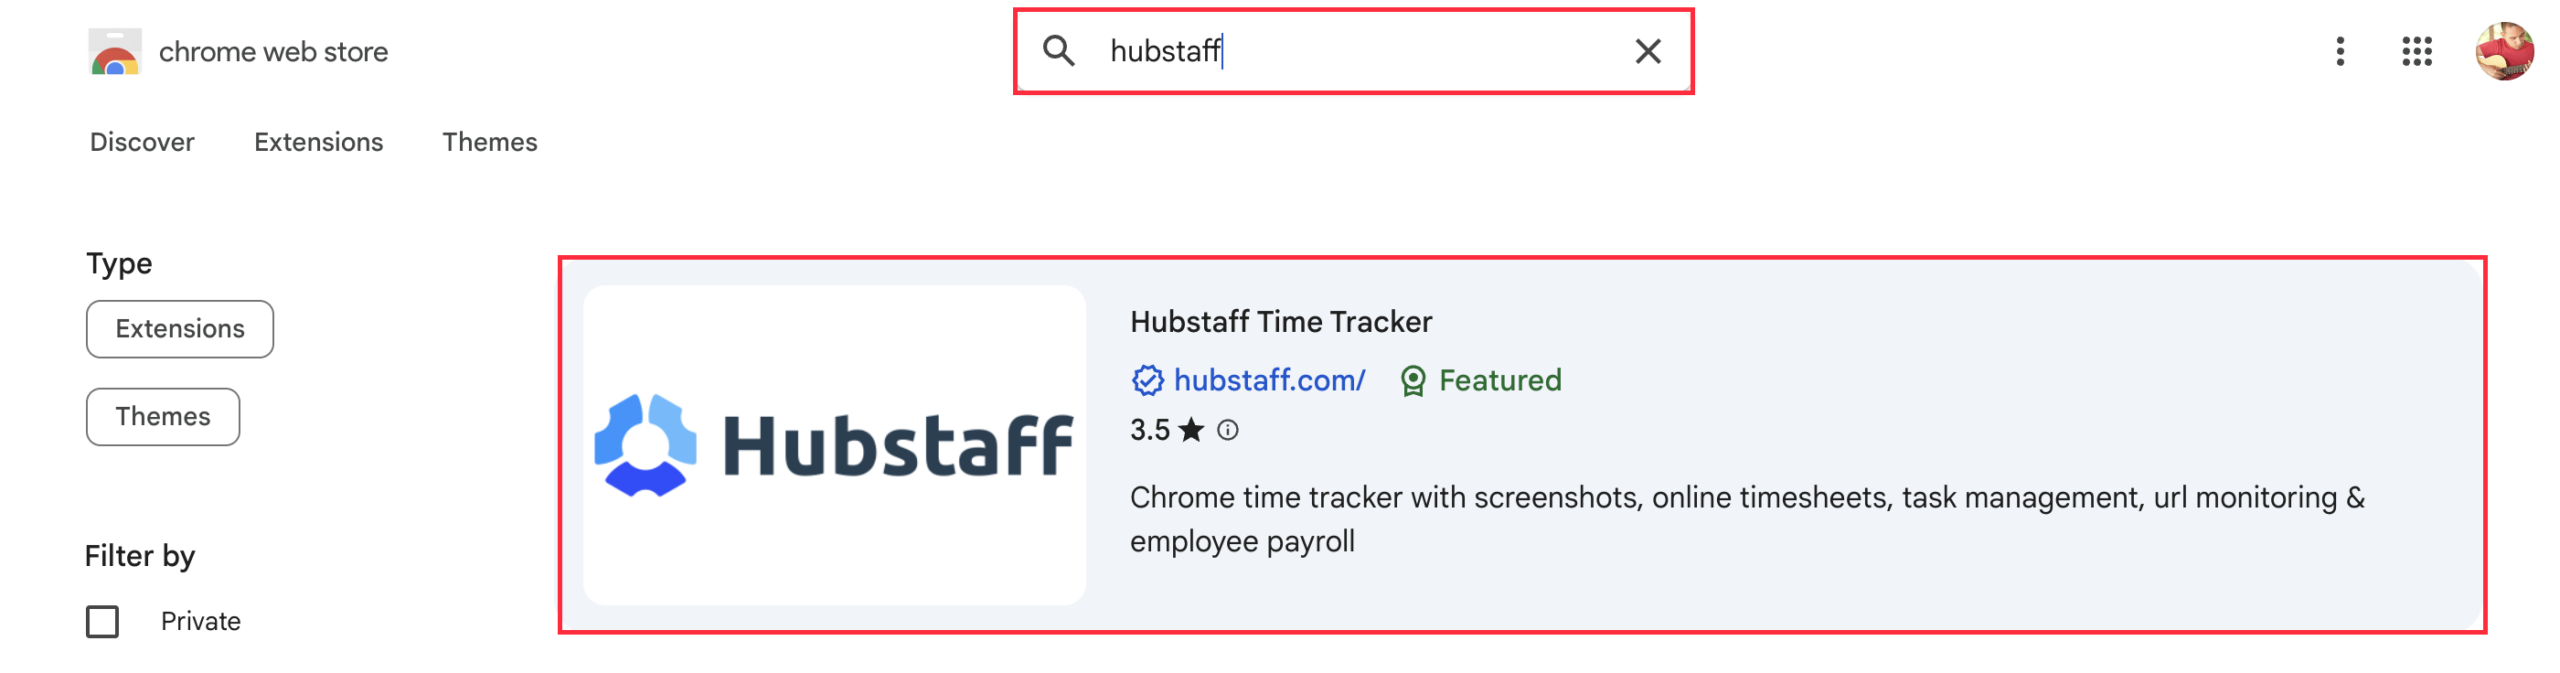
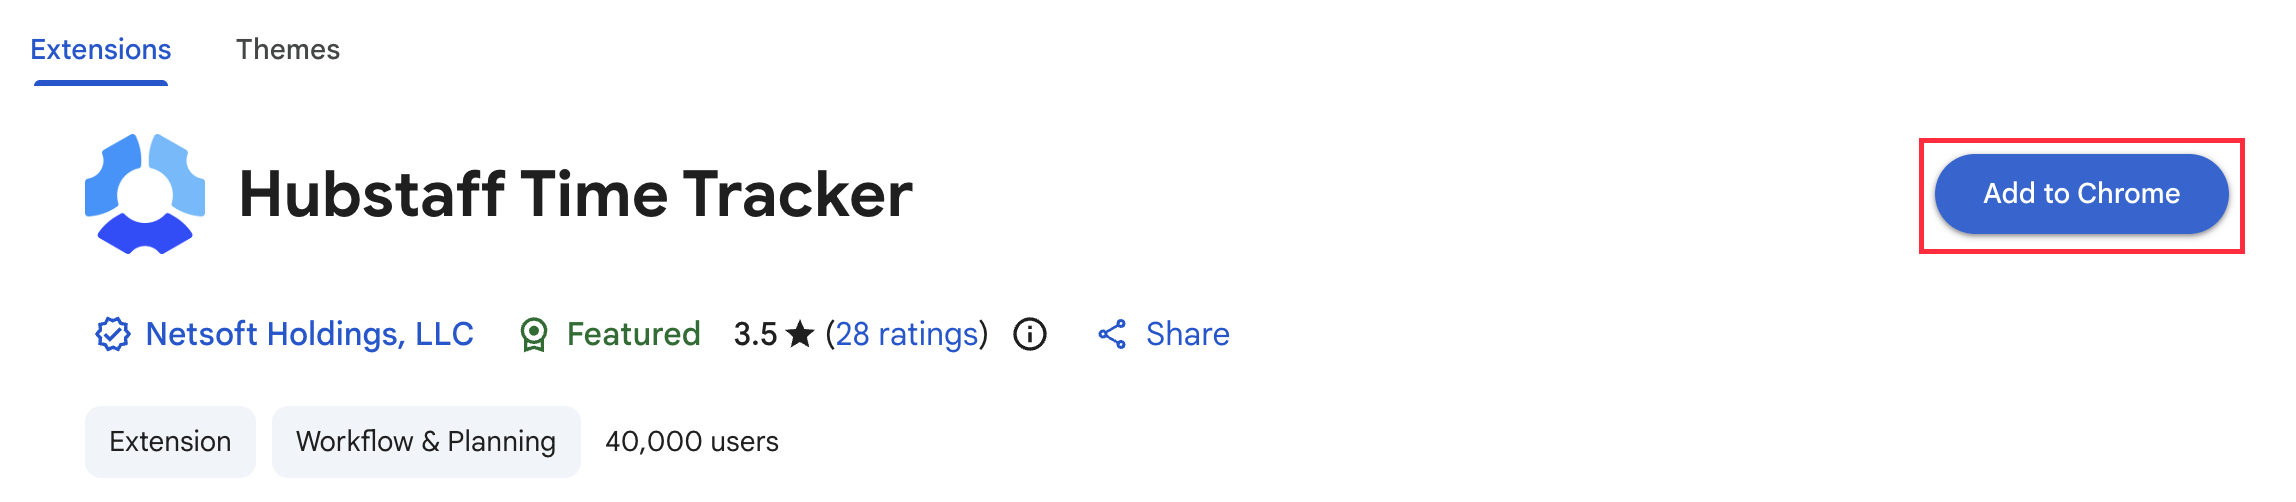
Click on “Add to Chrome”. Click here to be taken directly to the installation page.
Step 2
Next, when prompted, click the Add Extension button on the permissions pop-up.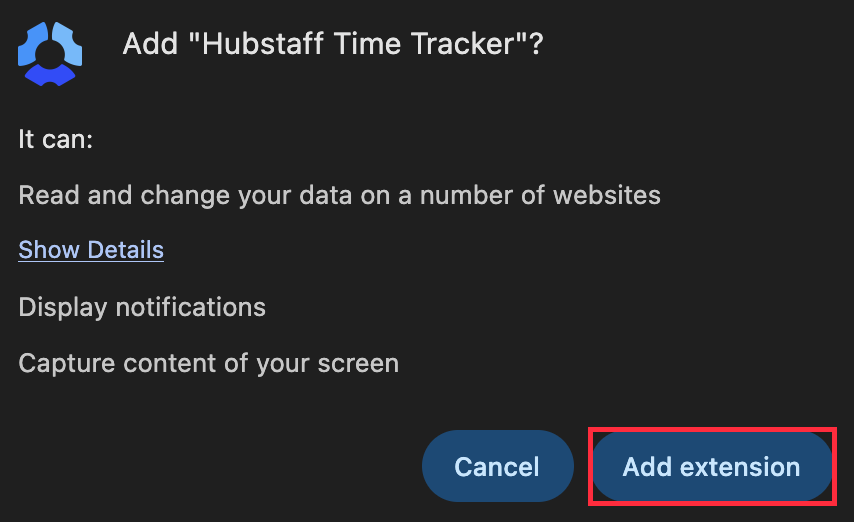
Step 3
Once the installation is complete, you’ll be able to click the Hubstaff icon next to your search bar to open the extension window and sign in to start tracking your time.

If you can’t track time, contact your organization owner to confirm that your organization allows time tracking through the Chrome extension and that they have assigned you to a project or task that enables time tracking.
At this point, you can track time for any project that your manager has authorized you to work on. It may be a good idea to inform your manager that you have successfully installed and activated your Hubstaff app so they can confirm that everything is working correctly.
The Chrome extension has limitations with how well it tracks activity. It is limited to 15-second granularity. That means if you do something once every 15 seconds, you will have 100% activity.
The Hubstaff Chrome extension cannot show a breakdown of activity for the keyboard and mouse. The numbers will always match. This is a limitation of the information provided by the X screensaver API on Chrome.
The Chrome extension may not be able to handle a large number of projects/tasks. This is due to limitations set in Chrome or your hardware’s memory usage.
**Starting on Version 0.10.1, we no longer support screenshots.