15 minutes
How to configure OneLogin for SCIM integration
This article explains how to configure SCIM (System for Cross-domain Identity Management) with OneLogin so you can automatically provision, update, and de-provision Hubstaff members from your OneLogin directory.
SCIM handles provisioning. It does not handle how people sign in. If you want your team to sign in through OneLogin, set up SSO as well (see How SCIM and SSO work together below). For SCIM with other providers, see the Microsoft Entra ID and Okta articles, or contact us at support@hubstaff.com.
- This feature is only available on the Enterprise plan.
- Who can access this feature: Organization Owners, Organization Managers, and Users with the Manage IT custom permission assigned to their account.
- Group-to-team sync is not available for OneLogin. OneLogin provisions and updates members only. If you need to mirror groups as Hubstaff teams, use Microsoft Entra ID or Okta, or manage teams directly in Hubstaff.
How SCIM and SSO work together
SCIM and SSO do two different jobs, and they are independent of each other:
SCIM provisions accounts. It creates and updates members and their profile details in Hubstaff. It does not send passwords to Hubstaff and does not control how people sign in.
SSO handles sign-in. With SSO, users sign in through OneLogin.
You can use SCIM on its own, but we recommend setting up both SCIM and SSO:
- With SSO enabled, provisioned users sign in through OneLogin, and you do not manage their passwords in Hubstaff.
- Without SSO, each provisioned user still needs a Hubstaff password. You set and manage that password for every provisioned user in Hubstaff. To avoid this manual step, set up SSO.
To set up SSO, see How to configure Single Sign-on.
Before you begin
To set up SCIM provisioning with OneLogin, you need:
- An Enterprise plan and an account with Organization Owner, Organization Manager, or the Manage IT permission.
- Administrator access to your OneLogin account.
- Recommended: SSO configured for your organization, so provisioned users can sign in through OneLogin without a Hubstaff password.
Enable SCIM in Hubstaff
Step 1
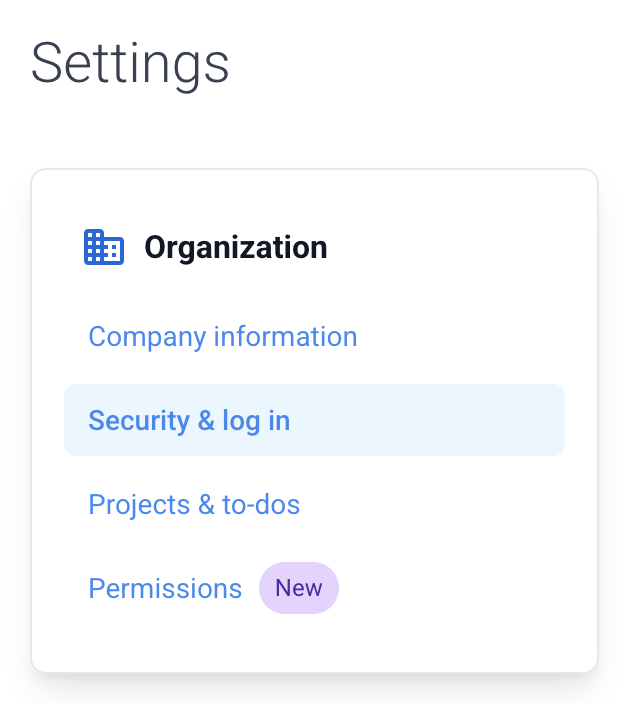
In Hubstaff, go to Settings > Organization > Security & log in.
Step 2
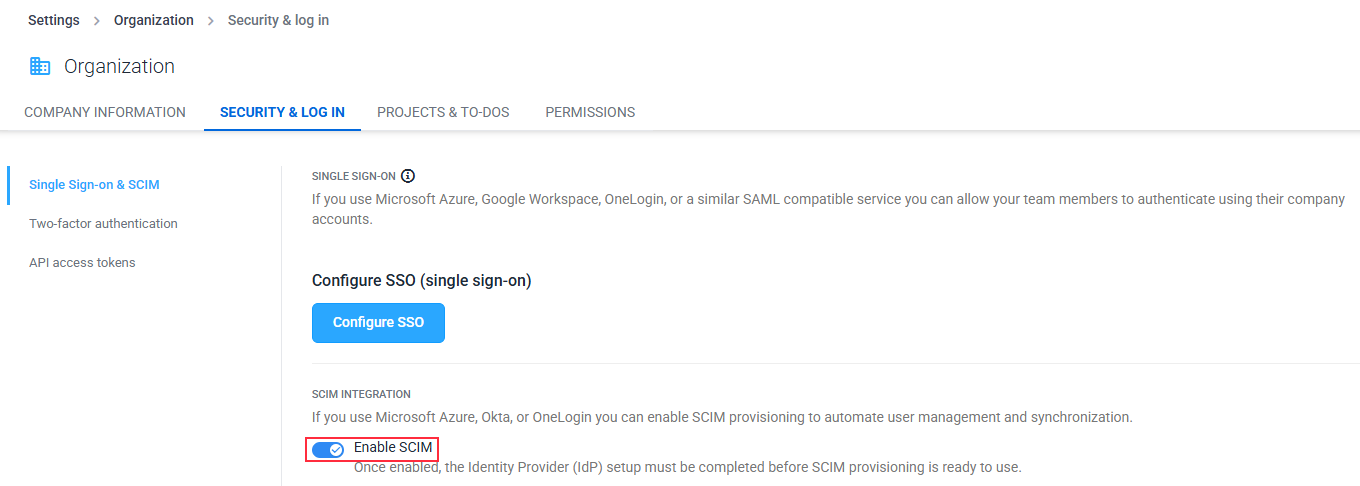
Open the Single Sign-on tab, then turn on the Enable SCIM toggle.
Step 3
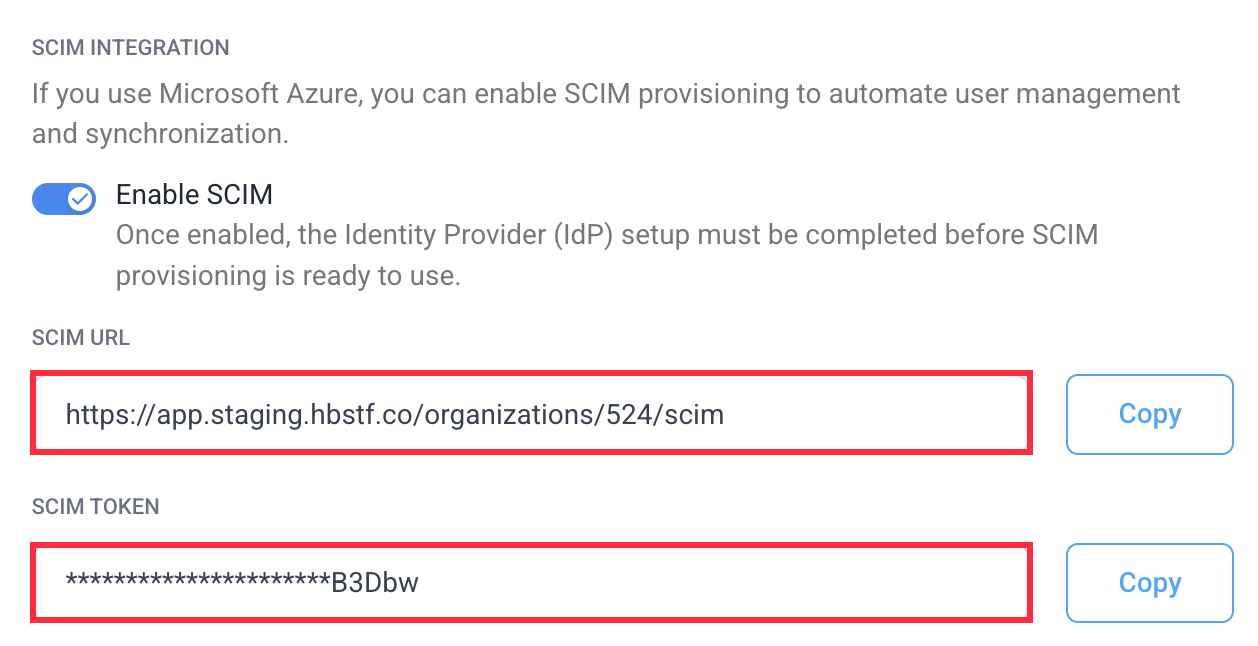
Copy the SCIM URL and SCIM token. You will paste both into OneLogin.
Create the OneLogin application
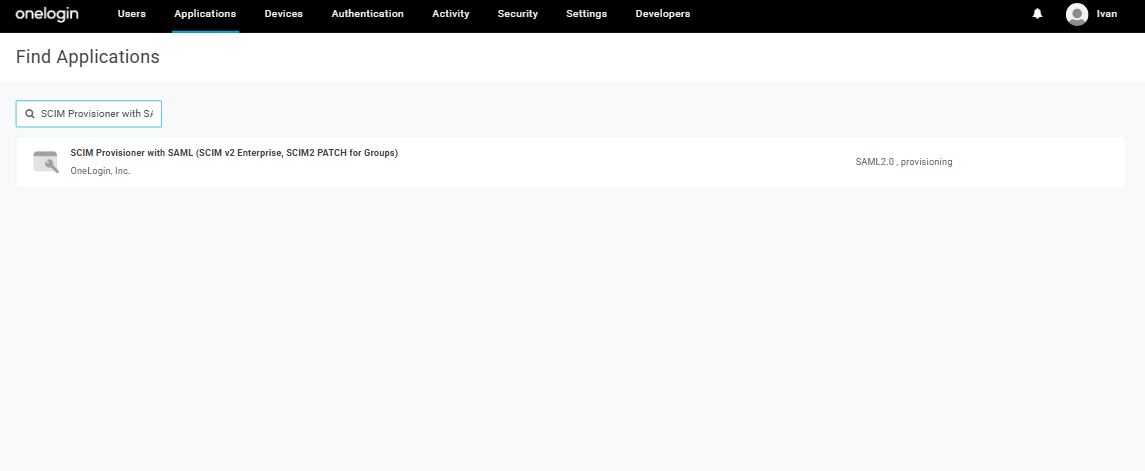
In OneLogin, add a new app and choose the type SCIM Provisioner with SAML (SCIM v2 Enterprise, SCIM2 PATCH for Groups).
Configure the SCIM connection
Step 1
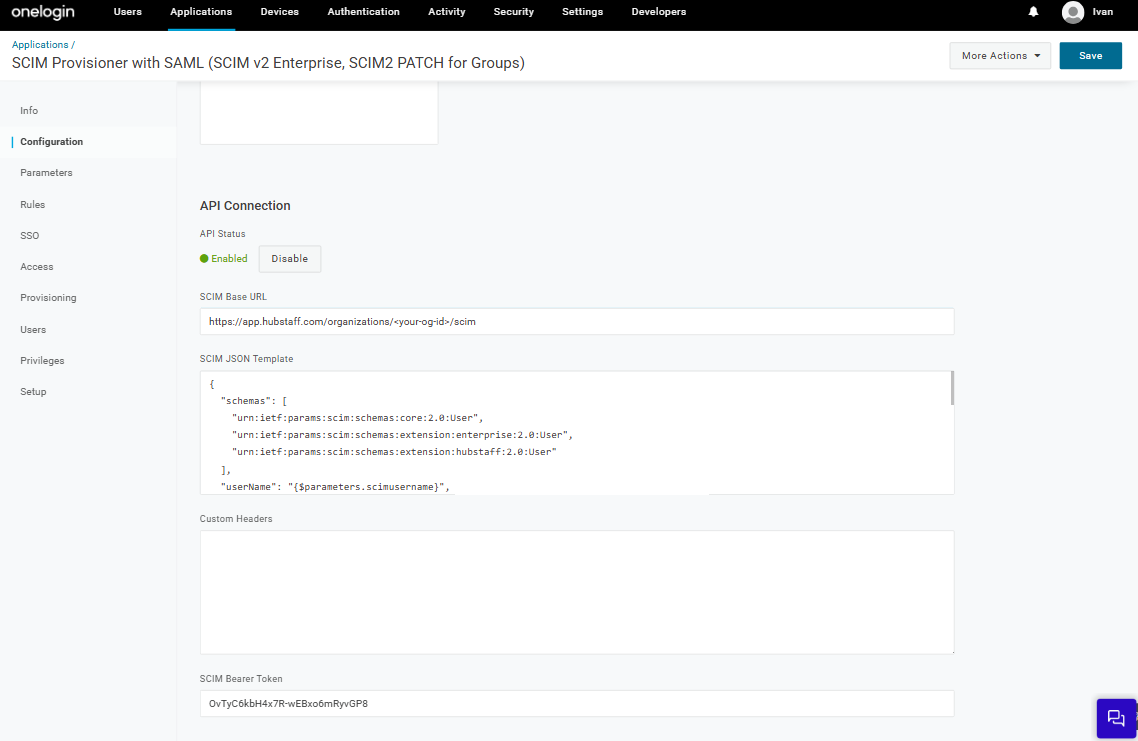
On the app’s Configuration tab, enter SCIM Base URL and SCIM Bearer Token using your Hubstaff SCIM URL and token.
Step 2
On the same tab, replace the SCIM JSON Template with the following:
{
  "schemas": [
    "urn:ietf:params:scim:schemas:core:2.0:User",
    "urn:ietf:params:scim:schemas:extension:enterprise:2.0:User",
    "urn:ietf:params:scim:schemas:extension:hubstaff:2.0:User"
  ],
  "userName": "{$parameters.scimusername}",
  "name": {
    "familyName": "{$user.lastname}",
    "givenName": "{$user.firstname}",
    "formatted": "{$user.display_name}"
  },
  "emails": [{
    "value": "{$user.email}",
    "type": "work",
    "primary": true
  }],
  "title": "{$parameters.title}",
  "urn:ietf:params:scim:schemas:extension:enterprise:2.0:User": {
    "department": "{$parameters.department}"
  },
  "urn:ietf:params:scim:schemas:extension:hubstaff:2.0:User": {
    "osUsername": "{$user.email}"
  }
}
Map the username
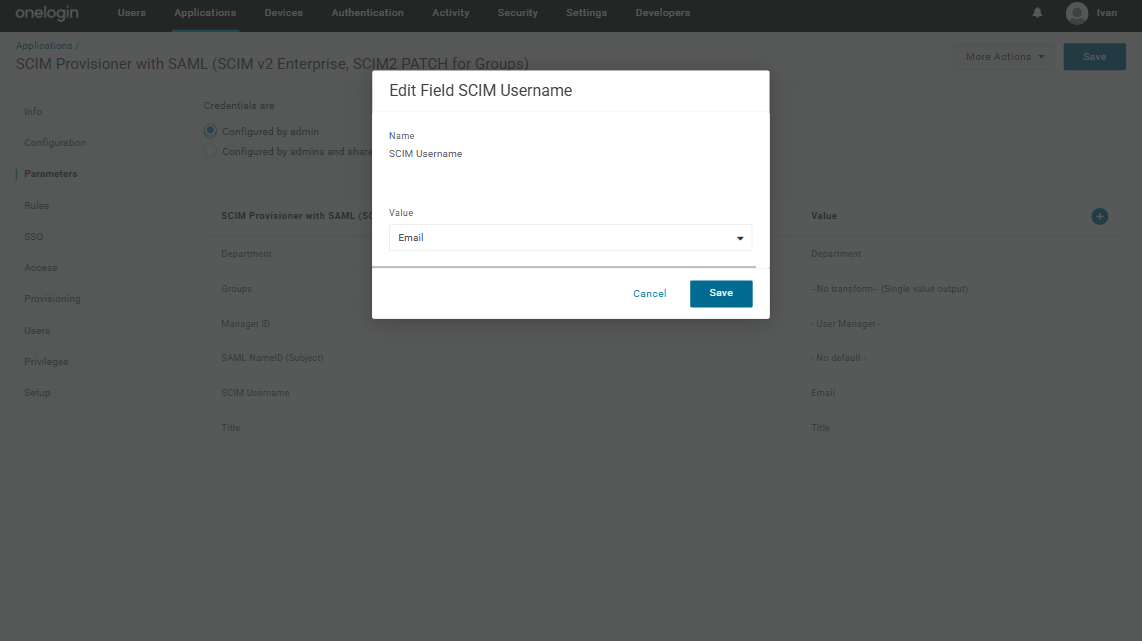
On the Parameters tab, map SCIM Username to Email. This ensures each Hubstaff member is matched by their email address.
Enable provisioning
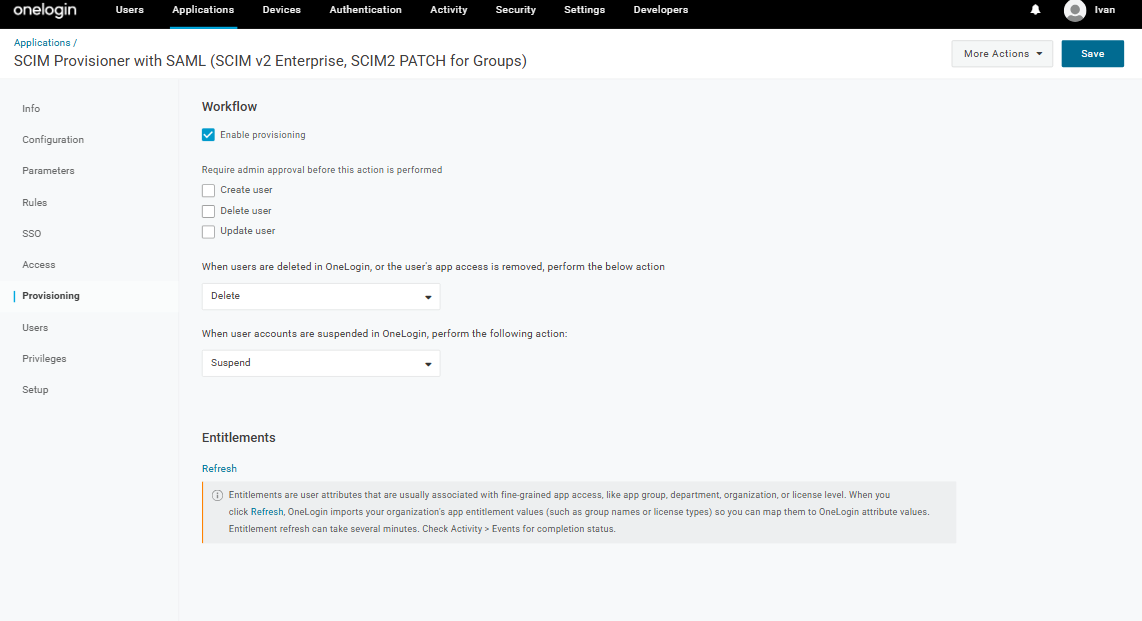
On the Provisioning tab, check Enable provisioning. Under Require admin approval before this action is performed, uncheck Create user, Update user, and Delete user so changes flow to Hubstaff without a manual approval step.
Provisioning users
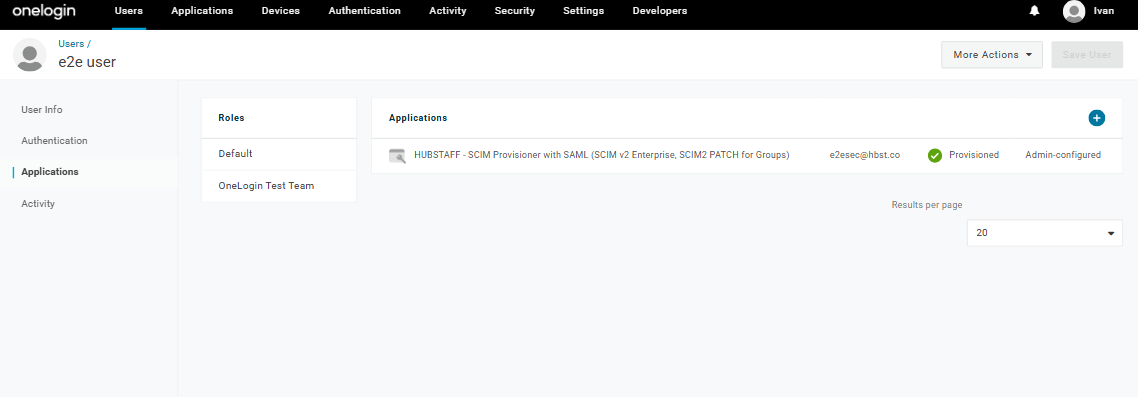
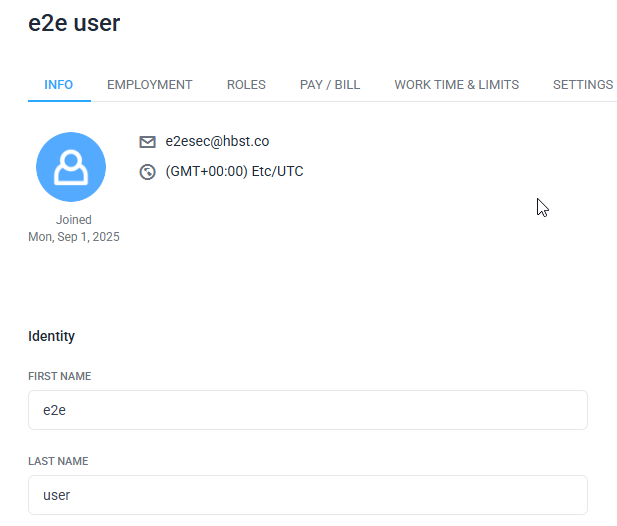
Once added, the member appears on your Hubstaff People > Members page. These fields sync from OneLogin: name, email, job title, department, and OS username (set to the member’s email). If OneLogin sends a single formatted display name, its first word becomes the first name, and the rest becomes the last name.
Updating users
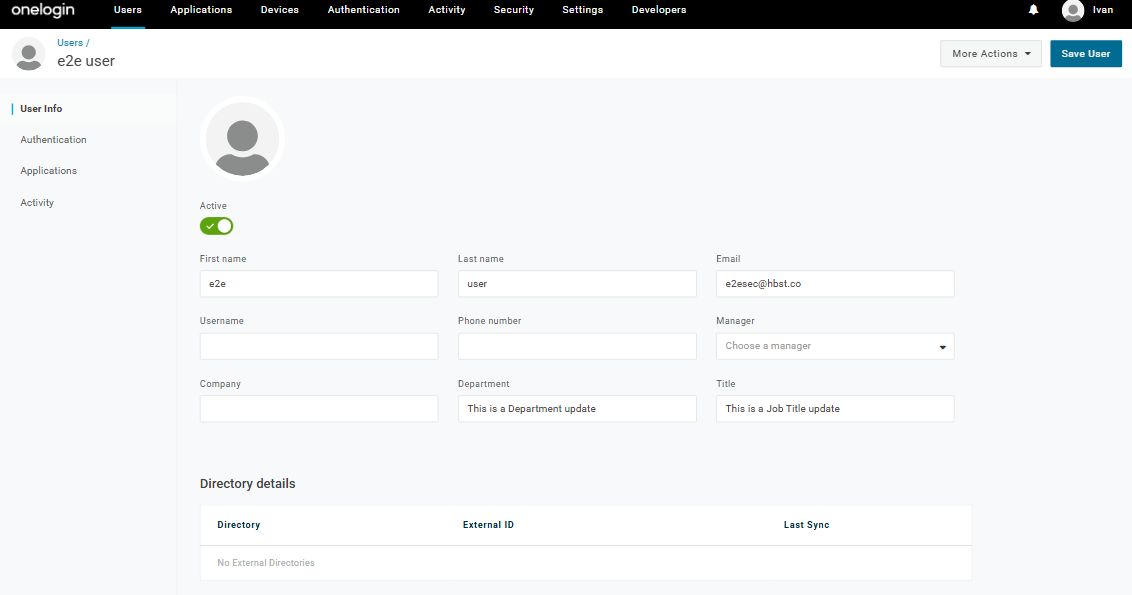
When you change a member’s profile in OneLogin, the update syncs to Hubstaff. Fields you do not change stay as they are.
De-provisioning users
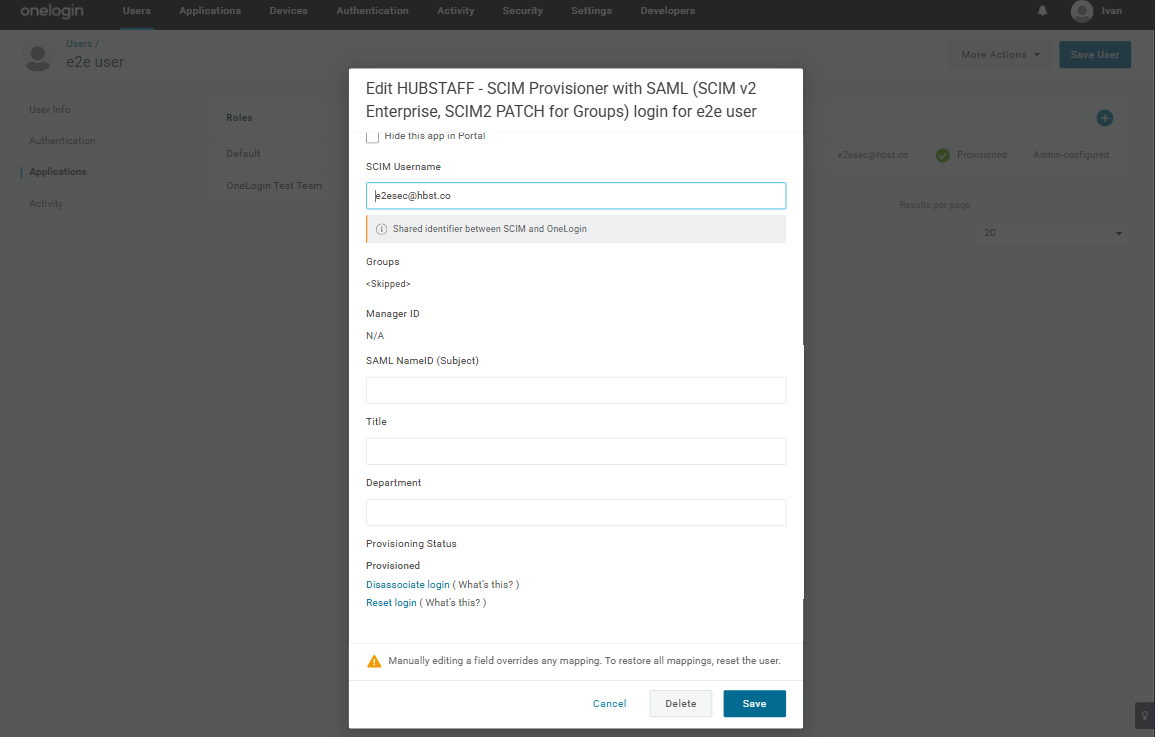
To remove a member, remove the Hubstaff app from the user in OneLogin, or deactivate their OneLogin account. They are removed from your Hubstaff organization. Re-adding the app restores their membership.
Managing and disconnecting SCIM
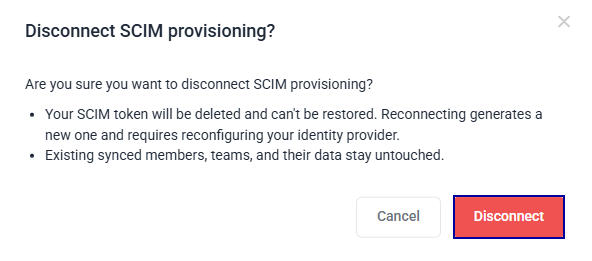
To stop SCIM provisioning, turn off the Enable SCIM toggle. A confirmation dialog appears; select Disconnect to confirm. Disconnecting deletes the SCIM token and removes the SCIM link from your members. Your members keep their names, team memberships, and tracked data. Only the connection to your identity provider is removed.
If you re-enable SCIM later, Hubstaff generates a new SCIM token, and the old one stops working, so update OneLogin with the new token.
Troubleshooting and FAQ
A provisioned user can’t sign in to Hubstaff.
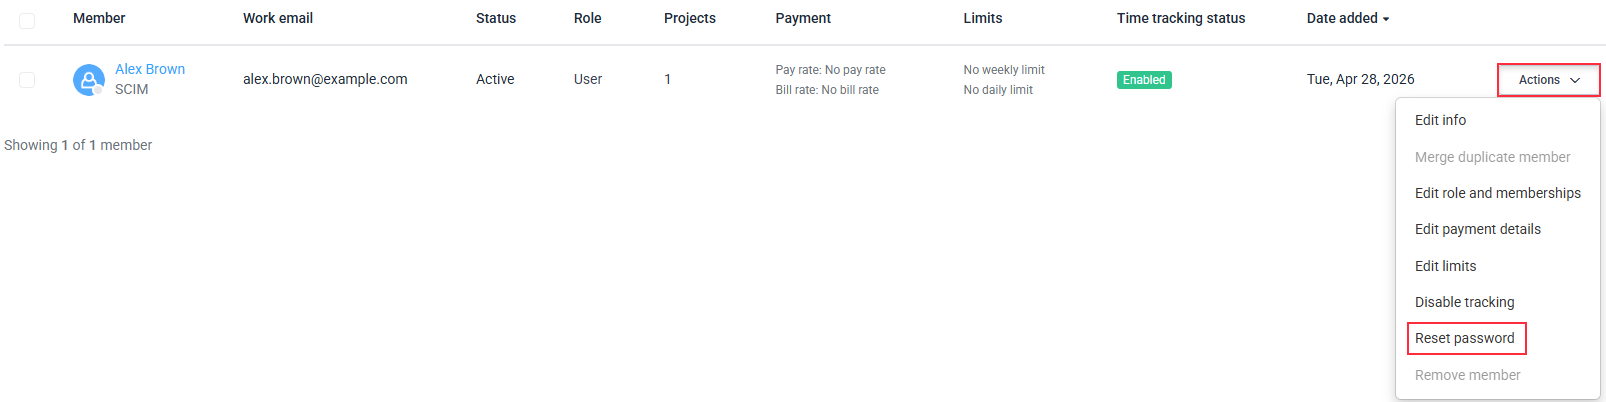
SCIM creates the account but does not set a way to sign in. If your organization uses SSO, the user signs in through OneLogin with Log in with SSO. If you do not use SSO, go to People > Members. Next to the member, select Actions > Reset password. Choose Automatically generate password to view and copy a generated password in the next step, or select Create password to set one manually. Share the password with the member through a secure channel. You can also set up SSO so they can sign in through OneLogin. See How SCIM and SSO work together above.
Do I have to set up SSO to use SCIM?
No. SCIM and SSO are independent. We recommend setting up both so you do not have to manage passwords manually in Hubstaff.
Can I sync OneLogin groups to Hubstaff teams?
No. Group-to-team sync is not available for OneLogin. Use Microsoft Entra ID or Okta if you need it, or manage teams directly in Hubstaff.