10 minutes
Hubstaff Gusto Payroll Setup
Hubstaff integrates with Gusto as a payroll integration option. This allows you to seamlessly integrate the hours you track with Hubstaff when processing payments for your team.
Employees and pay periods need to be set up in Gusto before linking users to Hubstaff.
⚠️ Supported employees only — contractors not supported
The Gusto integration works exclusively with W-2 hourly employees. The following are not supported:
- 1099 contractors — Gusto does not allow payment syncing for contractors.
- Fixed-rate employees — The Hubstaff connection is treated as a “job” in Gusto, and fixed-rate roles cannot hold multiple jobs.
If you need to pay contractors or fixed-rate workers, consider Wise as an alternative.
How to set up your Gusto integration
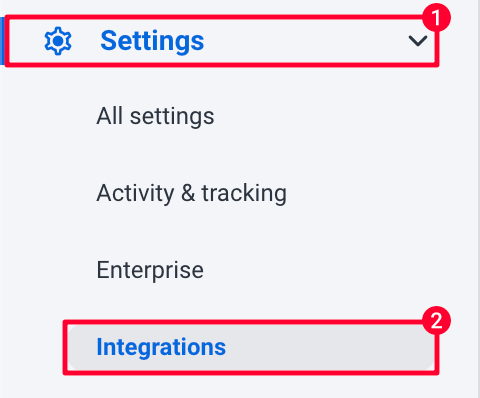
Step 1
Select Settings > Integrations from the main navigation side menu. Click Add Integration on the right-hand side of the Integrations page.
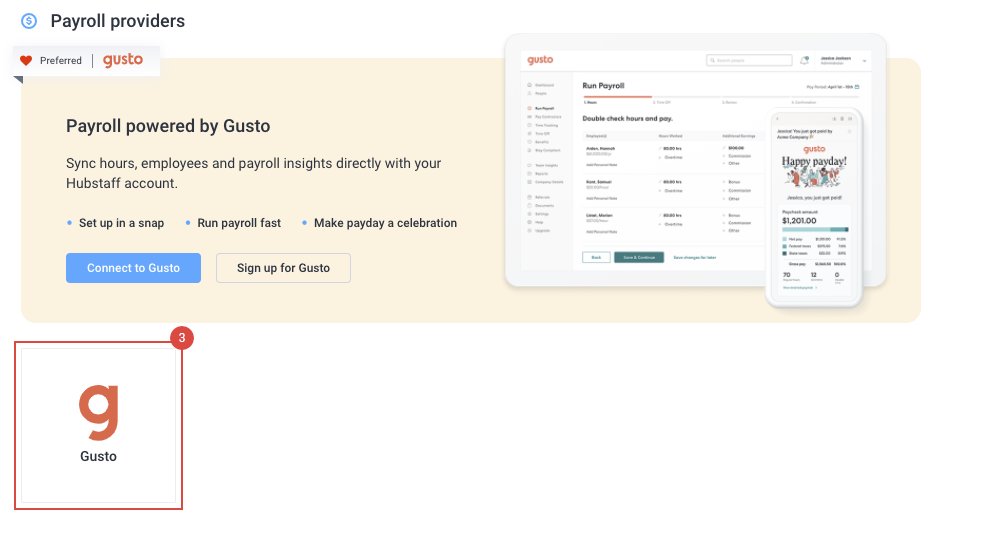
Step 2
Scroll down the page and select Gusto under the Payroll Providers section.
Step 3
The Setup integration page will open. A notification will appear alerting you that you must have already created a Gusto account before attempting to connect it with Hubstaff.
Press the Next button to continue.

Step 4
The Gusto authorization page will load. If you haven’t already signed in to your Gusto account, the Gusto sign-in page will appear.

After signing in, click Authorize to allow Hubstaff to connect with your Gusto account.

Step 5
Select which company from Gusto you wish to connect with Hubstaff then press Save.

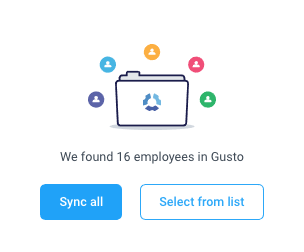
Step 6
Hubstaff will then detect how many employees you have within your Gusto company. If you wish to sync them all with Hubstaff, then click the Sync All button. If you wish to select individual employees out of the list, click on Select from list.
Step 7
On the Select employees page, there will be two columns.
- The Invite new members into Hubstaff column on the left shows all Gusto employees who do not match a respective Hubstaff account by both name and email address. If you check any users under this column it will send out an automatic email to the employee asking them to create a Hubstaff account.
- The right-hand column Sync to existing Hubstaff members will show all employees who have been automatically matched by either their name or email address to their preexisting account in Hubstaff. If you check any users under this column their account will be synced with the Hubstaff/Gusto integration.
- The Sync new members daily will Hubstaff fetch new employees in Gusto into Hubstaff.
- Once you have checked all relevant boxes, select the Finish button to finalize your integration.

Step 8
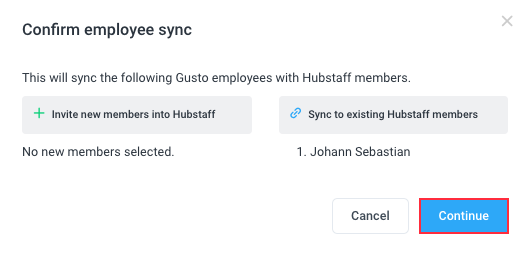
A pop-up notification will appear asking you to confirm your selection on the previous screen. This allows you to make any changes if you have accidentally checked a box for an employee you do not wish to bring into the integration.
Click Continue to confirm your selections.
Step 9
Your Gusto integration is now set up within Hubstaff.
Gusto Members
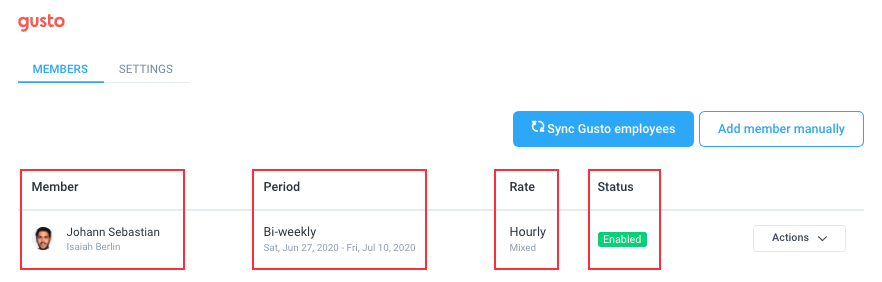
The Gusto Members area can be accessed via Integrations > Gusto.
A few of the key features:
- Members – This column shows a list of all team members who are connected with Gusto. If their name is red – this indicates this user is disabled for auto payments, and will not receive payments via auto payroll as well.
- Period – This column shows the pay period that the user is set to be on for payroll purposes.
- Rate – This column shows the hourly rate for the employee. Note: only hourly W-2 employees are supported in this integration.
The Actions menu has the following options:
- Edit – By clicking Edit, you can edit the user’s pay period, pay type, the amount they receive (hourly rate), bill rate, as well as if timesheet approval is required or not.
- Enable – This option enables their account to be able to receive auto payments. This setting relates to our auto payroll feature.
- Delete – Selecting this will remove the user from your integration.
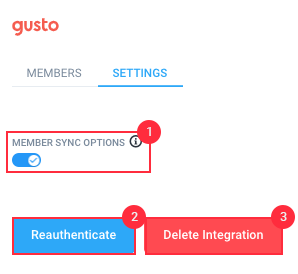
Gusto Settings
The Settings area can be accessed by clicking on the Settings tab under the Gusto logo.
There are 3 options available that can be changed from within the Gusto Settings page.
- Sync new members daily – this setting will enable Hubstaff to scan your Gusto account daily to incorporate newly added members
- Reauthenticate – You can reconnect your Gusto account with Hubstaff by clicking this button. This will also grant permissions between the two systems.
- Delete integration – This will remove your Gusto integration from Hubstaff.