13 minutes
Adding Notes in Hubstaff
While tracking time, users can add work notes, which lets them provide more details about the tasks or projects they working on.
There are two types of notes in Hubstaff: Time Notes and Job Notes.
Time notes allow employees to add details such as client numbers, codes, incident numbers, request IDs, ticket numbers, and any supplementary information about the task.
Time notes can be extracted via the Reports, Activity, and Timesheets sections to help owners and managers collect the recorded note data.These can be added on time tracker, or add them manually via different sections of the web dashboard.
Job notes allow users to attach photos to jobs and are enabled only when tracking time to a specific job under a work order using the mobile app. Job notes are only visible on work order jobs.

Adding Time Notes in the Desktop App
Step 1
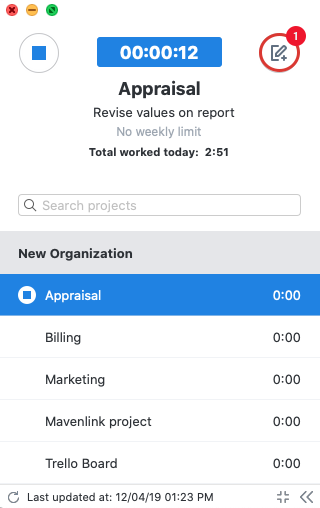
Once you have started tracking time to a project, click Add note.
Step 2
Enter your notes and then click on Add note.

After clicking on Add note, your note will be added to the current 10-minute block of time.
Adding notes on the mobile app
There are two types of notes you can add using the mobile app: Time Notes and Job Notes. Job notes are only available when users are tracking time to a job from a work order otherwise, only Time notes are available.
Adding time notes on the mobile app
Step 1
Once you’ve started tracking time, click on the Add note icon from the right side of the project selection section.

Step 2
Enter your note and click Save to send the note.

Adding job notes on the mobile app
While tracking time to a work order job on the mobile app, you can add notes and photos to each job. To add notes, follow this guide:
Step 1
Click on the Job note button on the mobile app timer page.

Step 2
Write a note, and/or upload an image (or multiple images) to add to your job note then hit Save.

Step 3
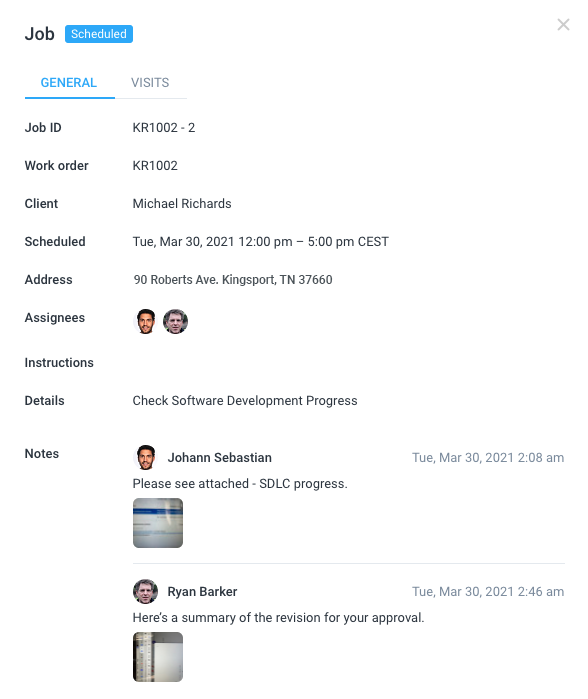
The note will appear on the dashboard via Work orders > Job name > Actions > View Job under the General tab as well as the work order page on the mobile app.
Adding Time Notes to tasks in the Hubstaff App
Step 1
Once you have started tracking time to a task, click Add Note and input the desired details.

Step 2
Enter your desired note.
Adding Time Notes in Your Activity Section
Step 1
Navigate to the Activity > Screenshots section. Click the pencil icon at the bottom of the segment of time you wish to add the work note for.
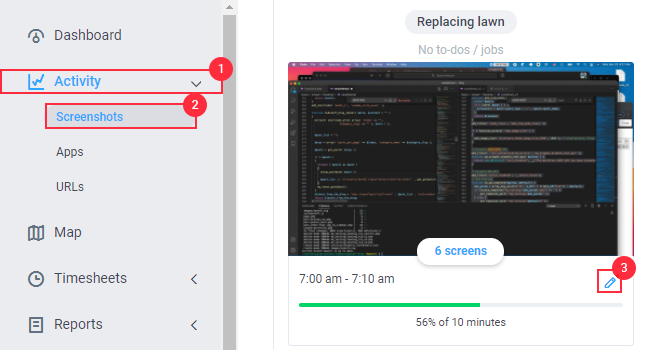
Step 2
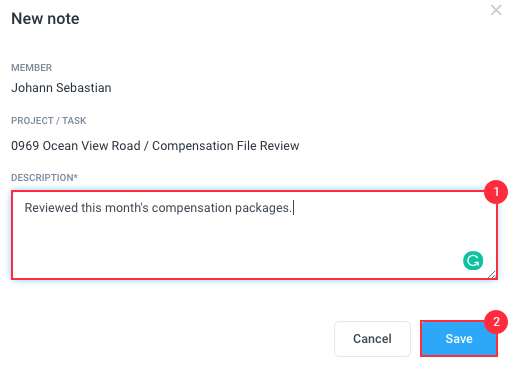
Click on the Add note button.

Step 3
Enter your note into the modal box that appears and click Save.
This feature gives workers the option to add a description to their screenshot and give more detail surrounding each 10-minute segment of time.
A user can add multiple notes for each segment of time, Hubstaff does not limit the number of notes that can be added.
Viewing Time Notes in Your Activity Page
After a note has been added, clicking on the pencil icon will display a dialog box containing the note. Users can edit their notes from this screen if needed.

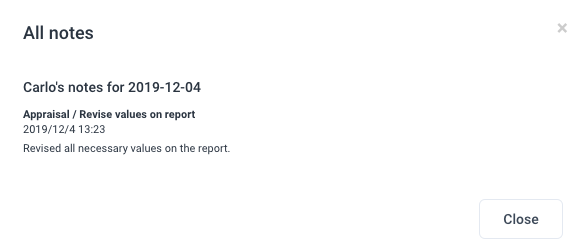
At the top of the Activities screen, navigate to the top right hand side, under Filters and you will find the “View all notes” button (3).
![]()
When this button is clicked, it will launch a pop-up screen that contains all notes for the selected user for the nominated day.

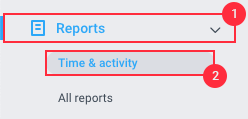
Viewing Time Notes in the Reports Section
Step 1
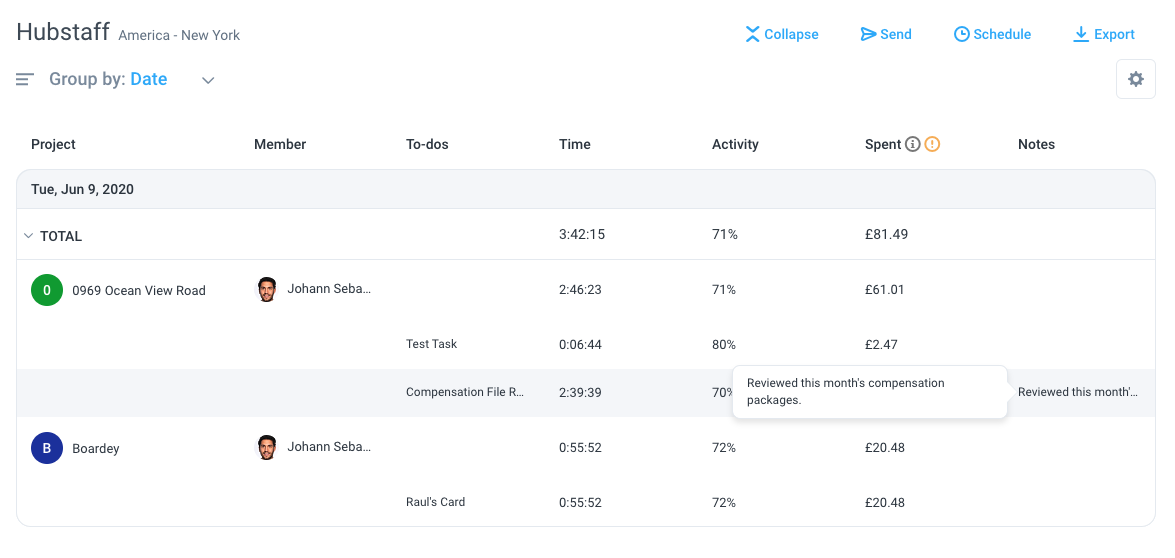
Click Reports on the left sidebar then select the Time & Activity tab. Work notes will be displayed in the Notes column, as shown below.
Step 2
Work notes will appear next to the dates or time entries where notes were added.
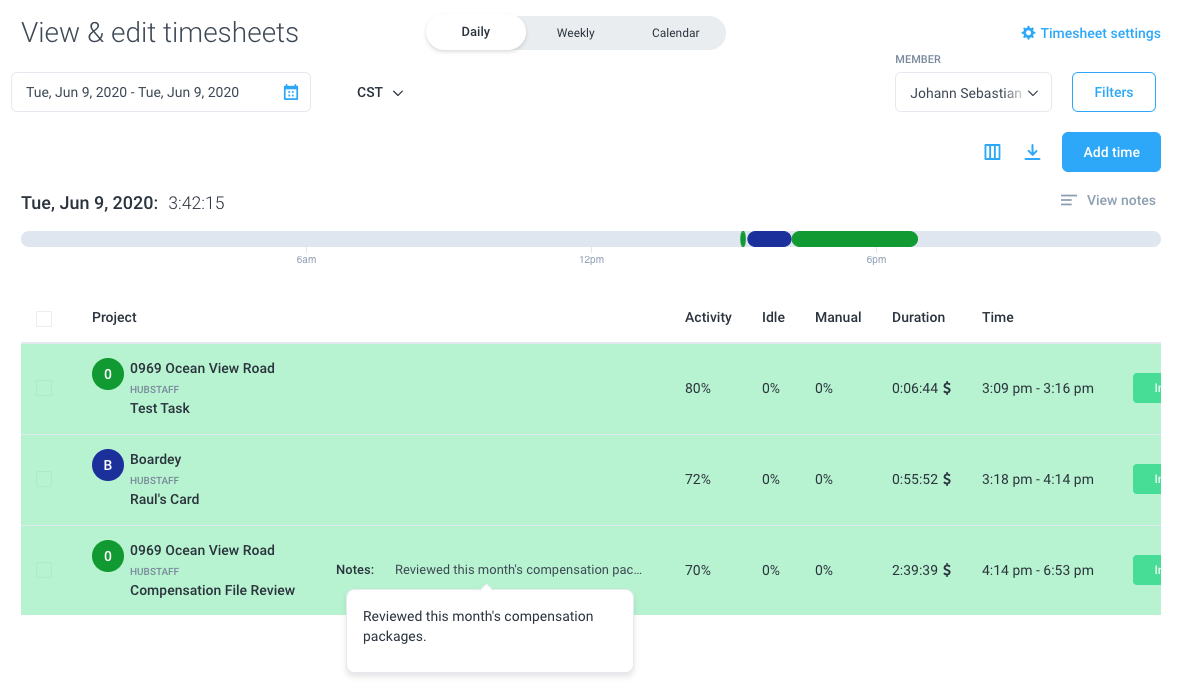
Viewing Time Notes in the Timesheets Section
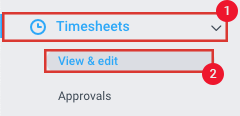
Step 1
Navigate to Timesheets > View & edit.
Step 2
Select the Daily view. Work notes will appear on the column after the project name.