13 minutes
How to Set Up Remote vs. Office Tracking in Hubstaff
Hubstaff’s Remote vs. Office feature lets owners, managers, and team leads compare productivity metrics based on where team members are working. When enabled, the desktop app collects network data to automatically or manually identify office locations so you can see whether your team is working remotely or from the office without asking them to self-report.
Before setting up Remote vs. Office tracking
- Your organization must have the Hubstaff Insights add-on active
- Team members must be using the latest desktop app version
- Network data collection must be enabled for your organization (see Step 1 below)
- Team members must consent to network data collection when prompted — if they decline, they won’t be able to track time while the feature is required
How to Enable Remote vs. Office Tracking
Step 1
Go to Settings → Activity & Tracking → Activity → Remote vs. Office
Step 2
Turn on the Network Data Collection global toggle. This enables the toggle for all members. You can also enable it for individual members only.
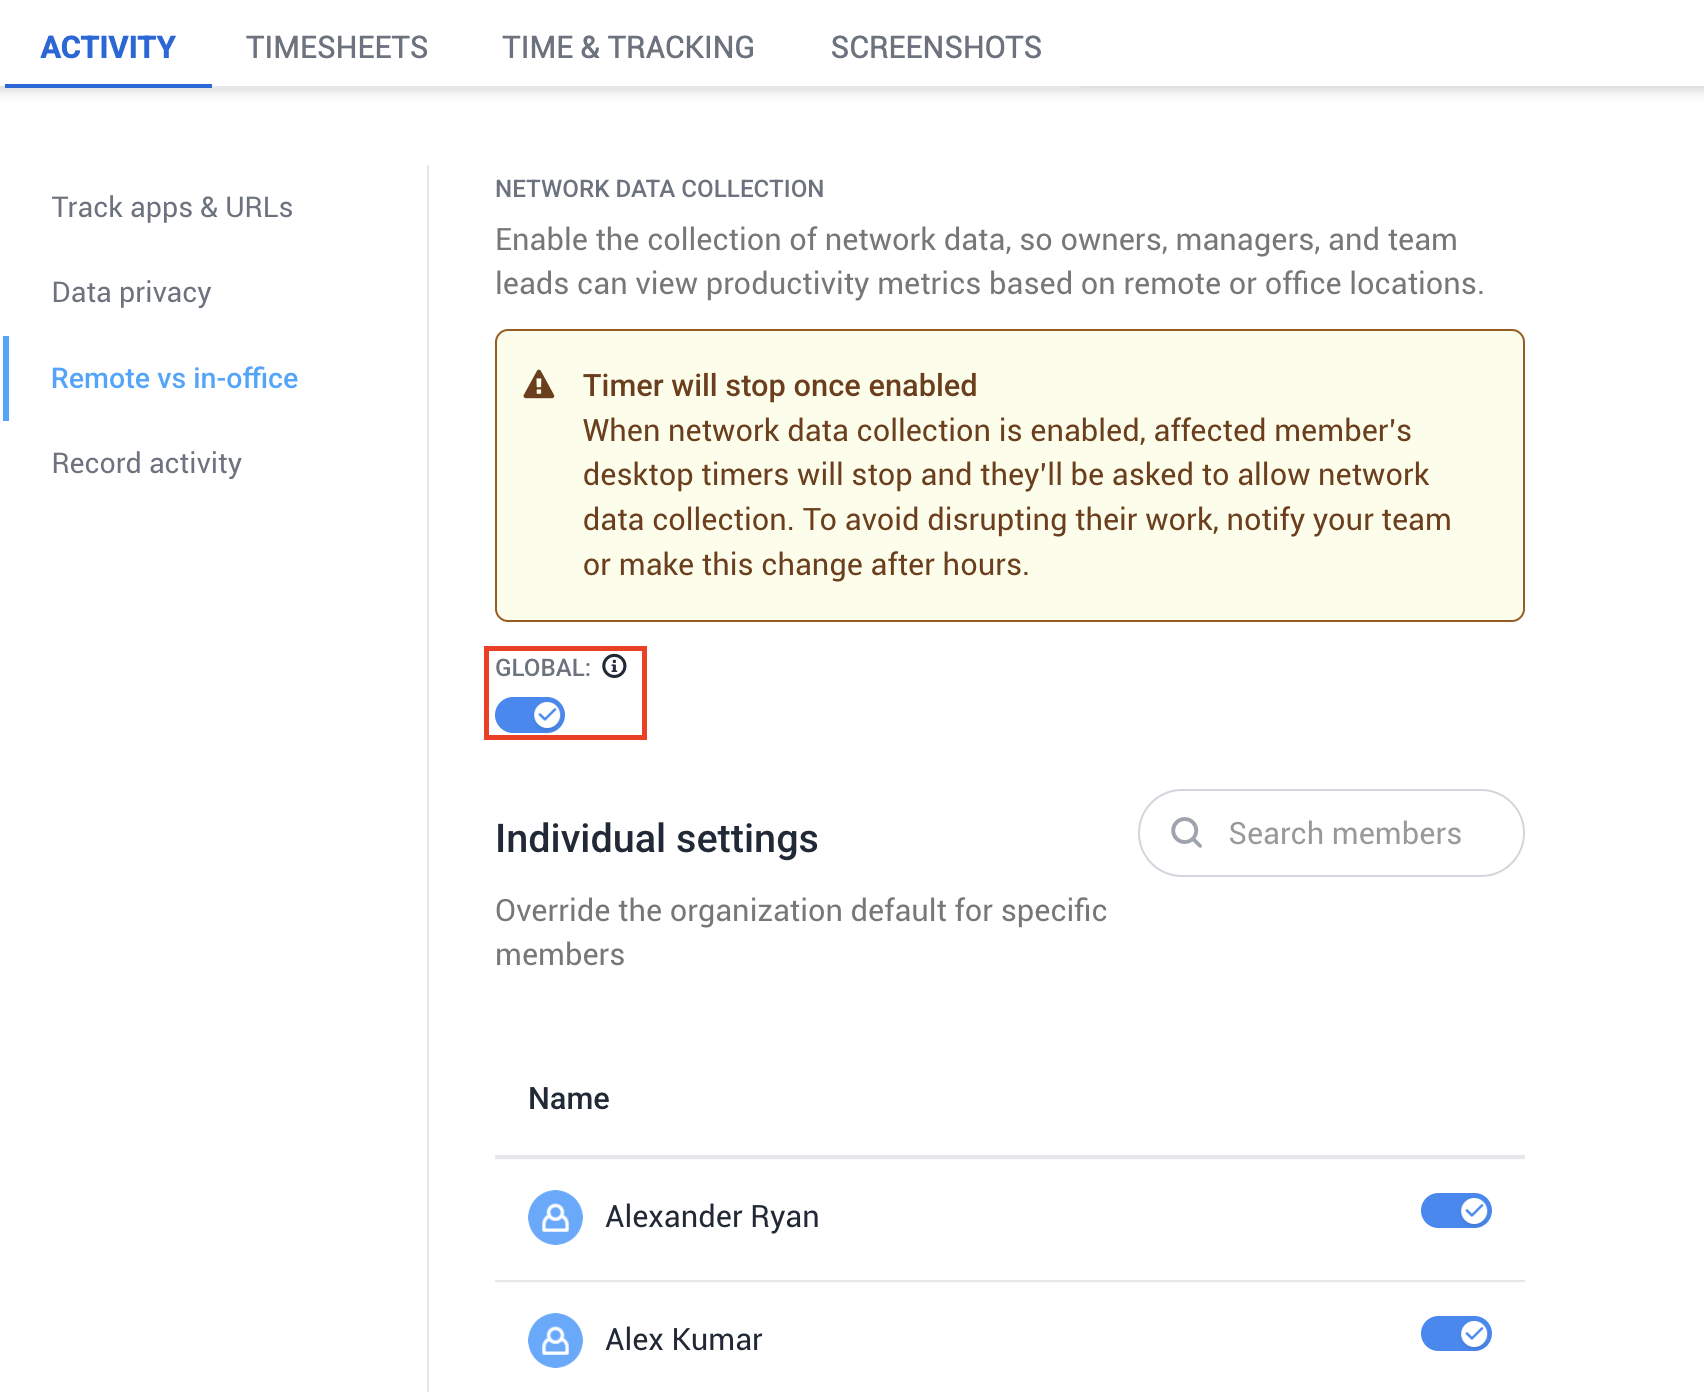
Hubstaff needs to know which network(s) correspond to your office(s). There are two ways to define office locations, and you can use both at the same time.
Automatic Detection
Automatic detection handles known shared networks without any manual input. Automatic office detection is enabled by default and requires no additional setup. To find the automatic detection setting:
- Go to Settings → All Settings → Insights → Remote vs. Office → Office Locations
- Locate Enable automatic detection
How automatic detection works
When 3 or more team members track time on the same router MAC address within the same day, Hubstaff automatically registers that network as an office location. From that point on, Hubstaff marks anyone tracking time on that same router as “in the office” — even if fewer than 3 people are connected.
If no team members track time from an auto-detected office for 16 consecutive days, Hubstaff expires and removes that location. It will re-register automatically the next time the 3-member rule is met.
Manually Add an Office Location (Optional)
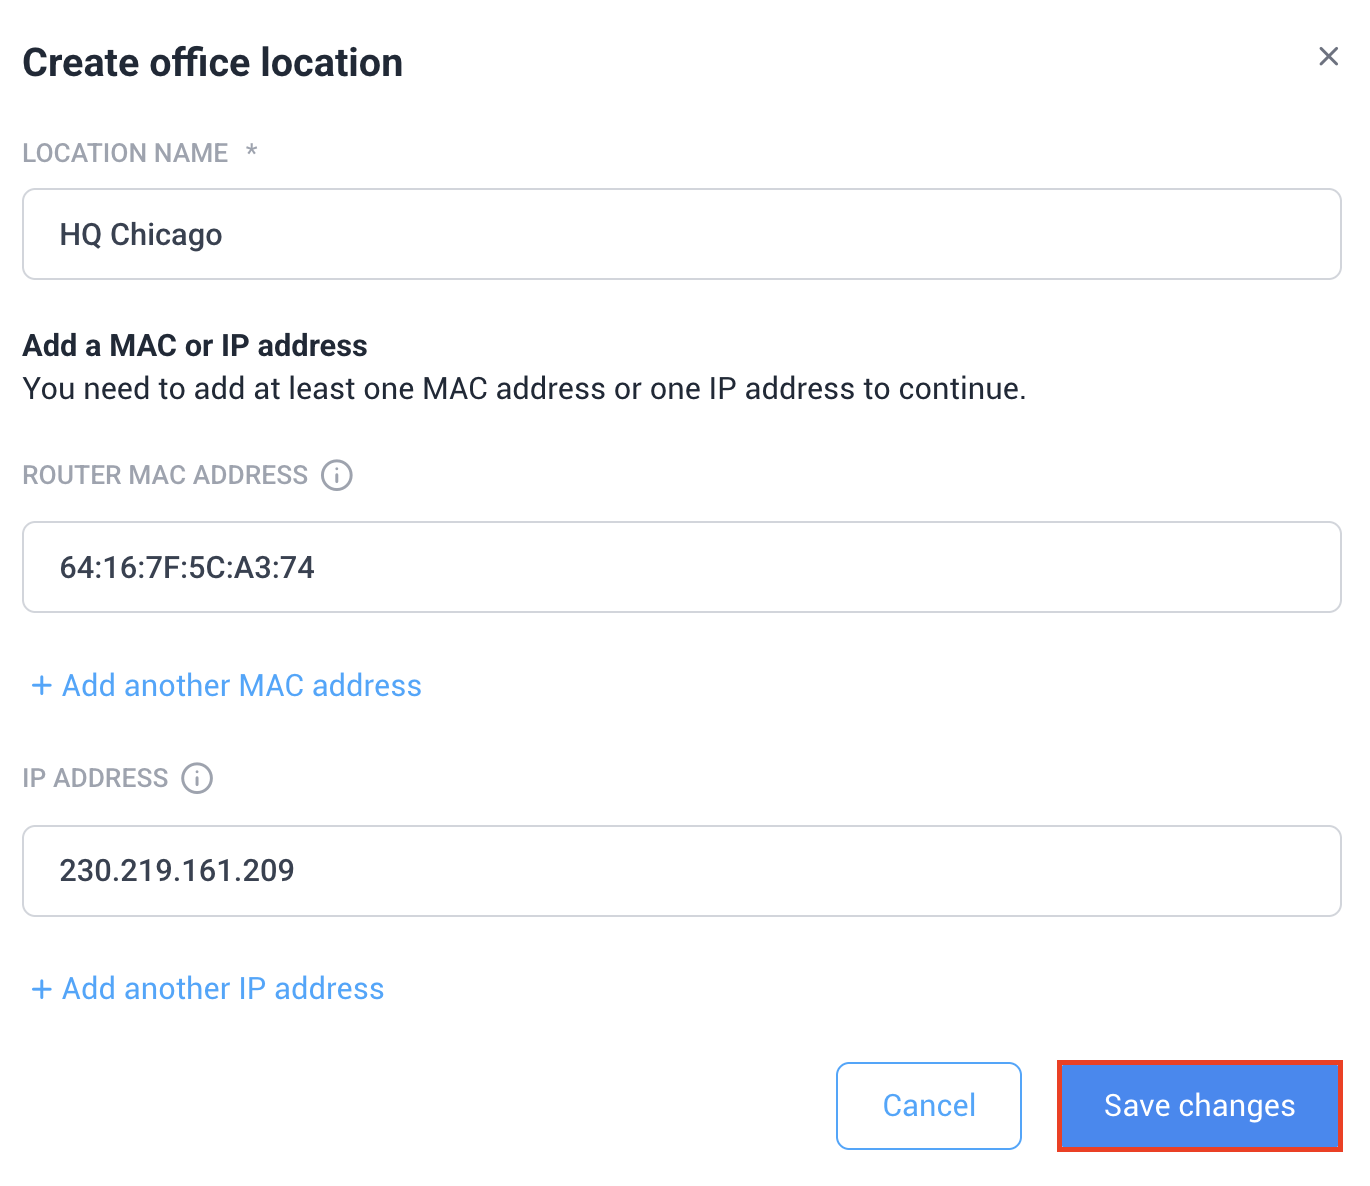
Manual setup lets you define specific locations by IP or MAC address.
- Go to Settings → All Settings → Insights → Remote vs. Office → Office Locations
- Click the Create office location button
- Fill in the details:
- Location name (optional, up to 70 characters — e.g., “HQ Chicago”)
- Public IP address (optional, but at least one IP or MAC is required)
- Router MAC address (optional, but at least one IP or MAC is required)
- Click Save changes
If a location should never be classified as an office (e.g., a co-working space or Starbucks that was auto-detected), use the Actions → Mark as non-office option to exclude it permanently.
How Hubstaff Determines Office vs. Remote
Once office locations are configured, Hubstaff classifies each block of tracked time as one of three categories:
| Category | When it applies |
| Office | Time tracked while connected to a network that matches a manual or auto-detected office location |
| Remote | Time tracked on any network not recognized as an office |
| Unknown | Time that can’t be classified |
What counts as a workday location
If a team member tracks 51% or more of their time from one location in a day, that location is used for their daily classification across widgets like Utilization, Start/End Time, and Member Overview.
Unknown Time: What It Is and Why It Happens
Some tracked time can’t be classified as office or remote. This is labeled Unknown and is excluded from Remote vs. Office reports and widgets. This is expected behavior and does not affect your other time tracking data.
Common reasons time is marked Unknown
- Manual time entries — time added manually has no network data
- PTO and holidays — these don’t have associated tracking sessions
- Unsupported app versions — older desktop clients, mobile apps, and the Chrome extension don’t collect network data
- Offline tracking — time tracked without an active internet connection
Scenarios Where Network Data May Not Be Captured
Even when network data collection is enabled and the team member has consented, there are some technical situations where the public IP or router MAC address may not be recorded.
| Scenario | What’s captured | What to expect |
| No internet connection (offline tracking) | Neither IP nor MAC | Time is classified as Remote |
| Timer started and stopped very quickly | Neither IP nor MAC | Time is classified as Unknown |
| Active network without a valid public IP (e.g., misconfigured VPN, captive portal) | MAC only (no IP) | Time classification depends on whether MAC matches a known office |
| Server IP endpoint temporarily unavailable | MAC only (no IP) | Time classification depends on whether MAC matches a known office |
Using Remote vs. Office in the Performance Page
Step 1
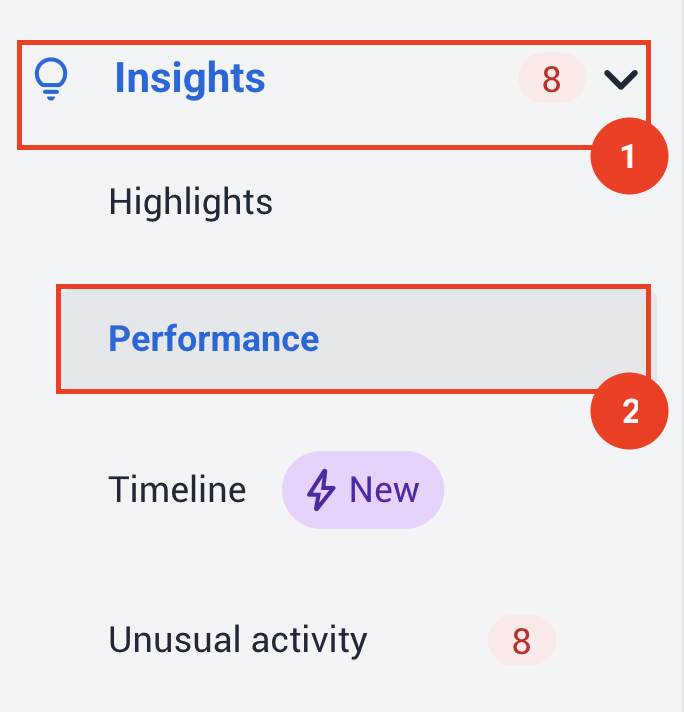
From the left-hand side menu in the Dashboard, go to Insights and then click on Performance
Step 2
Click the Remote vs. Office toggle at the top of the page
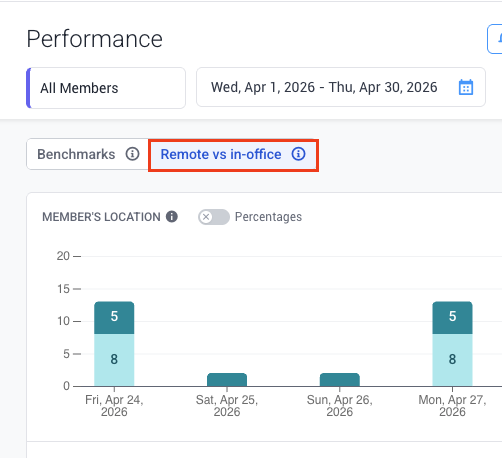
If not yet configured, you’ll see a prompt to set up office locations. If configured but no data has been collected yet, widgets will show empty states until data is available.
Step 3
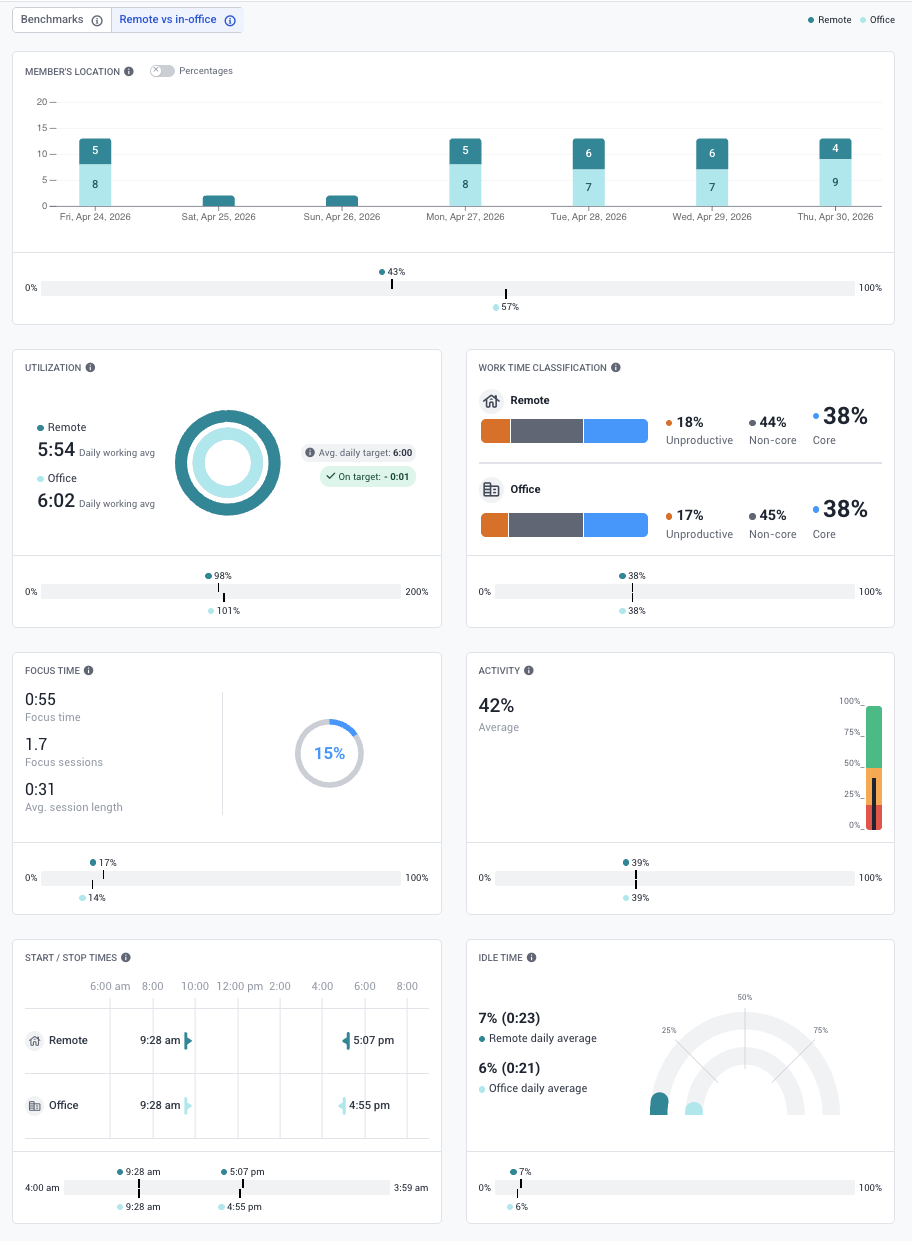
View your team’s productivity broken down by location across widgets, including:
- Utilization — remote vs. office daily averages
- Work Time Classification — core work, focus time, activity by location
- Idle Time — average idle time percentage for remote vs. office
- Start/End Time — average clock-in and clock-out times by location
- Member Location — daily and weekly breakdown of how many members worked remote vs. office
- Member Overview — per-member table showing remote time, office time, activity, and location history
FAQ
Does Hubstaff track my GPS location?
No. Remote vs. Office detection uses your device’s public IP address and router MAC address only. It does not track GPS or physical location data.
What happens if I work from a hybrid location (partly remote, partly in the office) on one day?
Hubstaff uses the location where you tracked 51% or more of your time that day. If no single location reaches 51%, the day may appear as remote in some widgets.
Will enabling this feature stop my team’s active time tracking?
Yes. Enabling network data collection for a member will stop their current tracking session. They’ll be prompted to consent to network data collection the next time they start the timer.
Is this data collected even if I’m not using Insights?
Yes. Once network data collection is enabled, data is collected regardless of whether your Insights add-on is active. This means your Remote vs. Office reports will already have historical data when you activate Insights.
Can I set up office locations before rolling out the feature to my team?
Yes. You can configure office locations and toggle settings before enabling network data collection for members.