5 minutes
Expense Reports
Expense reports are a great way to manage your team’s expenses. Our expense report shows expense data by date and time, and can also be filtered based on billable and non-billable items so you’re always on top of your team’s spending and keep track of your finances.
Generating expense reports with Hubstaff is easy:
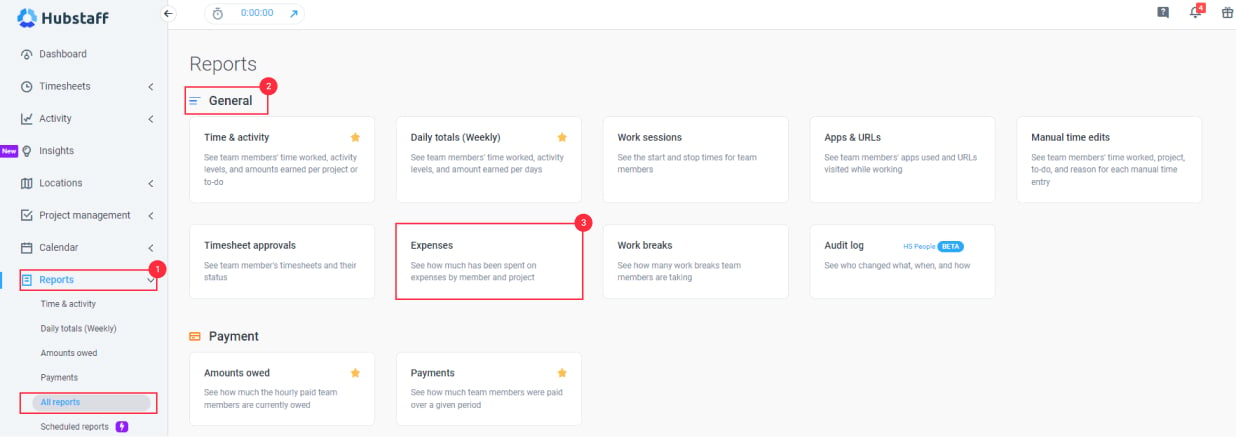
Step 1
Please navigate to the Reports section on the sidebar, click on Reports or All reports, then select Expenses under the General tab.
Step 2
Select the date range from the calendar then hit Apply.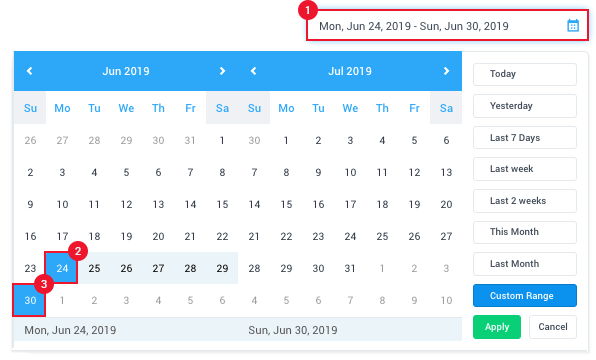
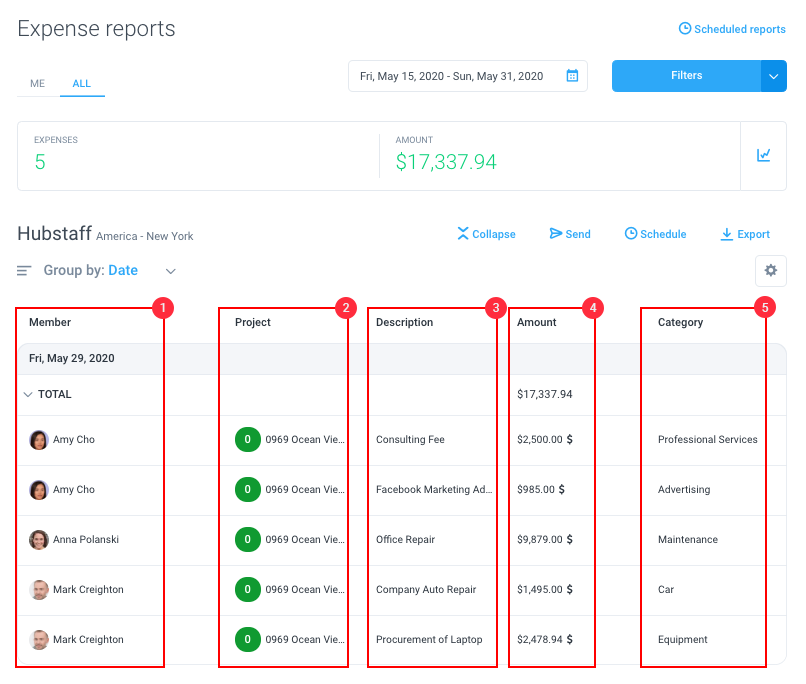
Step 3
The expense report will now be generated and you’ll be able to view the following columns:
- Member name – the name of the member who tracked the expense.
- Project name – the project where the expense is logged under.
- Expense Description – any notes added on the expense logged.
- Amount – the total amount of the expense.
- Category – shows the type of expense.
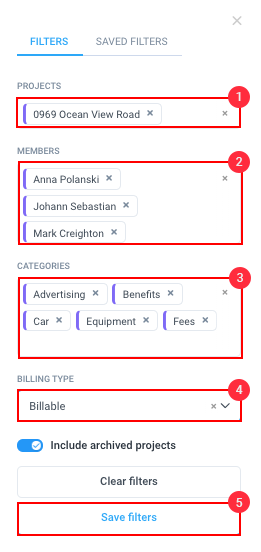
Step 4
You can also customize the report by clicking on the Filters button.

You’ll be taken to the Filters dialog where you can apply the following filters to the report. Hit Save filters to apply the filters to your report.
- Projects
- Members
- Categories
- Billing Type
Our Scheduled reports feature will let you have reports automatically sent based on a frequency of your choosing
If you need to Export a report for your own record keeping, we offer that option as well