9 minutes
Scheduled Reports
Hubstaff makes it easy for organizations to view and schedule business reports on a recurring basis through email (PDF or CSV format). This feature can be useful for bookkeeping purposes, sending clients and stakeholders information by scheduled email, or if certain members of your team oversee the performance and attendance of employees.
When you complete this article, you should be able to do the following:
- Schedule a report
- Edit a scheduled report
- Pause a scheduled report from being sent
- Delete a scheduled report

How to schedule a report
Step 1
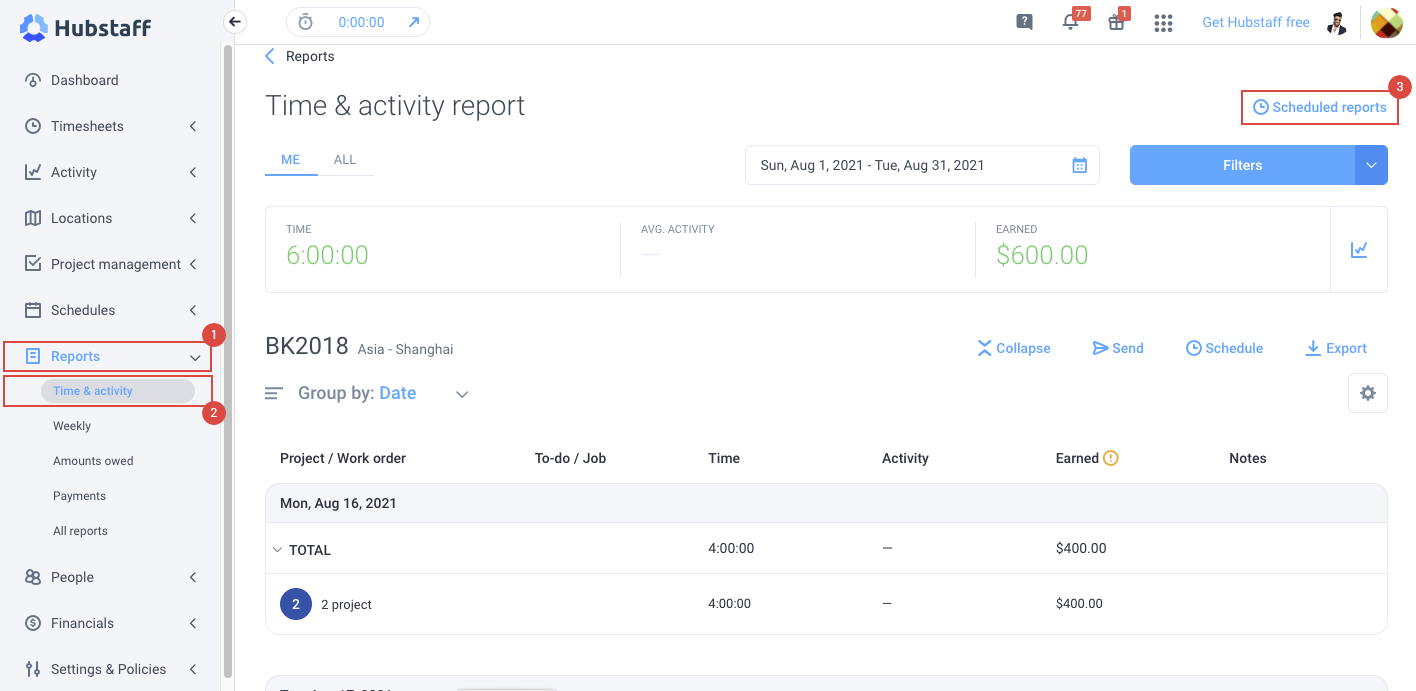
Click on Reports. Select the relevant report you wish to have sent on a scheduled basis. In this example, we are using the Time & Activity report. Click on the Schedule button.

Step 2
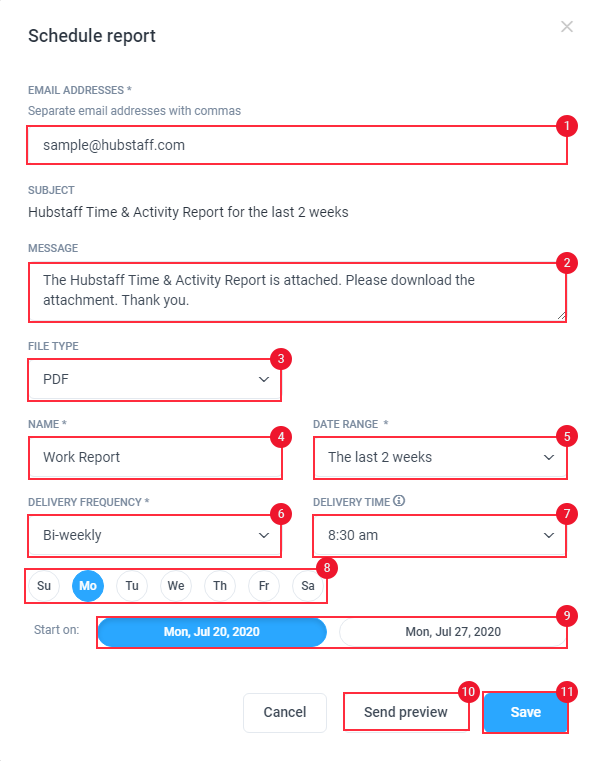
A pop-up dialogue will appear, allowing you to configure the details of your scheduled report.
-
- Email address: This is the email address to which the report will be sent
- Message: This is the body text of the email that the recipient will receive containing the report
- File type: You can choose to have the report delivered in either PDF or CSV format
- Name: This is the custom name given to the scheduled report you are creating, for your own referencing purposes
- Date range: This is the time period the report will cover
- Today
- Yesterday
- The last 7 days
- This week
- Last week
- The last 2 weeks
- This month
- Last month
- Delivery frequency: This is how often the report will be emailed. Available options:
- Daily
- Weekly
- Bi-weekly
- Monthly
- Delivery time: This is the time the email will be sent
Step 3
Press Save to create the scheduled report.
How to edit a scheduled report
Step 1
Click on Reports from the main navigation menu. Select the Time & Activity option. Click on Scheduled reports on the upper right-hand side of the page.
Step 2
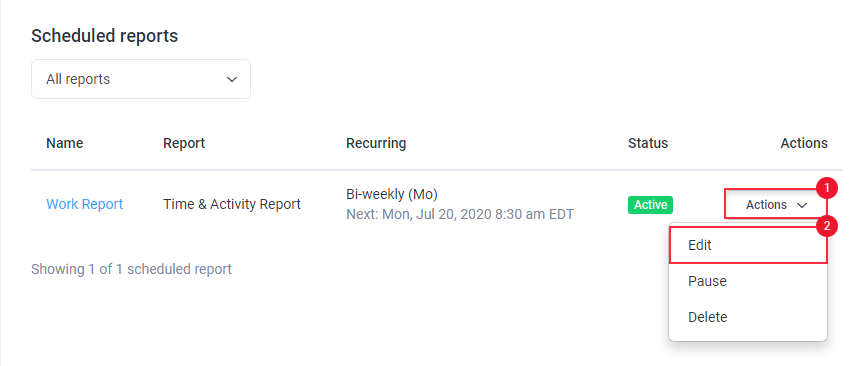
Select Actions against the relevant report. Click Edit from the drop-down menu that appears.
Step 3
A popup dialogue will appear. Edit the relevant fields to make the necessary changes to the schedule of your report. Click Update to finalize the changes.

How to pause a scheduled report from being sent
Step 1
Click on Reports from the main navigation menu. Select the Time & Activity option. Click on Scheduled reports towards the upper right-hand side of the page.
Step 2
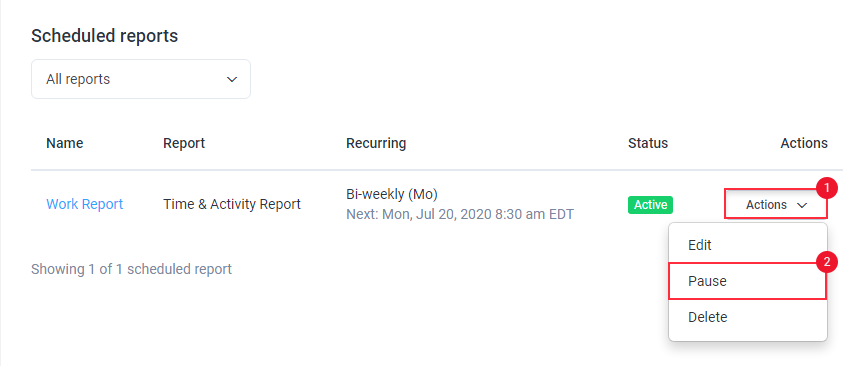
Select Actions against the relevant report. Click Pause from the drop-down menu that appears.
Step 3
You can confirm your scheduled report is paused by checking the status column. The Paused label confirms your scheduled report is currently paused and will not be sent.

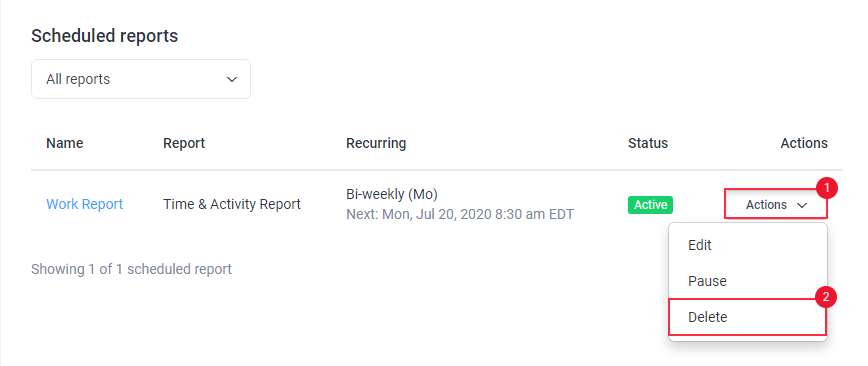
How to delete a scheduled report
Step 1
Click on Reports from the main navigation menu. Select the Time & Activity option. Click on Scheduled reports towards the upper right-hand side of the page.
Step 2
Select Actions against the relevant report. Click Delete from the drop-down menu that appears.
Step 3
A pop-up dialogue will appear. Click OK to delete the scheduled report.
