19 minutes
Automatic Payments and Payroll in Hubstaff
Hubstaff makes automatic payments and payroll easy.
1. Choose how you want to pay your team
Go to Financials > Manage Payroll > Payment workflow.
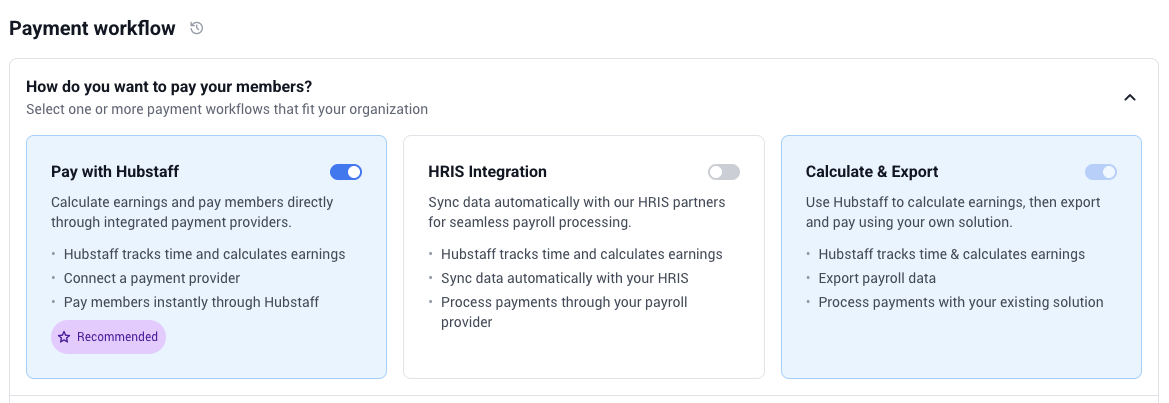
Under How do you want to pay your members?, select one or more payment workflows:
- Pay with Hubstaff – Use a supported payment provider integrated with Hubstaff to pay your team.
- HRIS integration – Sync approved working hours automatically to a supported HRIS partner, where payroll is processed.
- Calculate & Export – Calculate payroll within Hubstaff, then export the payroll data so you can pay your team manually using your preferred payment method.
2. Setting up your Payer account (Owners)
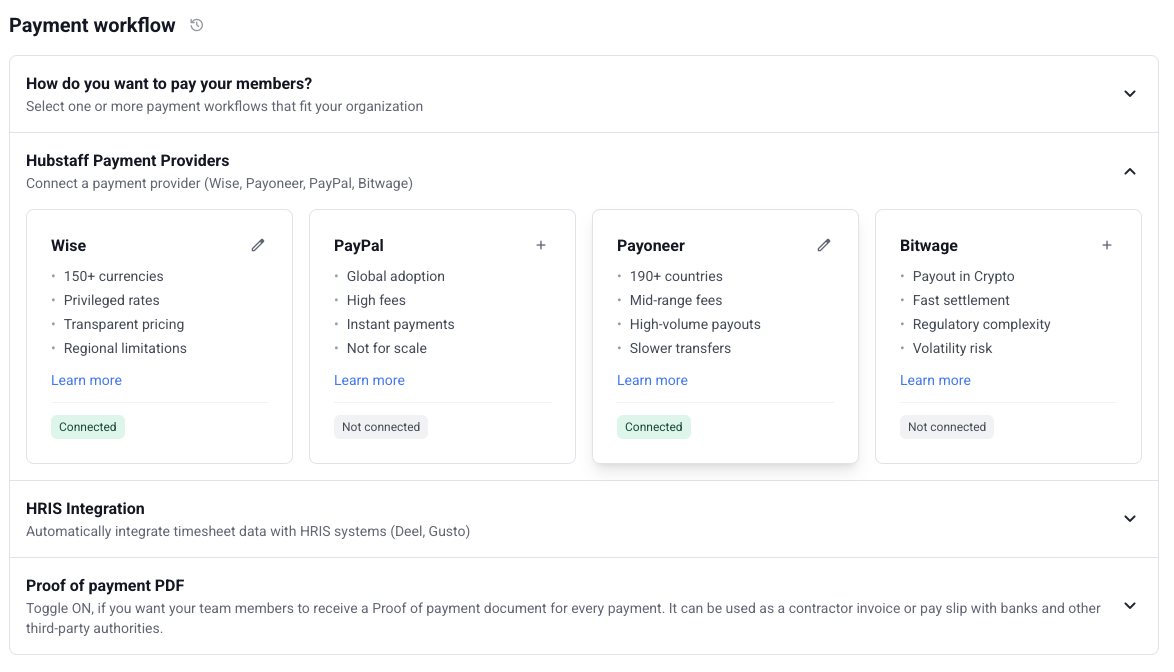
To connect a payment provider, go to Financials > Manage Payroll > Payment Workflow > Hubstaff payment providers. Select the provider you want to connect and follow the setup wizard. Once complete, Hubstaff returns you to the Manage Payroll page automatically.
Available providers:
- Add Wise payment account (Recommended)
- Add Payoneer payment account
- Add Bitwage payment account
- Add PayPal payment account
- Add Deel payment account
3. Setting up Automatic Payments
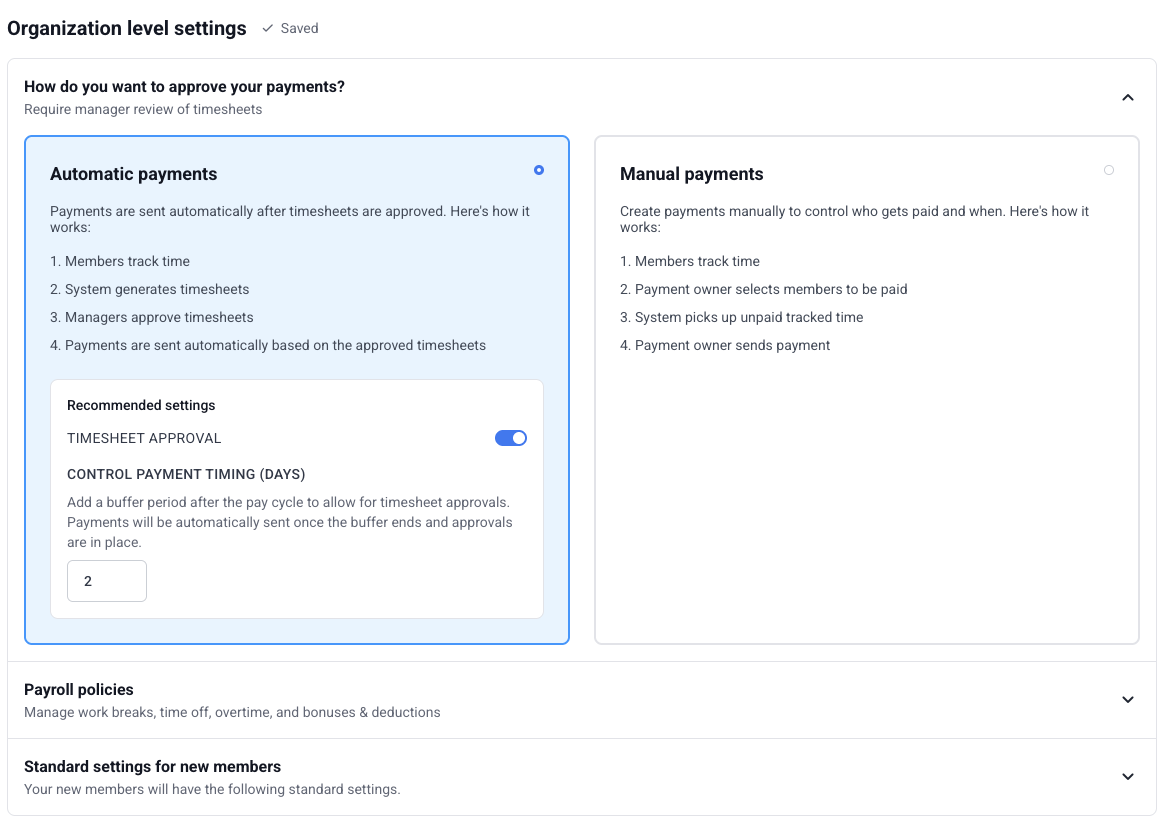
To set up automatic payments, go to Financials > Manage Payroll > Organization level settings > How do you want to approve your payments?
Select Automatic payments from the available options. By default, the Timesheet approval toggle is enabled. We recommend keeping this setting on, as it allows you to review and approve your team’s timesheets before automatic payments are processed. Only approved timesheets will be included in the payroll run.
When using automatic payments, a Payment Approval Window of 2 days is applied by default after each pay period ends. This gives you time to review timesheets before payments process. You can adjust this in the Organization-level settings section of the Manage Payroll page.
3.1 Adding payroll adjustments
Payroll adjustments allow you to make one-time or recurring additions and deductions to your team member payments. To do this follow this guide.

3.2 Selecting payment frequency and default payment method
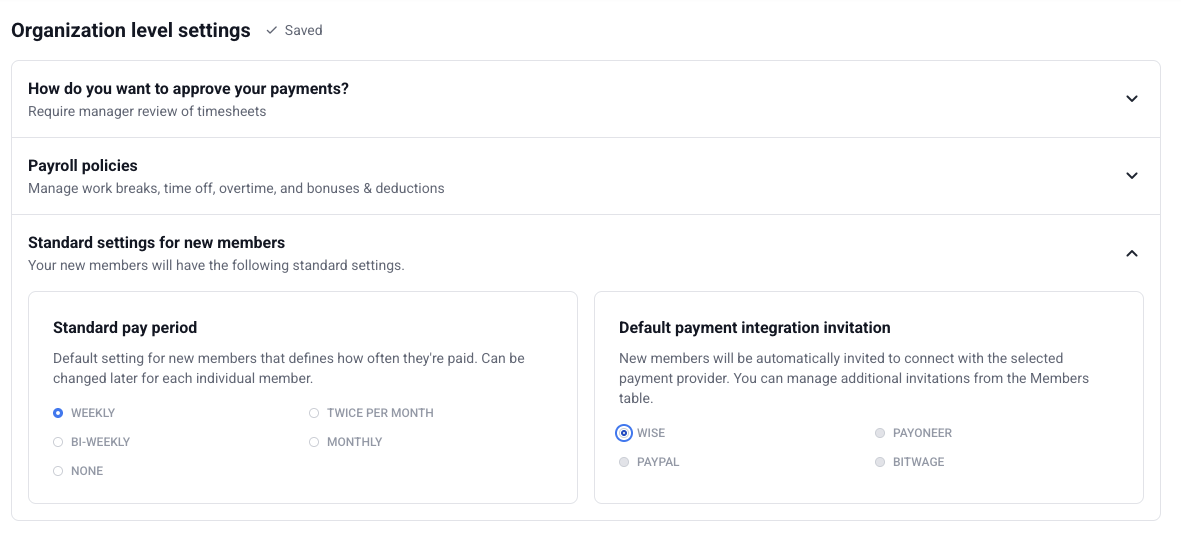
When setting up automatic payroll, you can set the payment frequency by selecting a pay period. Go to Financials > Manage Payroll > Organization level settings > Standard settings for new members.
You can choose one of the available pay periods below:
- Weekly: Every Monday (by default, or changes depending on the organization start week set – e.g., if it is set to Tuesday, then the pay period will move to Tuesday – Monday, to be paid on Tuesday the succeeding week)
- Bi-Weekly: Every other Monday (For Bi-weekly payments, you will have the option to choose from 2 pay periods; this also changes based on the organization start week set on your account.)
- Twice per month: 16th and 31st of the month
- Monthly: 31st of the month
Then, select the default payment method to pay your team.
If you choose Bi-weekly payments, you will have the option to choose between two start-on dates (pay periods).
4. Inviting team members to connect their receiving account
Once a payment integration is connected at the organization level, new members will be invited to connect with it. You can manage additional invitations from the Members table by navigating to Financials > Manage Payroll > Member level settings.
Select members, then from the action banner that appears, click Manage primary payout method and choose the payment provider to send the invitation.
For more details on this, please see our article: Adding Members to Payroll.
4.1 Setting up pay rates for your members
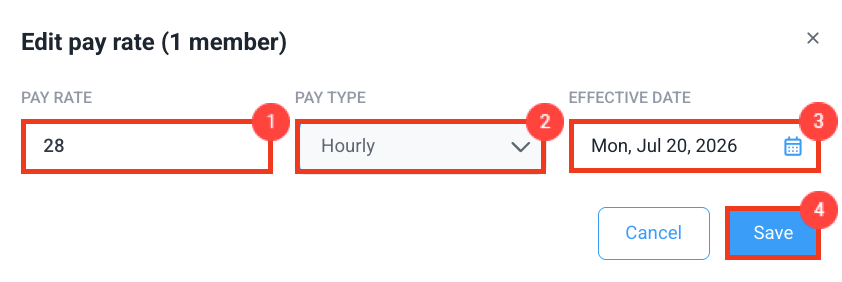
From the Members table, select the members whose pay rate you want to update. In the action banner that appears, click Edit pay rate.
In the pop-up window, enter the pay rate and pay type (hourly or fixed amount), then set the effective date. Lastly, hit Save.
5. Users ready for payroll and completing your setup
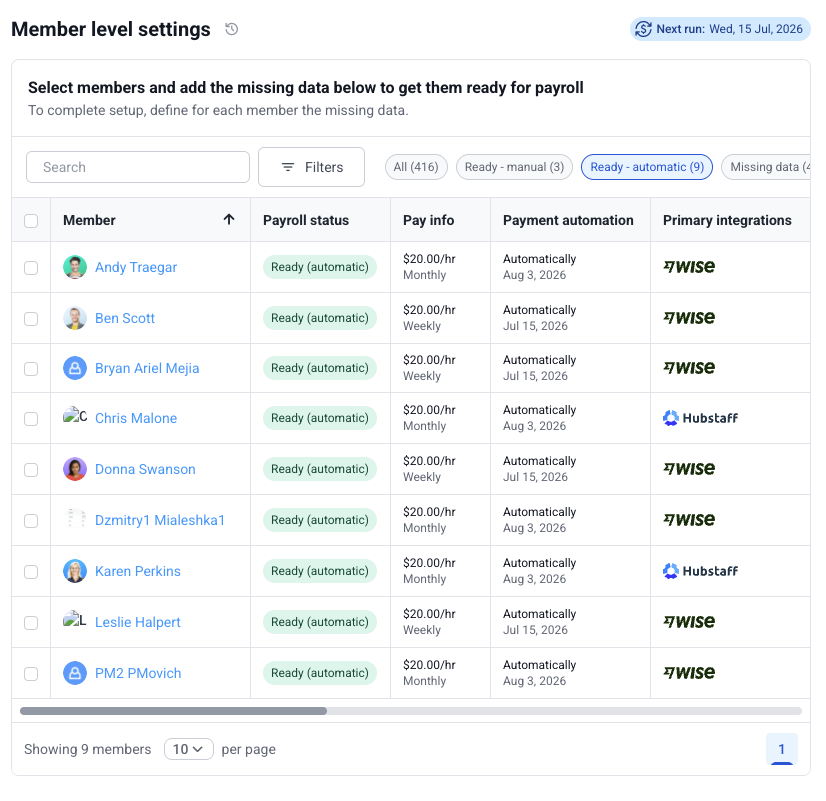
After you’ve set up payroll and your team members have connected their accounts with the selected payment provider, members who meet all the requirements for automatic payroll will display a Ready status in green.
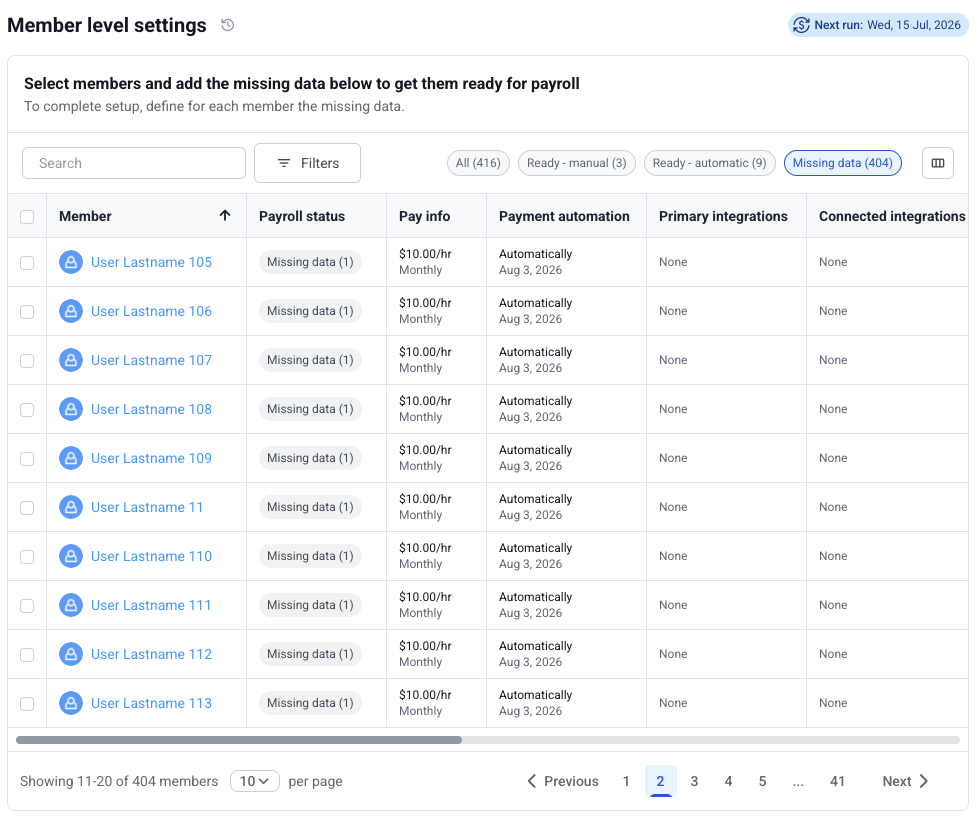
Members with incomplete payroll information will display a Missing data status in gray, along with the number of required items that still need to be completed.
5.1 Completing your setup
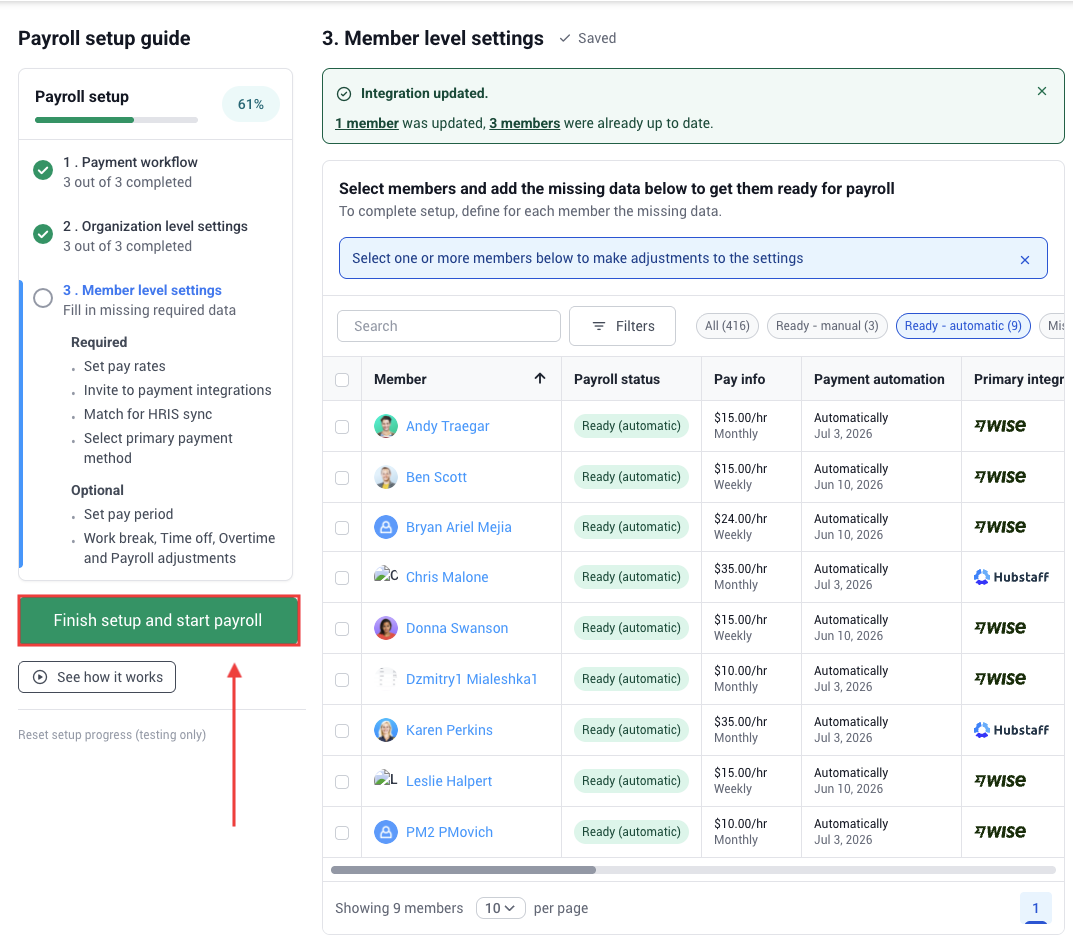
Once all required sections are complete and at least one member has a Ready status, the Finish setup and start payroll button becomes active. Clicking it to confirm and setup automatic payroll.
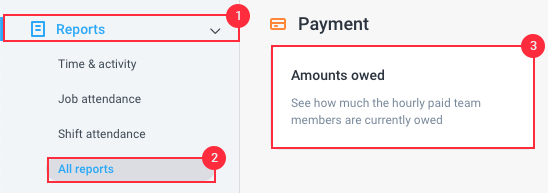
How do I view unpaid hours for users?
To view how much you owe people for various date ranges, you can click on Reports > Amounts Owed. From there, you can set a custom date range to view the unpaid amounts and how many hours they’ve worked during your selected dates. You can also click on Filters to apply filters to the report.
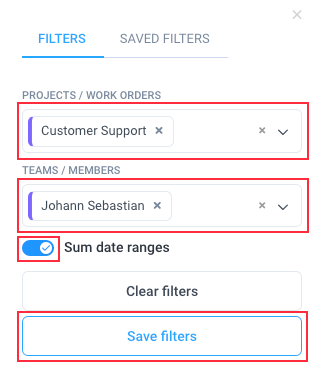
Clicking on Filters will let you filter the time by project or team member. You can also toggle the Sum date ranges setting to view totals.
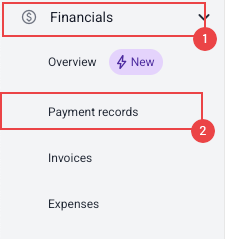
How do I view past payments?
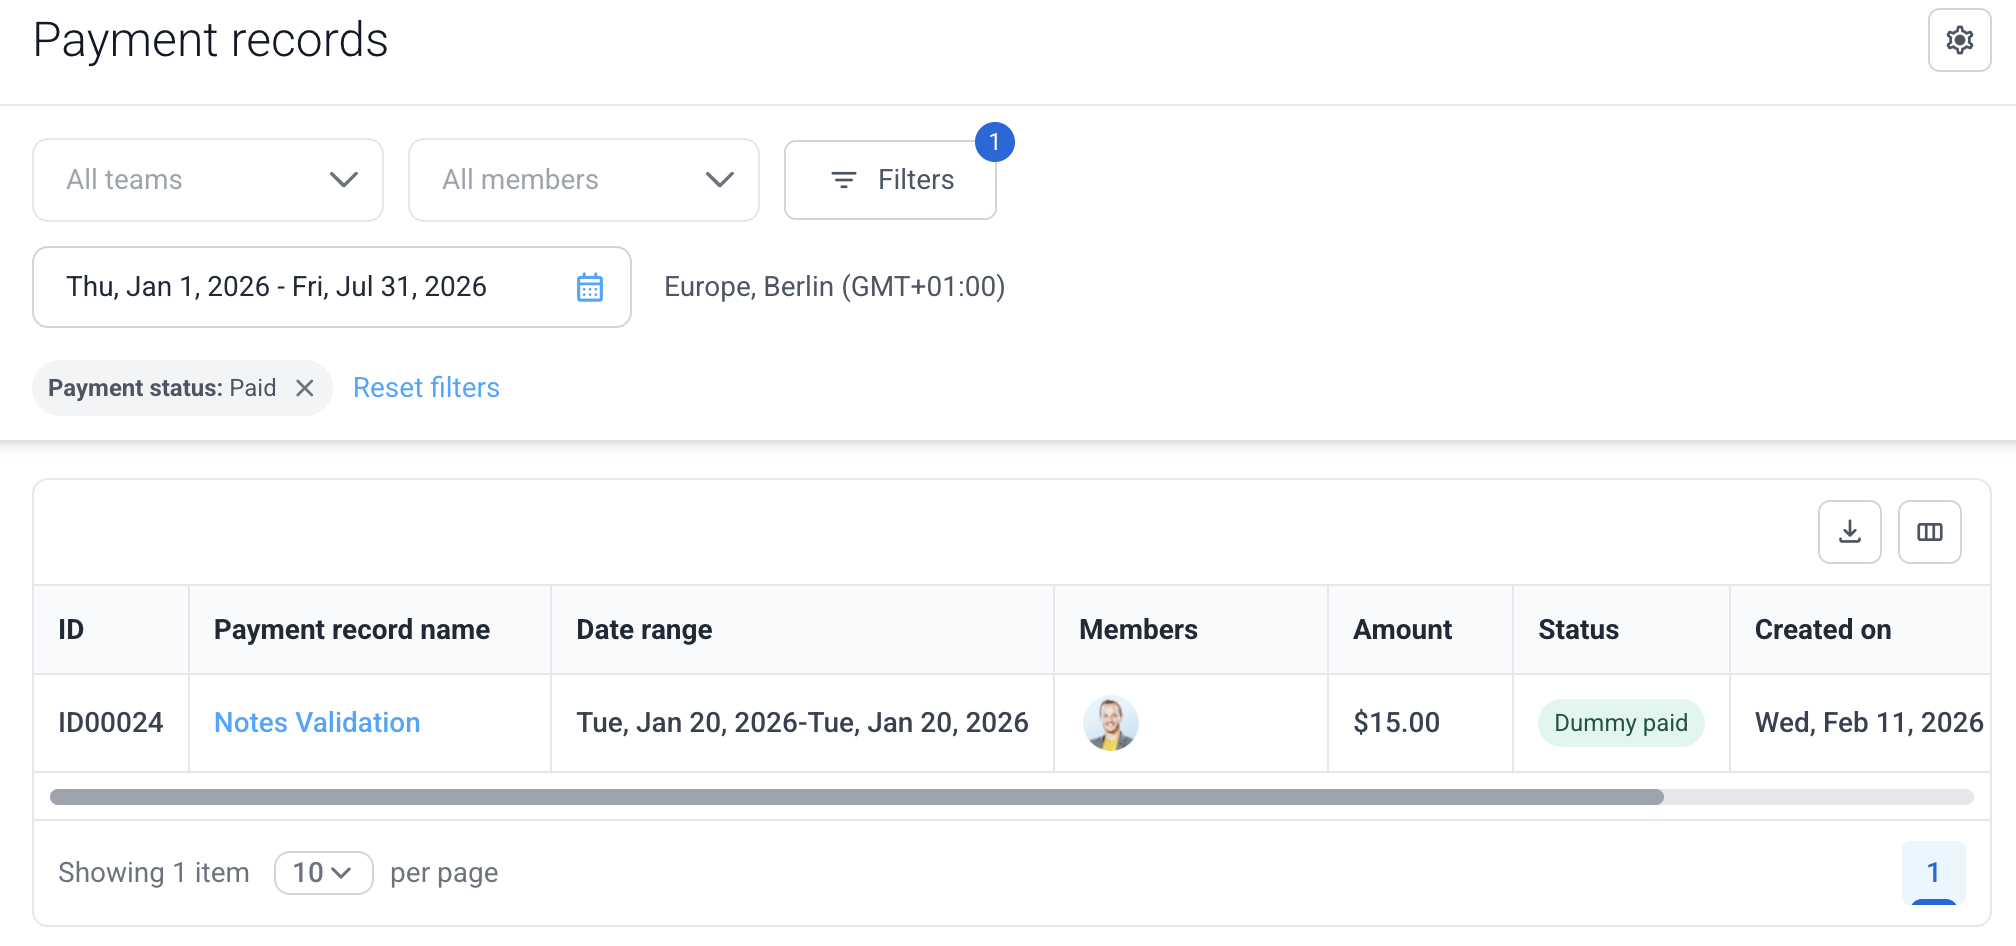
To view the past payments you’ve made, go to your Financials > Payment records page.
You’ll see all the historical data for your previous payments.
How do I send a manual payment?
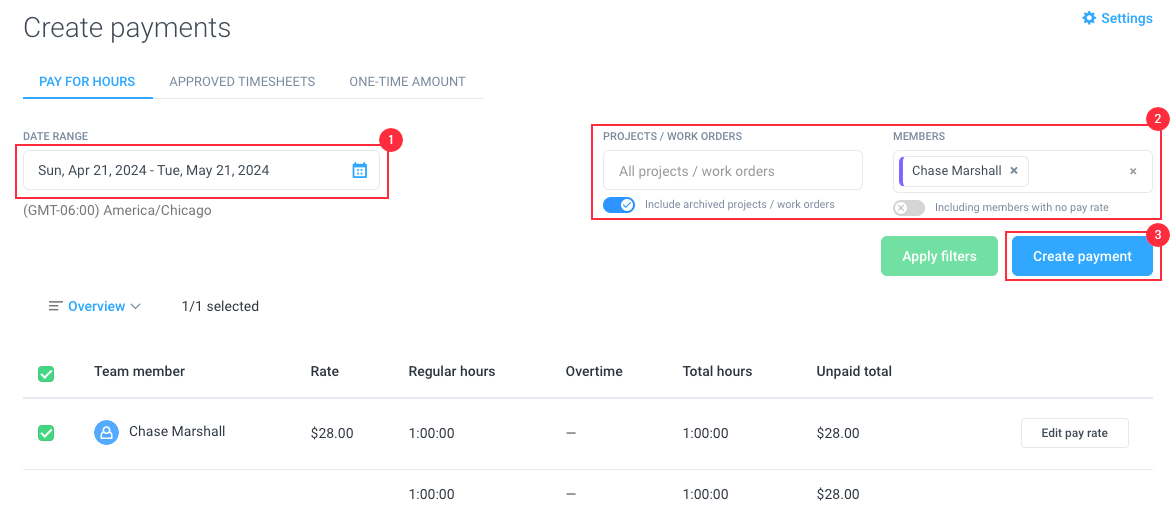
To send a manual payment, go to Financials > Create payments. You’ll be able to select a custom date range, filter to specific projects/ work orders and members you’d like to pay, then hit Apply filters. Once the hours you wish to pay are visible, you can click on the Create Payment button.
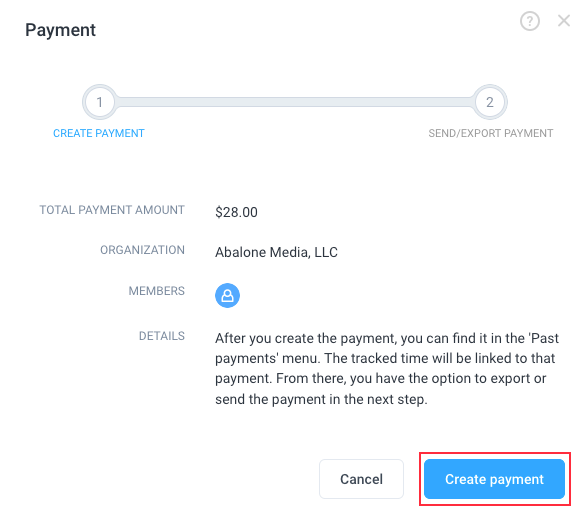
You’ll see a pop-up window asking you if you want to mark the hours as paid.
After that, you’ll be asked which payment integration you’d like to use to make payments for your team members. Select the payment merchant you’d like to use, then click Send payment.
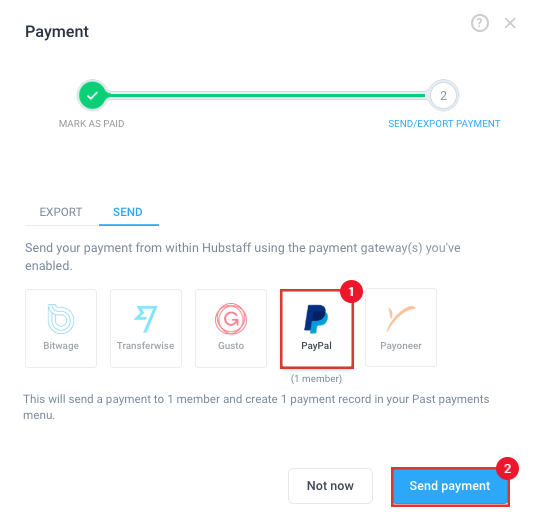
The payment request will get sent, and the user will be paid shortly.
Paying contractors in different countries
Hubstaff offers support for different currencies (you can only have one currency per organization). The currency that you have enabled in your organization needs to have sufficient funds in that specific currency for Payroll to be successful.
Example:
Your organization’s currency in Hubstaff is set to PHP. You are trying to pay your team for their work done, and the total payment is PHP 400.
In your payment account, you have 1000 USD and PHP 200.
This payment would fail because there are insufficient funds in the correct currency in the payment account. For this payment to be successful, you would need to ensure that your payment account either has PHP 400 OR you would need to change your Hubstaff organization’s default currency to USD so the USD funds from your payment account would be used.
If you send a payment in a currency different from the person getting paid (i.e., the organization currency is set to USD, the employee’s currency is PHP). That person won’t incur any fees, however, there are conversion rates. The receiver would pay for that – and no one really “pays” for it. The exchange rate is just the exchange rate. The receiver will end up getting a little less because of the currency exchange rate. Whichever payroll option you are using will do this conversion automatically.