How do I display a report for my payments?
The payments report will allow you to see how much you have paid your employees over a given period, all in a single report. You can choose date ranges, projects, and members. The report will display the amount paid to each person and the total paid to everyone based on what options you chose. Employees can also view how much they’ve earned.
Step 1
Click on the “Reports” tab on the left sidebar and then select the ¨Payments¨. You can also “star” the report so it appears under the Reports section of the menu bar.

Step 2
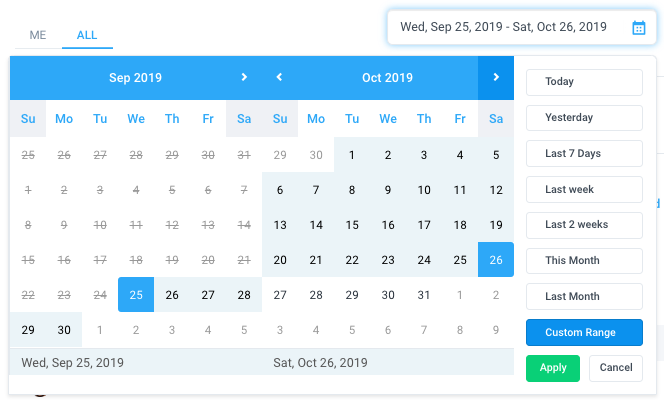
You will notice that there is a Me and All tab, The Me tab is visible to everyone but the All tab is only available to owners and managers.
![]()
Select the date range on the calendar then hit Apply.
Step 3
![]()
Click on the Filters button to apply filters to your report. You can filter your report by projects/work orders, teams/members, and payment types.

Click on the “Sum Date Ranges” setting to view totals and not daily totals. You may also click on the “Save filters” button to save your current filters and apply them to another report in the future.
After applying the filters, the report will be generated. The report will include the following columns:
- Payment type – one-time payment, manual or automatic payments.
- Paid on – date the amount was paid
- Amount – total amount paid

Sending Reports
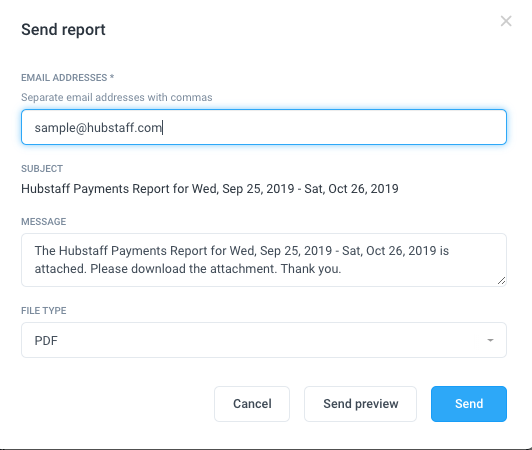
Reports may be sent to one or more email recipients by clicking on the Send button.
![]()
Add the email recipients on the field, separating each email address with a comma, then customize the message (optional) then either send a test message clicking the “Send me test” button, or click on “Send” to send the report.
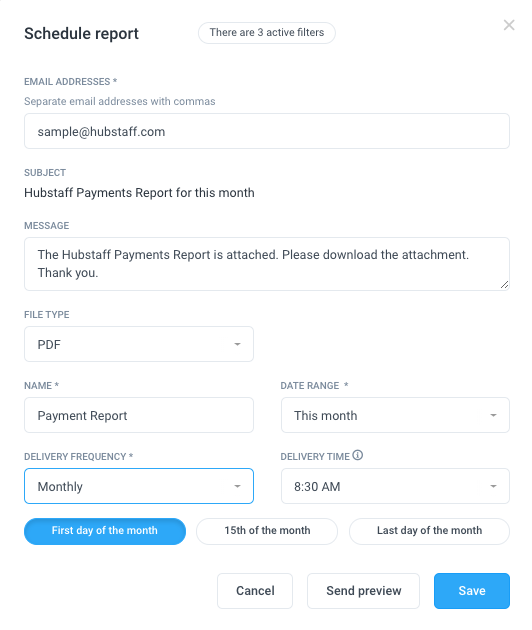
Scheduling Reports
![]()
You may also schedule reports to be sent automatically by clicking on the “Schedule” icon. After clicking the icon, a dialog box will appear where you can:
- Enter the e-mail addresses of the recipients.
- Customize the message on the e-mail.
- Choose the file type (CSV/PDF).
- Enter the name of the report.
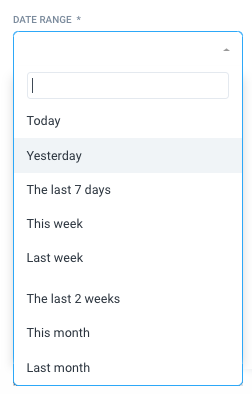
- Choose the Date Range included in the report from:
- Delivery Frequency – how often the report is sent. Choose from:
- Daily
- Weekly
- Monthly (when the monthly option is selected you are provided 3 additional options: 1st of the month, 15th of the month, Last day of the month)
- Delivery time – exact time when the report is sent.
- Send Preview
- Save – stores your scheduled report, which you can view via the Scheduled Reports section.

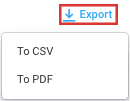
Exporting Reports
Reports can be exported as a PDF or CSV file by clicking the Export button.